Chinese Stir Fry (or, How to Clean the Refrigerator)

I recently returned from a 3-day, mini vacation and while I was away, my thoughts turned to all of things in my refrigerator that would need to be used when I returned home.  I wasn’t preoccupied with those thoughts but, being the frugal person that I am, I imagined what I could do with the food that would likely be on the verge of spoiling when I returned.

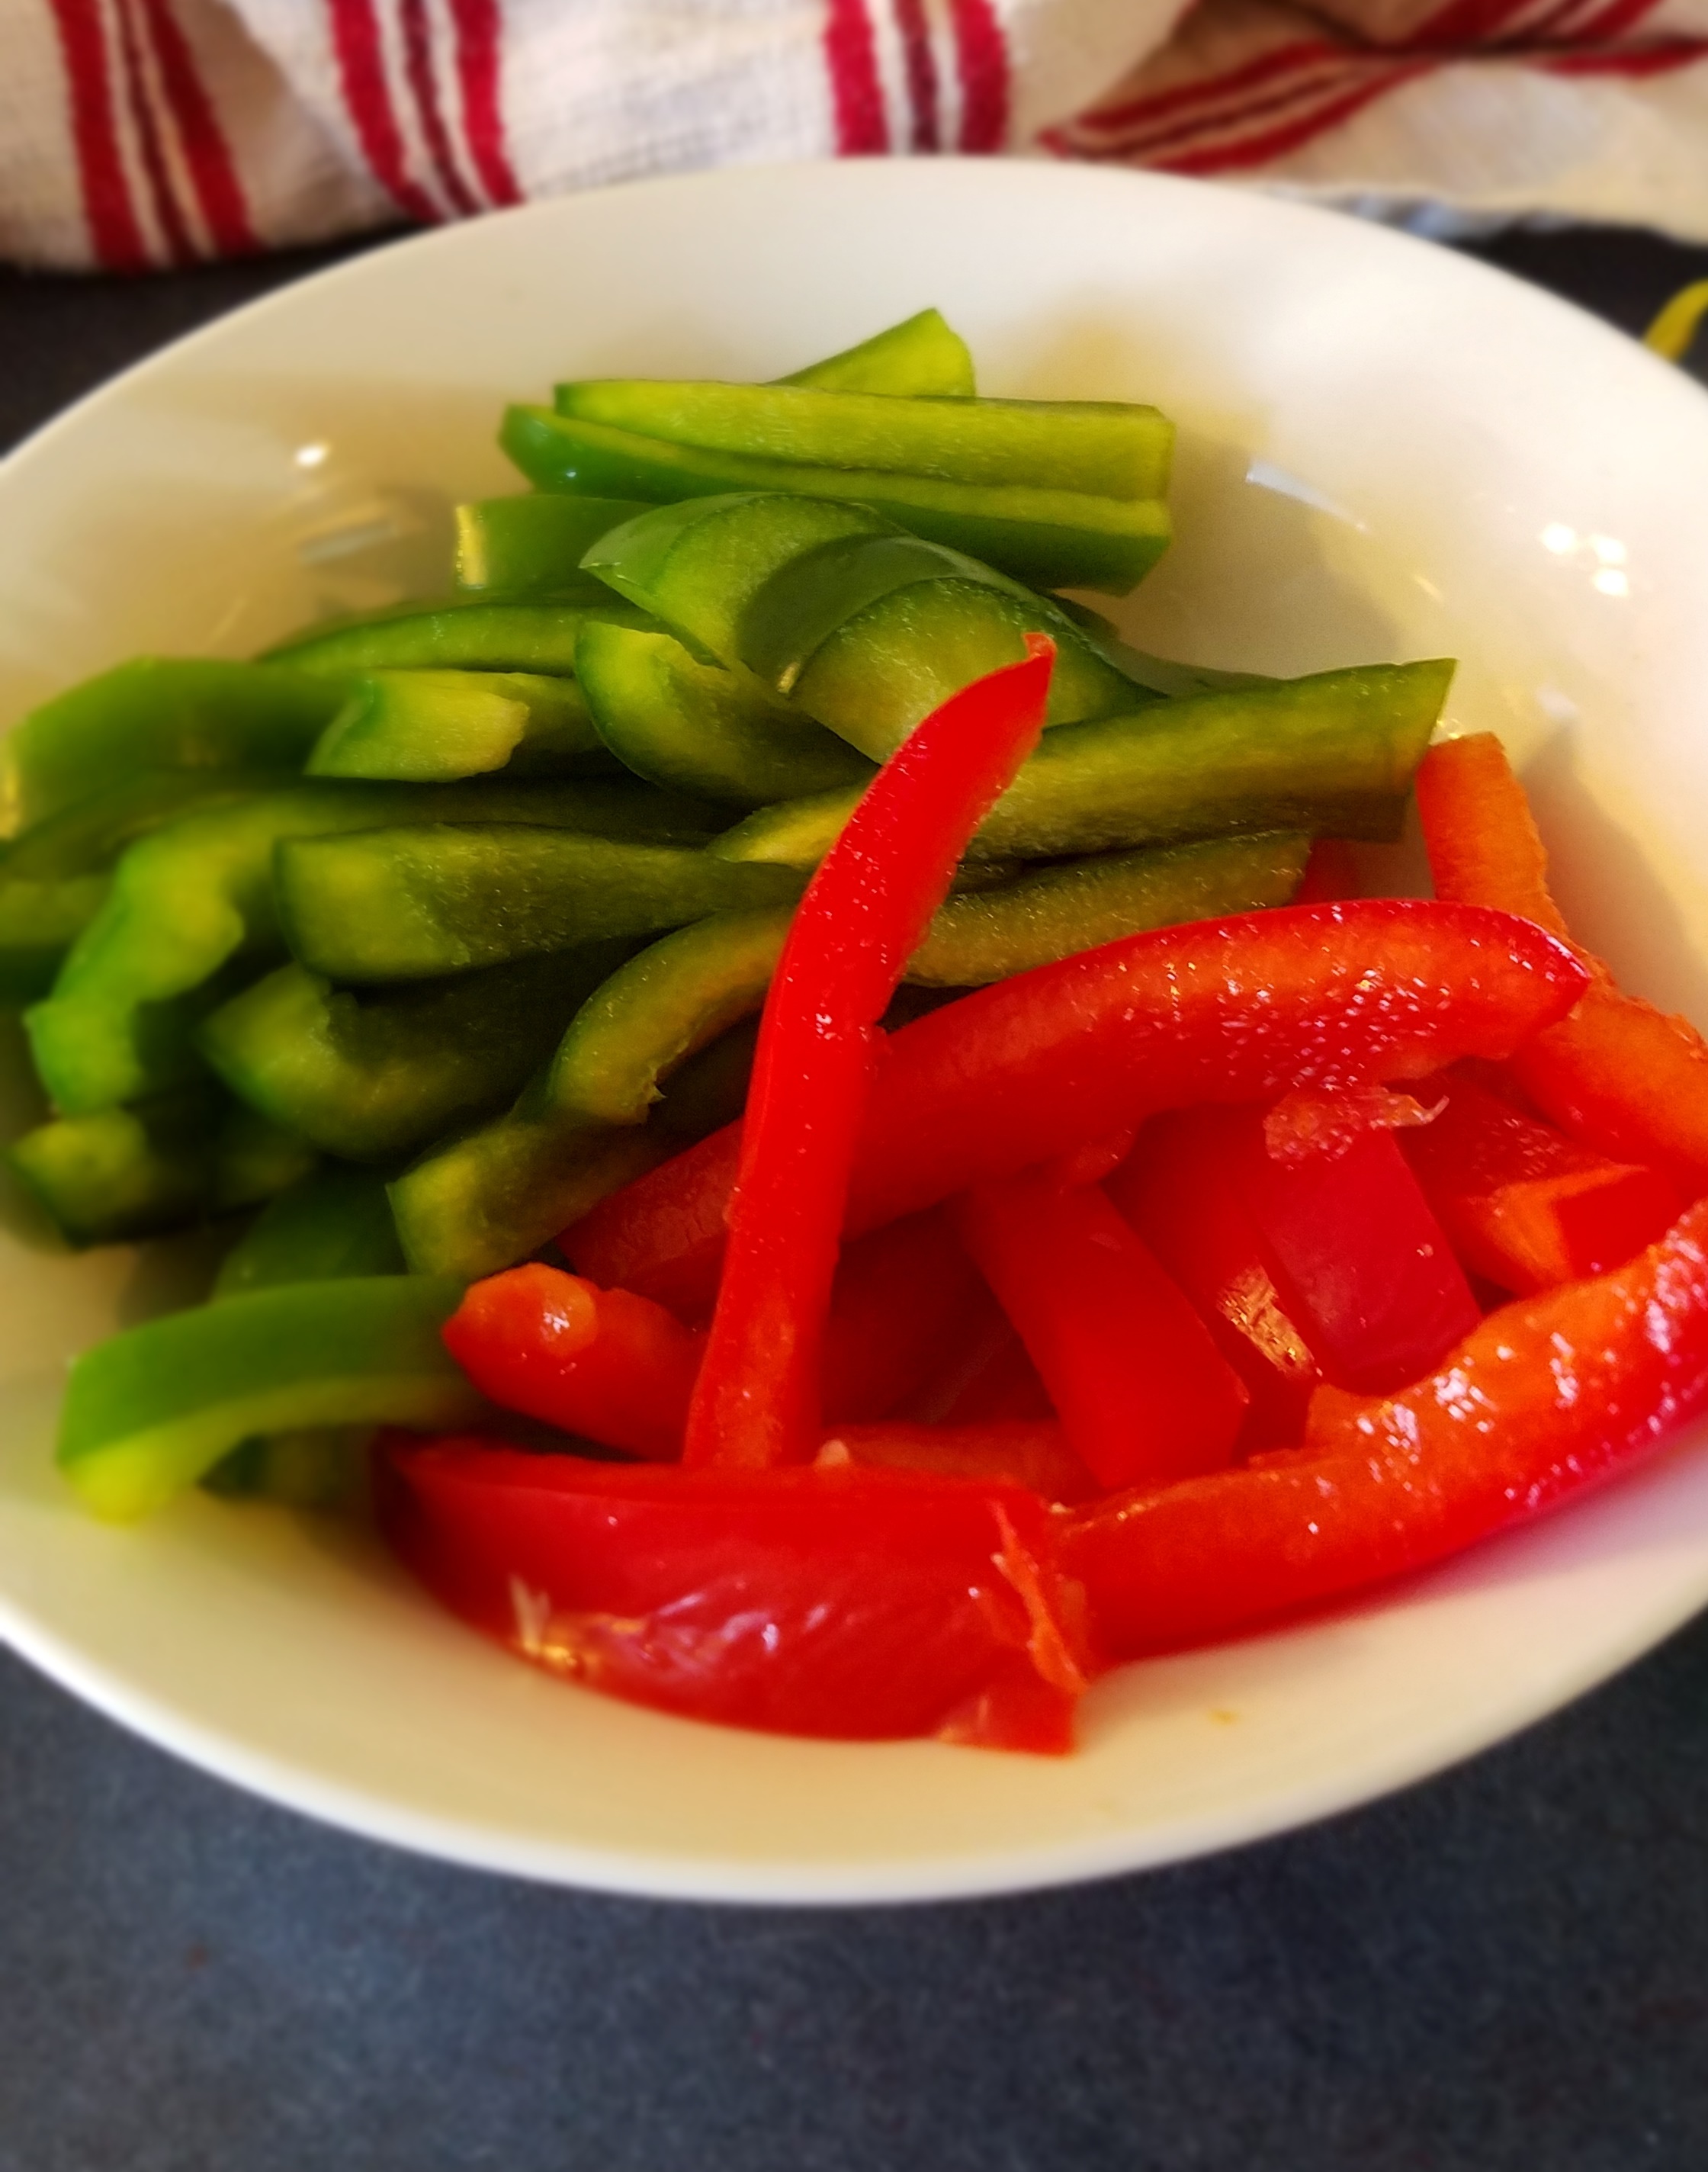
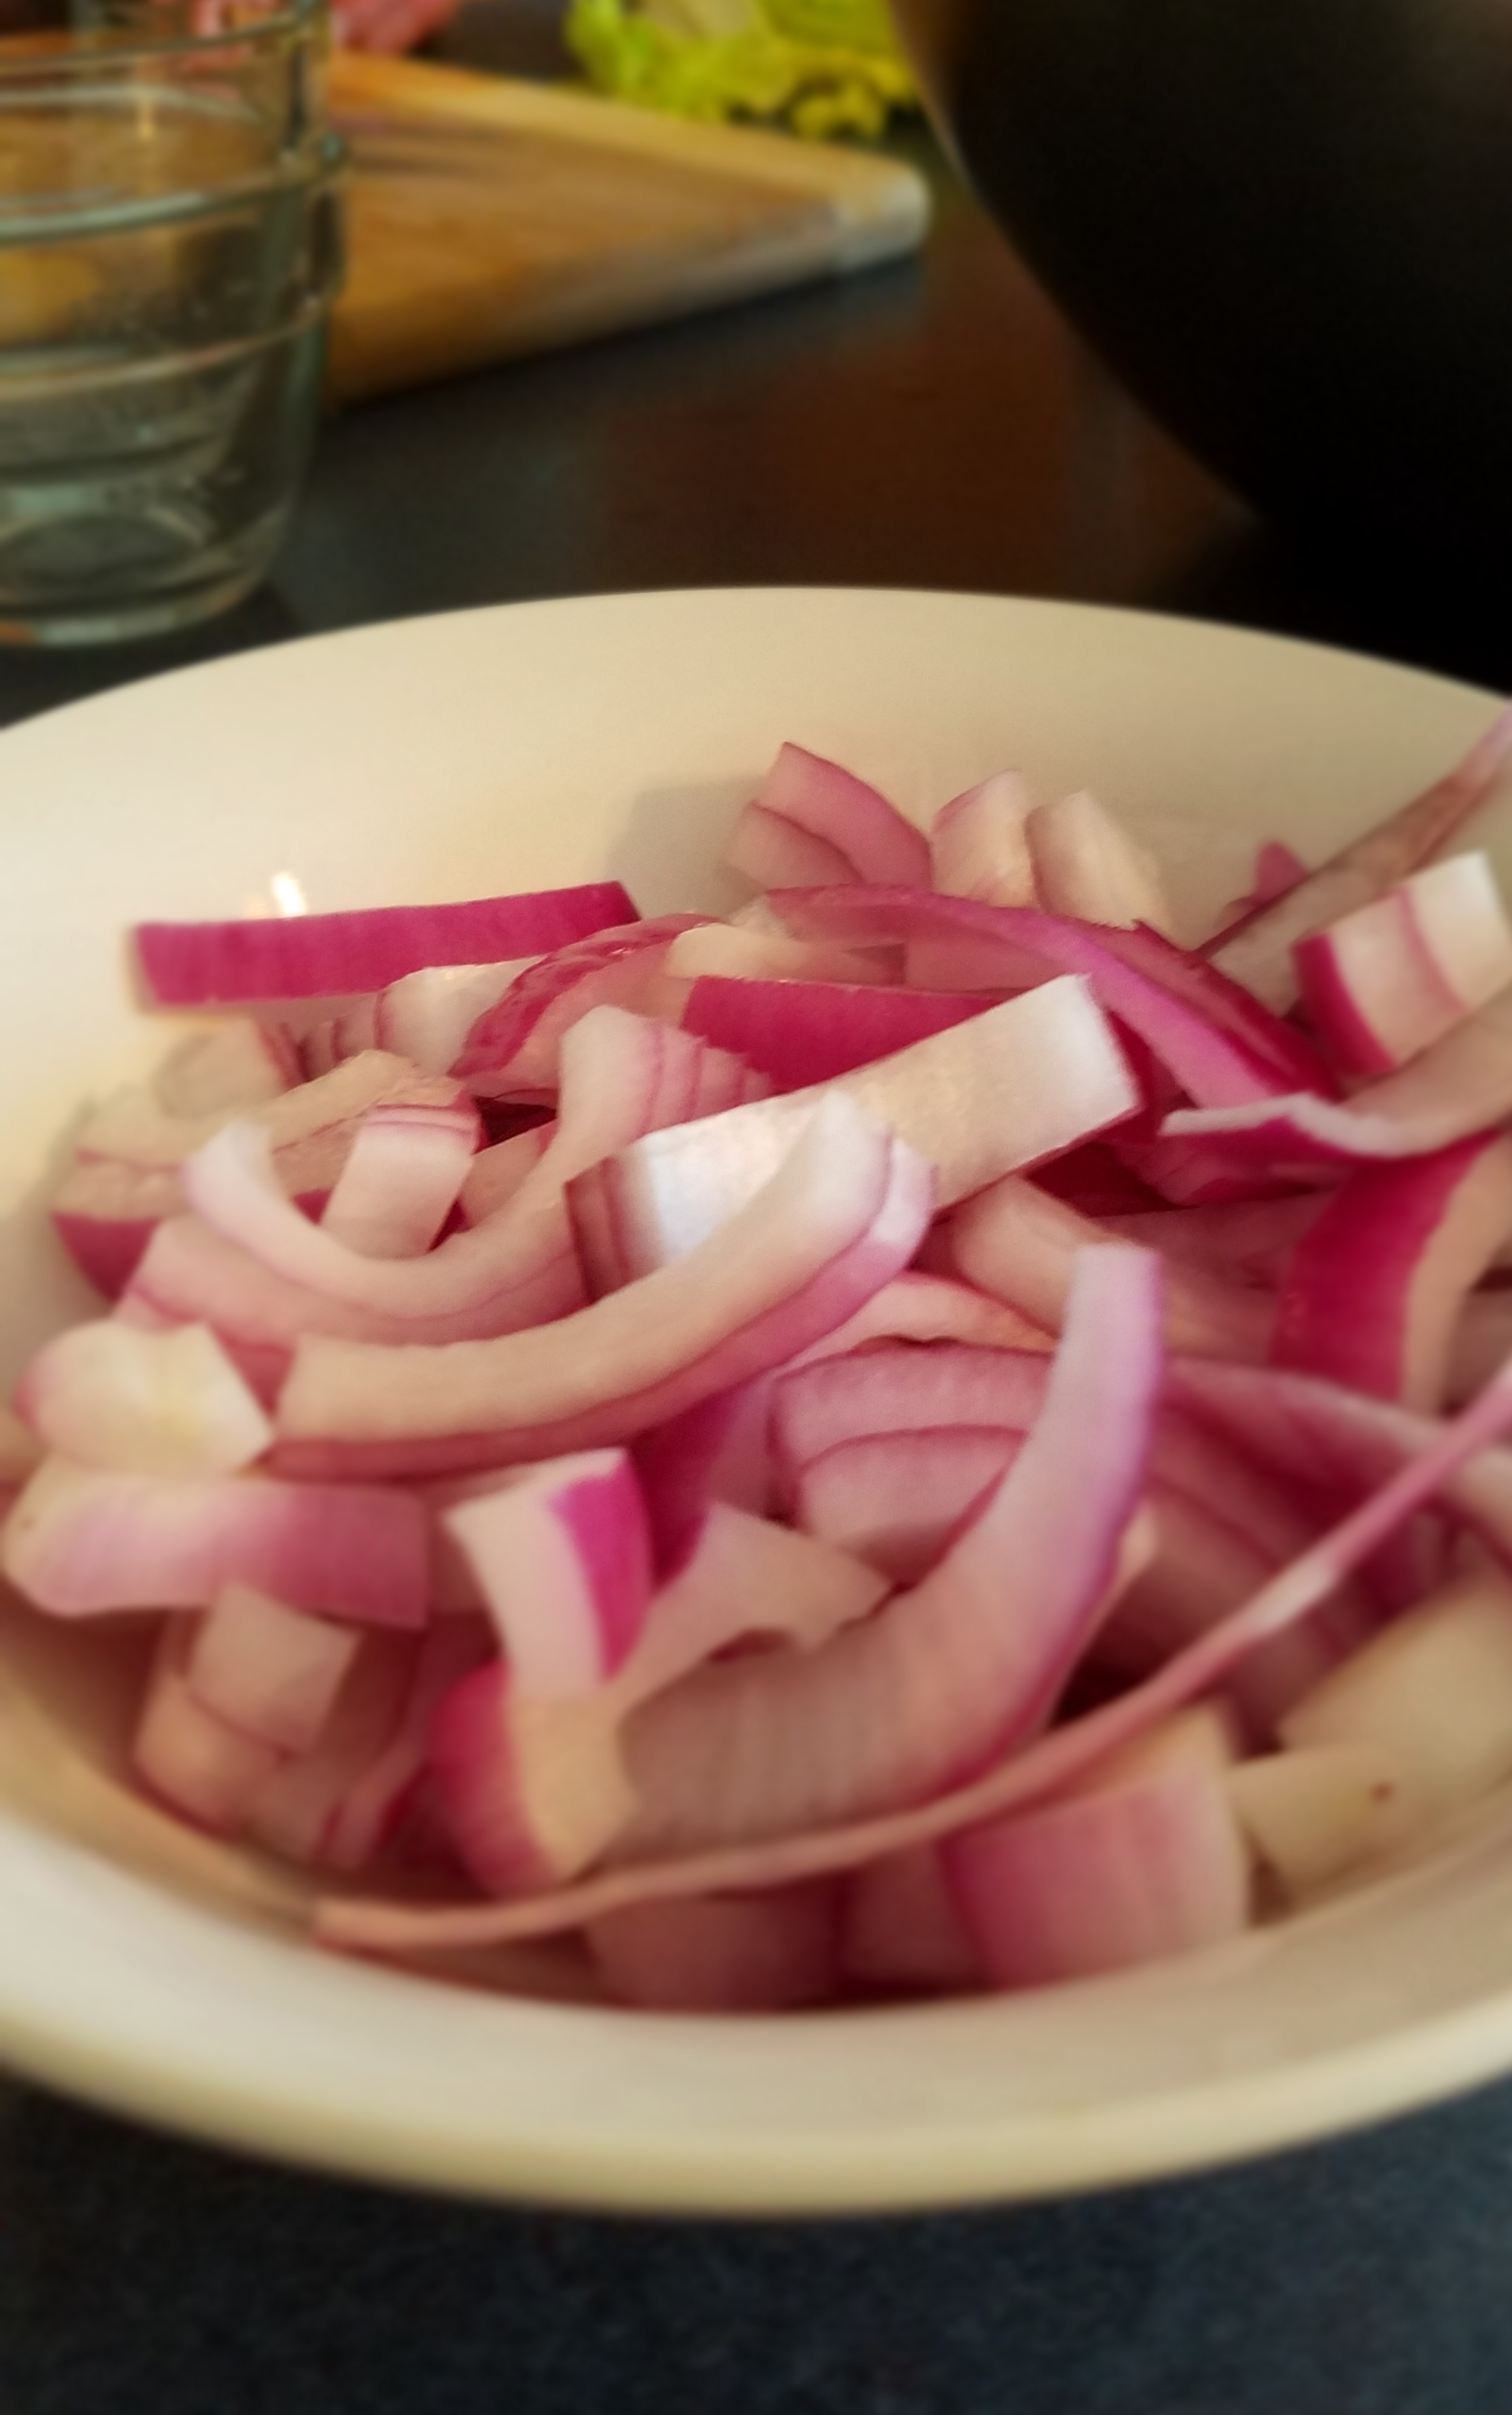
Sure enough, upon my return, I opened the refrigerator to inspect the various vegetables and other odds and ends.   As I expected, the bell peppers were on their last legs.  The celery and green onions were going limp.  The red onion was holding on strong and the carrots were just fine, so no worries there.  And then, I remembered the unopened package of beef that I had left in the meat drawer.  I knew that it had been in the refrigerator for several days.  The solution was obvious.  A beef stir fry was the perfect remedy.

This was a meal made out of necessity and practicality but each of the components combined quite nicely and the quick stir fry allowed some items, that were past their prime, a chance to shine.

Ingredients for the stir fry:

3 cloves of garlic

2 Tbs thinly sliced ginger

2 Tbs canola oil

1 pound, thinly sliced beef

2 carrots

1 green bell pepper

1 red bell pepper

1 medium sized red onion

2 celery stalks

3 scallions

3 cups uncooked white rice

Ingredients for the marinade:

3 Tbs dark soy sauce

1 Tbs soy sauce

1 Tbs sambal (chili garlic sauce)

Ingredients for the sauce:

½ tsp sesame oil

1 clove garlic, minced

2 Tbs brown sugar

2 Tbs Hoisin sauce

1 Tbs honey

2 Tbs white vinegar

1 tsp hot sauce (your choice)

1 Tbs soy sauce

1 Tbs cornstarch

1 Tbs water

Directions:

Remove some of the starch from the rice by rinsing and scrubbing the rice by hand in a colander.  Put the rice in a large pot and cover with water.  Allow the rice to soak for 30 minutes. 

While the rice is soaking, marinate the beef and prepare a mise en place.

The beef that I used was a packaged roast that had already been thinly sliced.  It was marketed to be used for carne asada but, since it was not seasoned, it was suitable for my purpose. 

Slice the beef into ribbons and allow it to marinate for about 30 minutes.    

Peel, slice and chop the vegetables as you like.  Reserve some chopped scallion tips for the garnish. 

Preparing this mise en place took about 45 minutes.  I wasn’t rushed because I knew that the rice would take about an hour, from start to finish.

Cook the rice according to the directions on the package.  In this case, as I mentioned earlier, I soaked the rice for 30 minutes and then I cooked and steamed the rice for 20 minutes. I allowed the rice to steam for 10 additional minutes before fluffing with a fork.

I made the stir fry, while the rice finished steaming. 

Add the cooking oil to a hot wok.  Season the wok with ginger and garlic for one minute and then remove the ginger and garlic. 

Introduce the vegetables, starting with the ones that will take the longest to cook.  In this case,  I started with the carrots, followed by the bell peppers, red onion, celery and scallions.  Remove the vegetables to a bowl when they have softened but before they go limp.

Add a splash of oil to the wok and stir fry the beef.  The beef will cook within a matter of a few minutes.  Remove the beef to the bowl containing the cooked vegetables.

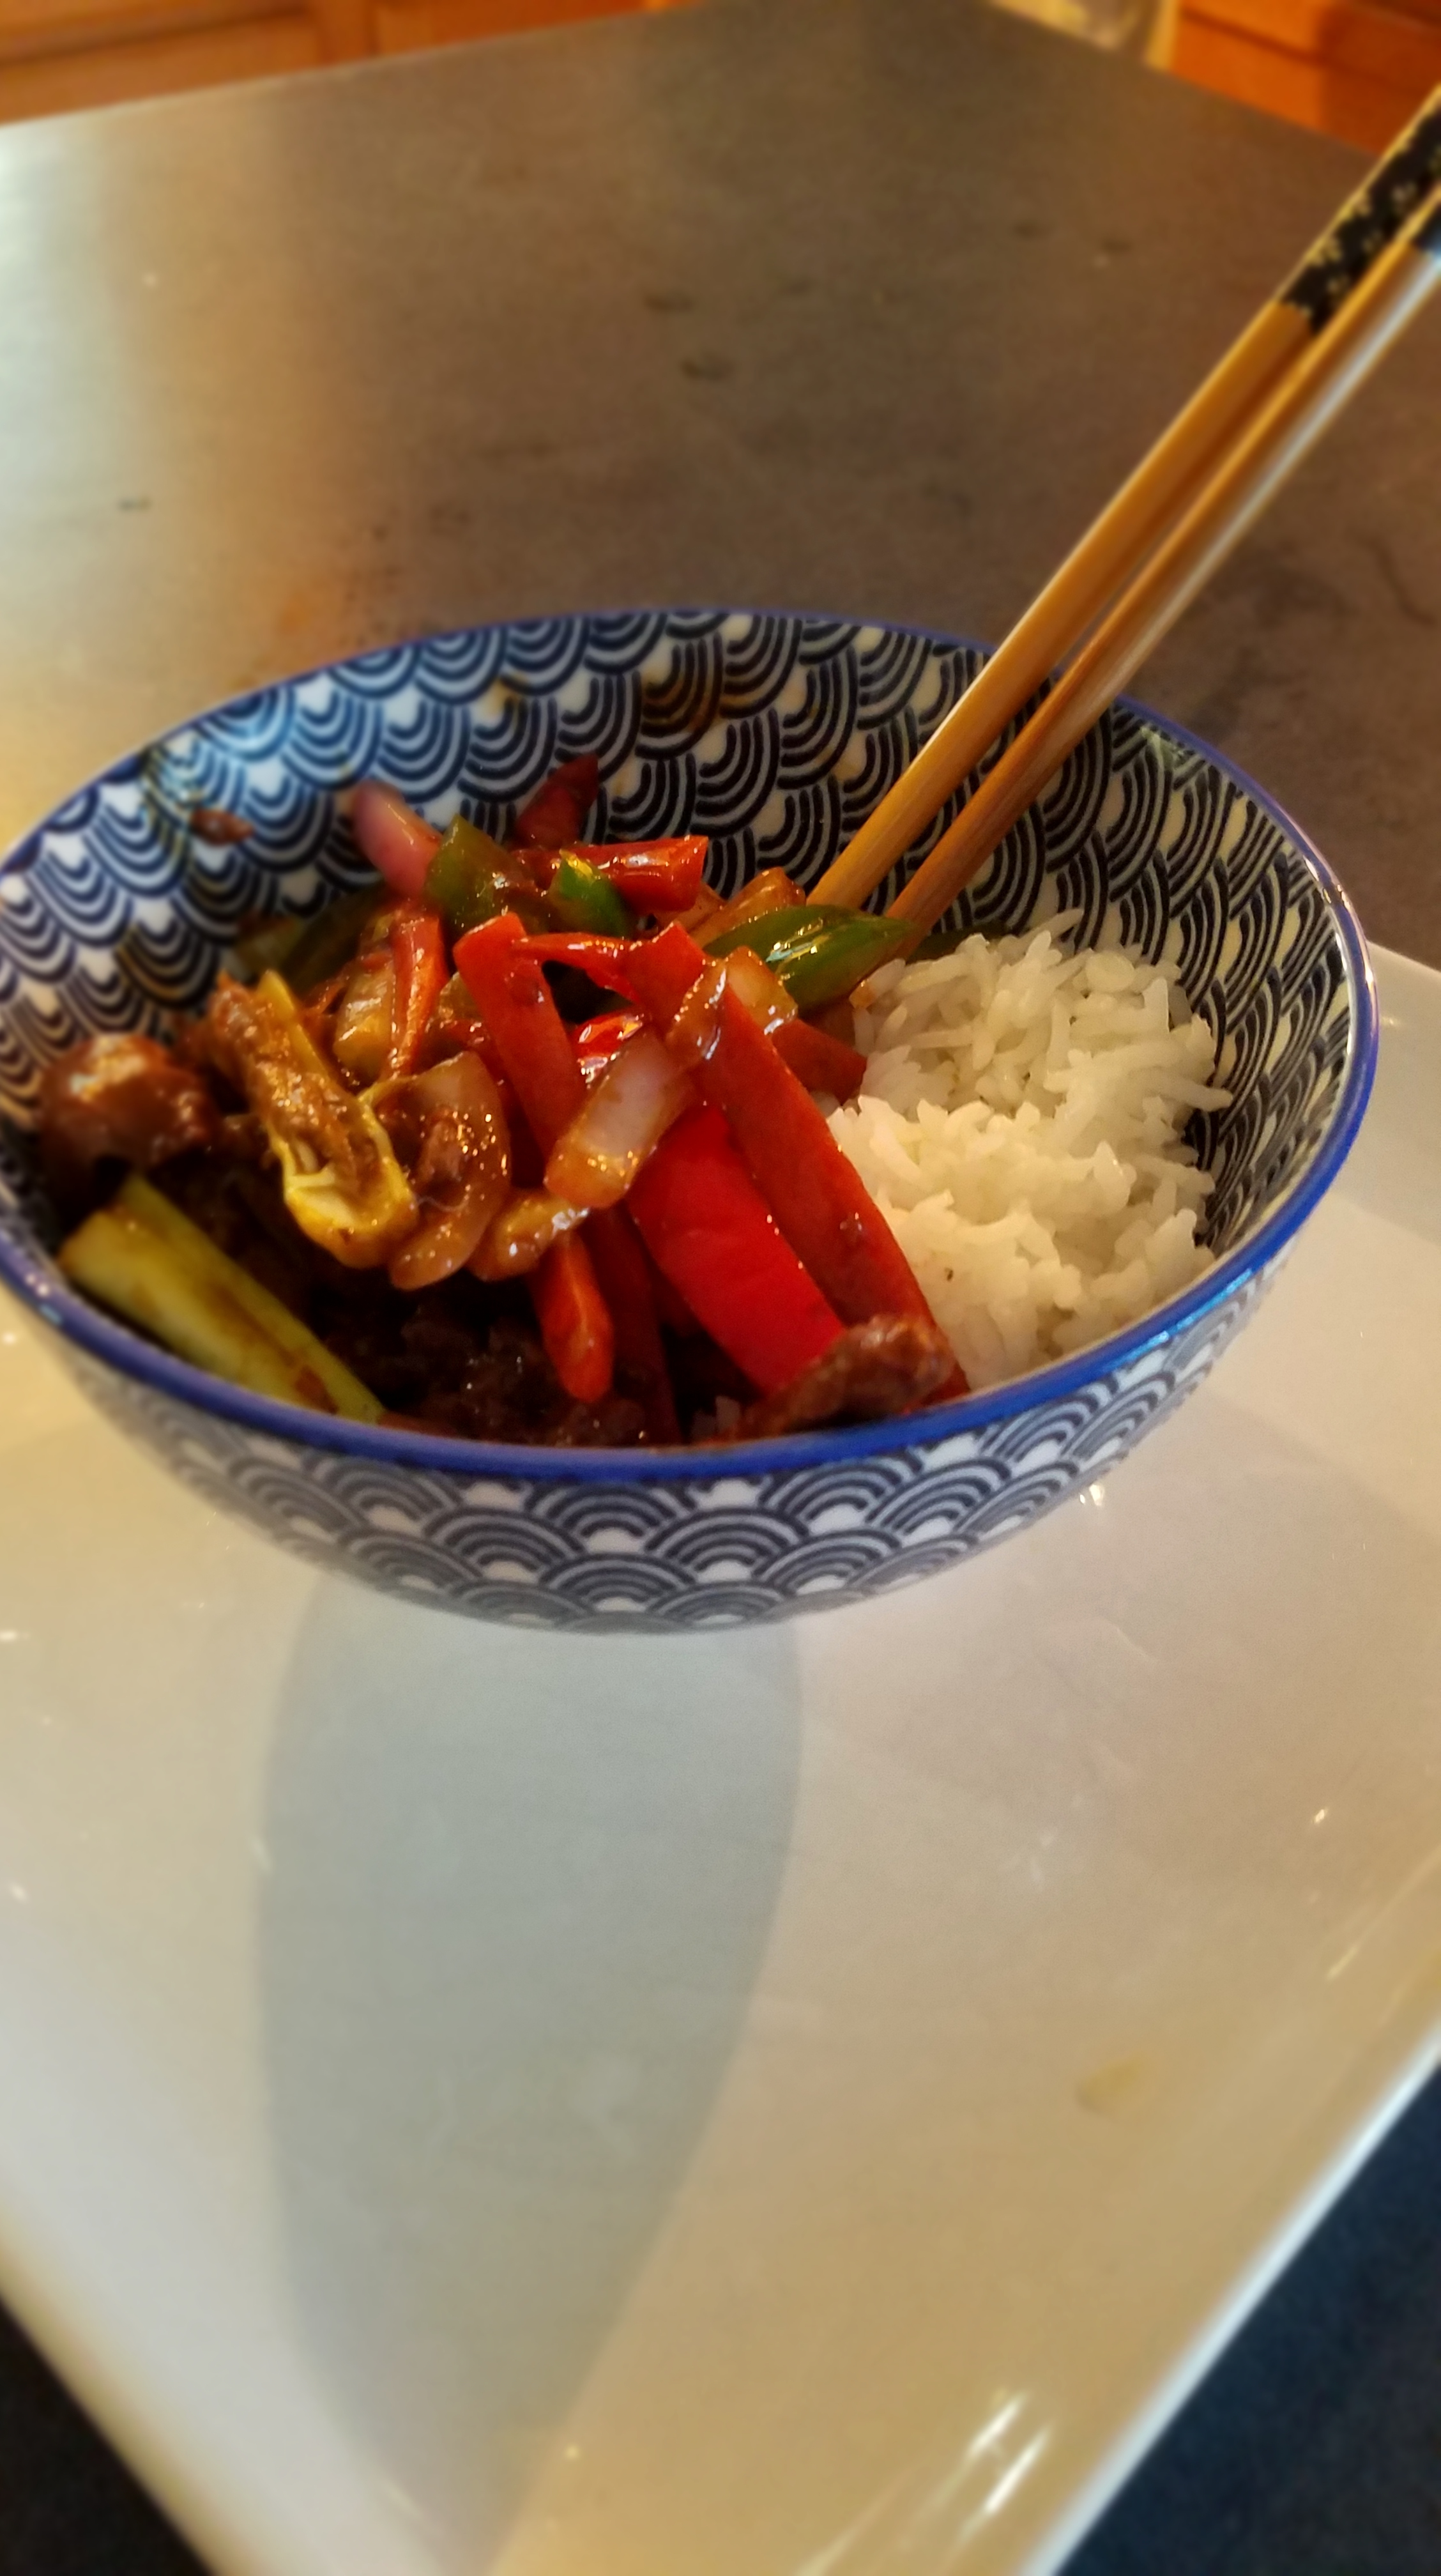
Add the sauce to the wok and stir until thickened.  Add the beef and vegetables back to the wok and stir to incorporate the sauce.  Turn out the stir fry to a serving dish and top with scallions.
Everything in its place

And, the hoity-toity French phrase of the week is…mise en place.

What is it about the French language that annoys me so much?   Maybe it’s the way that the French don’t bother to pronounce many of the letters that make up their words.   Maybe it’s the haughty names they give to such simple things like, “béchamel”, which is really just milk gravyC’mon, it’s gravy for cryin’ out loud!

But, I have to admit, the French were on to something when they came up with mise en place, the phrase that means, “everything in its place”.  The concept, as it relates cooking, is that a cook can set up a kitchen by organizing  ingredients that are needed for a certain menu.  Mise en place is intended to be a time saver. 

If I am making a peanut butter and jelly sandwich, I need four things.  Peanut butter, jelly, bread and a knife.  (Yes, just one knife.  I can smear some peanut butter on one slice of bread and then clean the knife on the other slice of bread, thereby permitting the use of the same knife to scoop out the jelly, without tainting the jelly jar in the process.)

Okay, the point I was trying to make before I became distracted by my own silliness is that you don’t need to lay out everything in place before making a PB&J.  You might grab a loaf of bread and put two slices on a plate.  And then, you might go to the pantry to pick up a jar of peanut butter and then smear some of it on a slice of bread.  Then, you might go to the refrigerator to hunt for the jelly.  Oh no, all you see is boring, utilitarian grape jelly…now, you have to search the depths of the fridge to find the delicious strawberry preserves.  Ah, there it is…that’s better!  Then, you finish the sandwich with a smear of strawberry preserves.  Even though you had to take time to search for the strawberry preserves, you didn’t really waste that much time.

But, there are times that you will want to have everything you need already in front of you, ready for action.  I find myself needing this sort of preparedness when I make a stir fry. 

Stir frying with a wok requires high heat and speed and it requires having the many vegetables and meats prepared, in advance.  You will want to have the menu items peeled, sliced or chopped and ready to introduce to the wok.  And, you will want to have everything within arm’s reach as you work your magic with the wok.  For this, you need to utilize mise en place.

I say all of this because I didn’t always understand the advantages that mise en place had to offer until I started cooking for parties and family gatherings.  Nothing can kill the spirit of a party like having to wait for hours and hours while a meal is being prepared.  Even if your goal is to immerse your guests in the act of preparing a meal, do you really want to have everyone tripping over themselves in your kitchen while they peel, grate, and cut? 

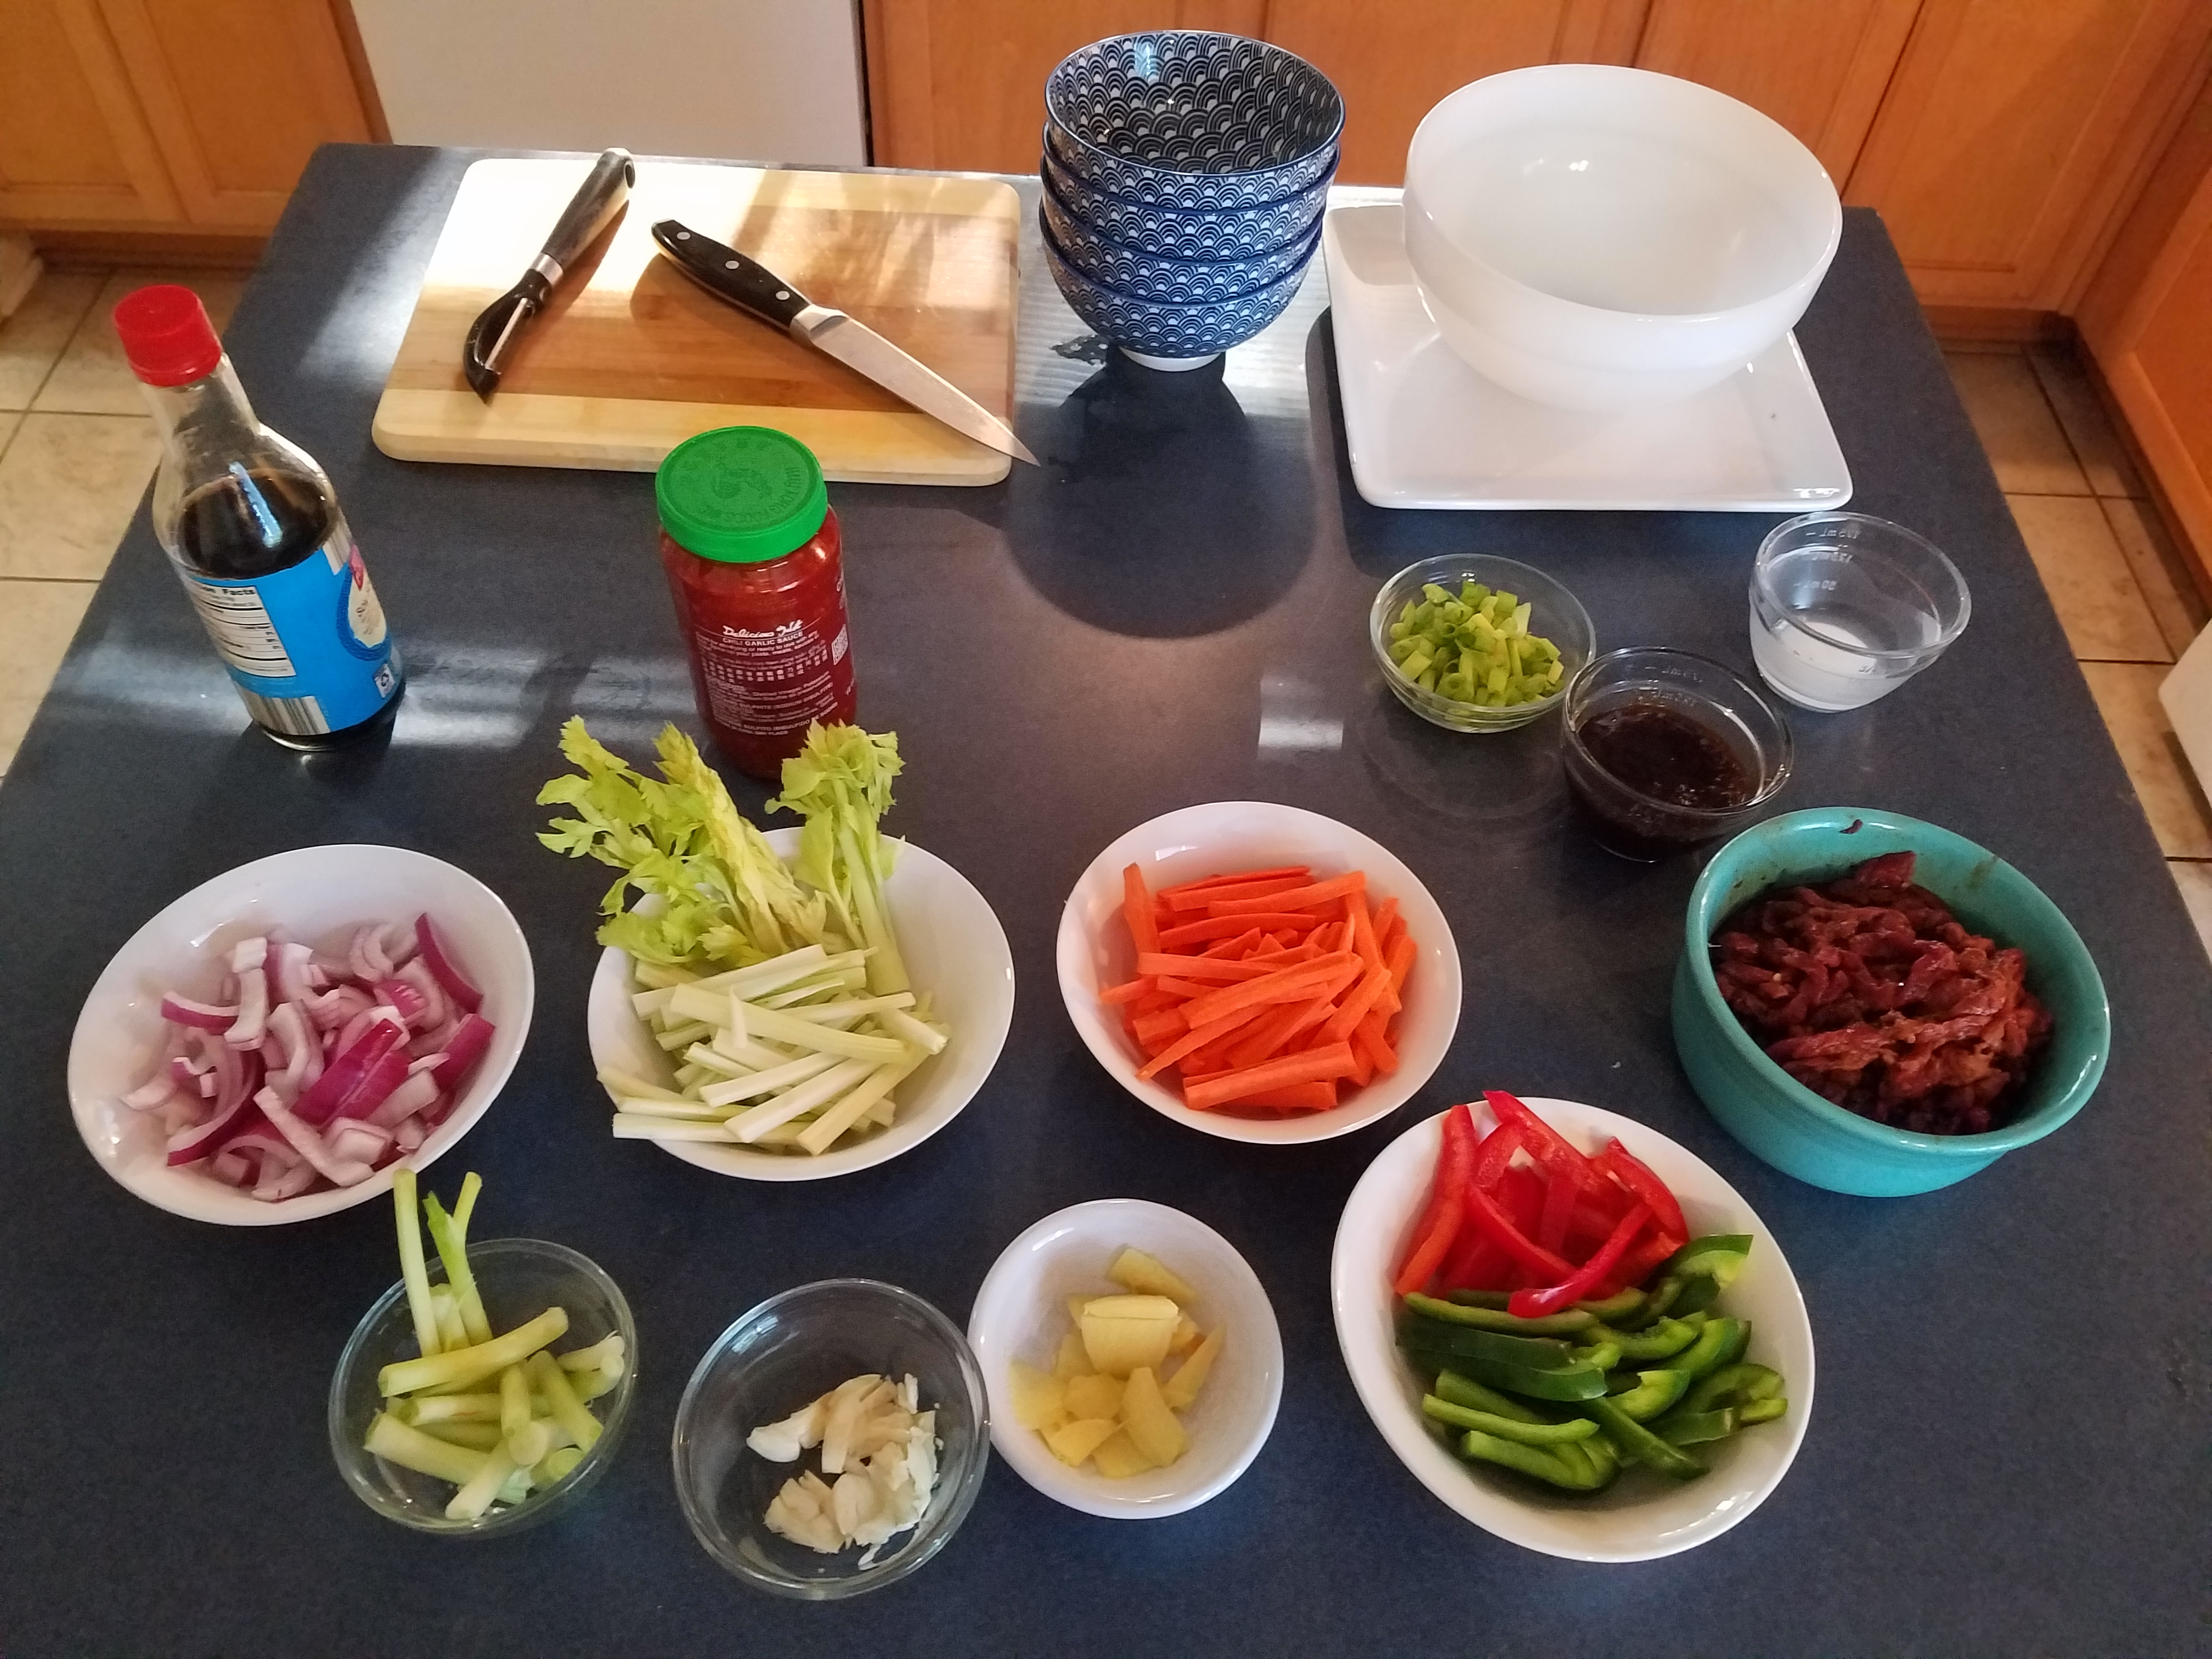
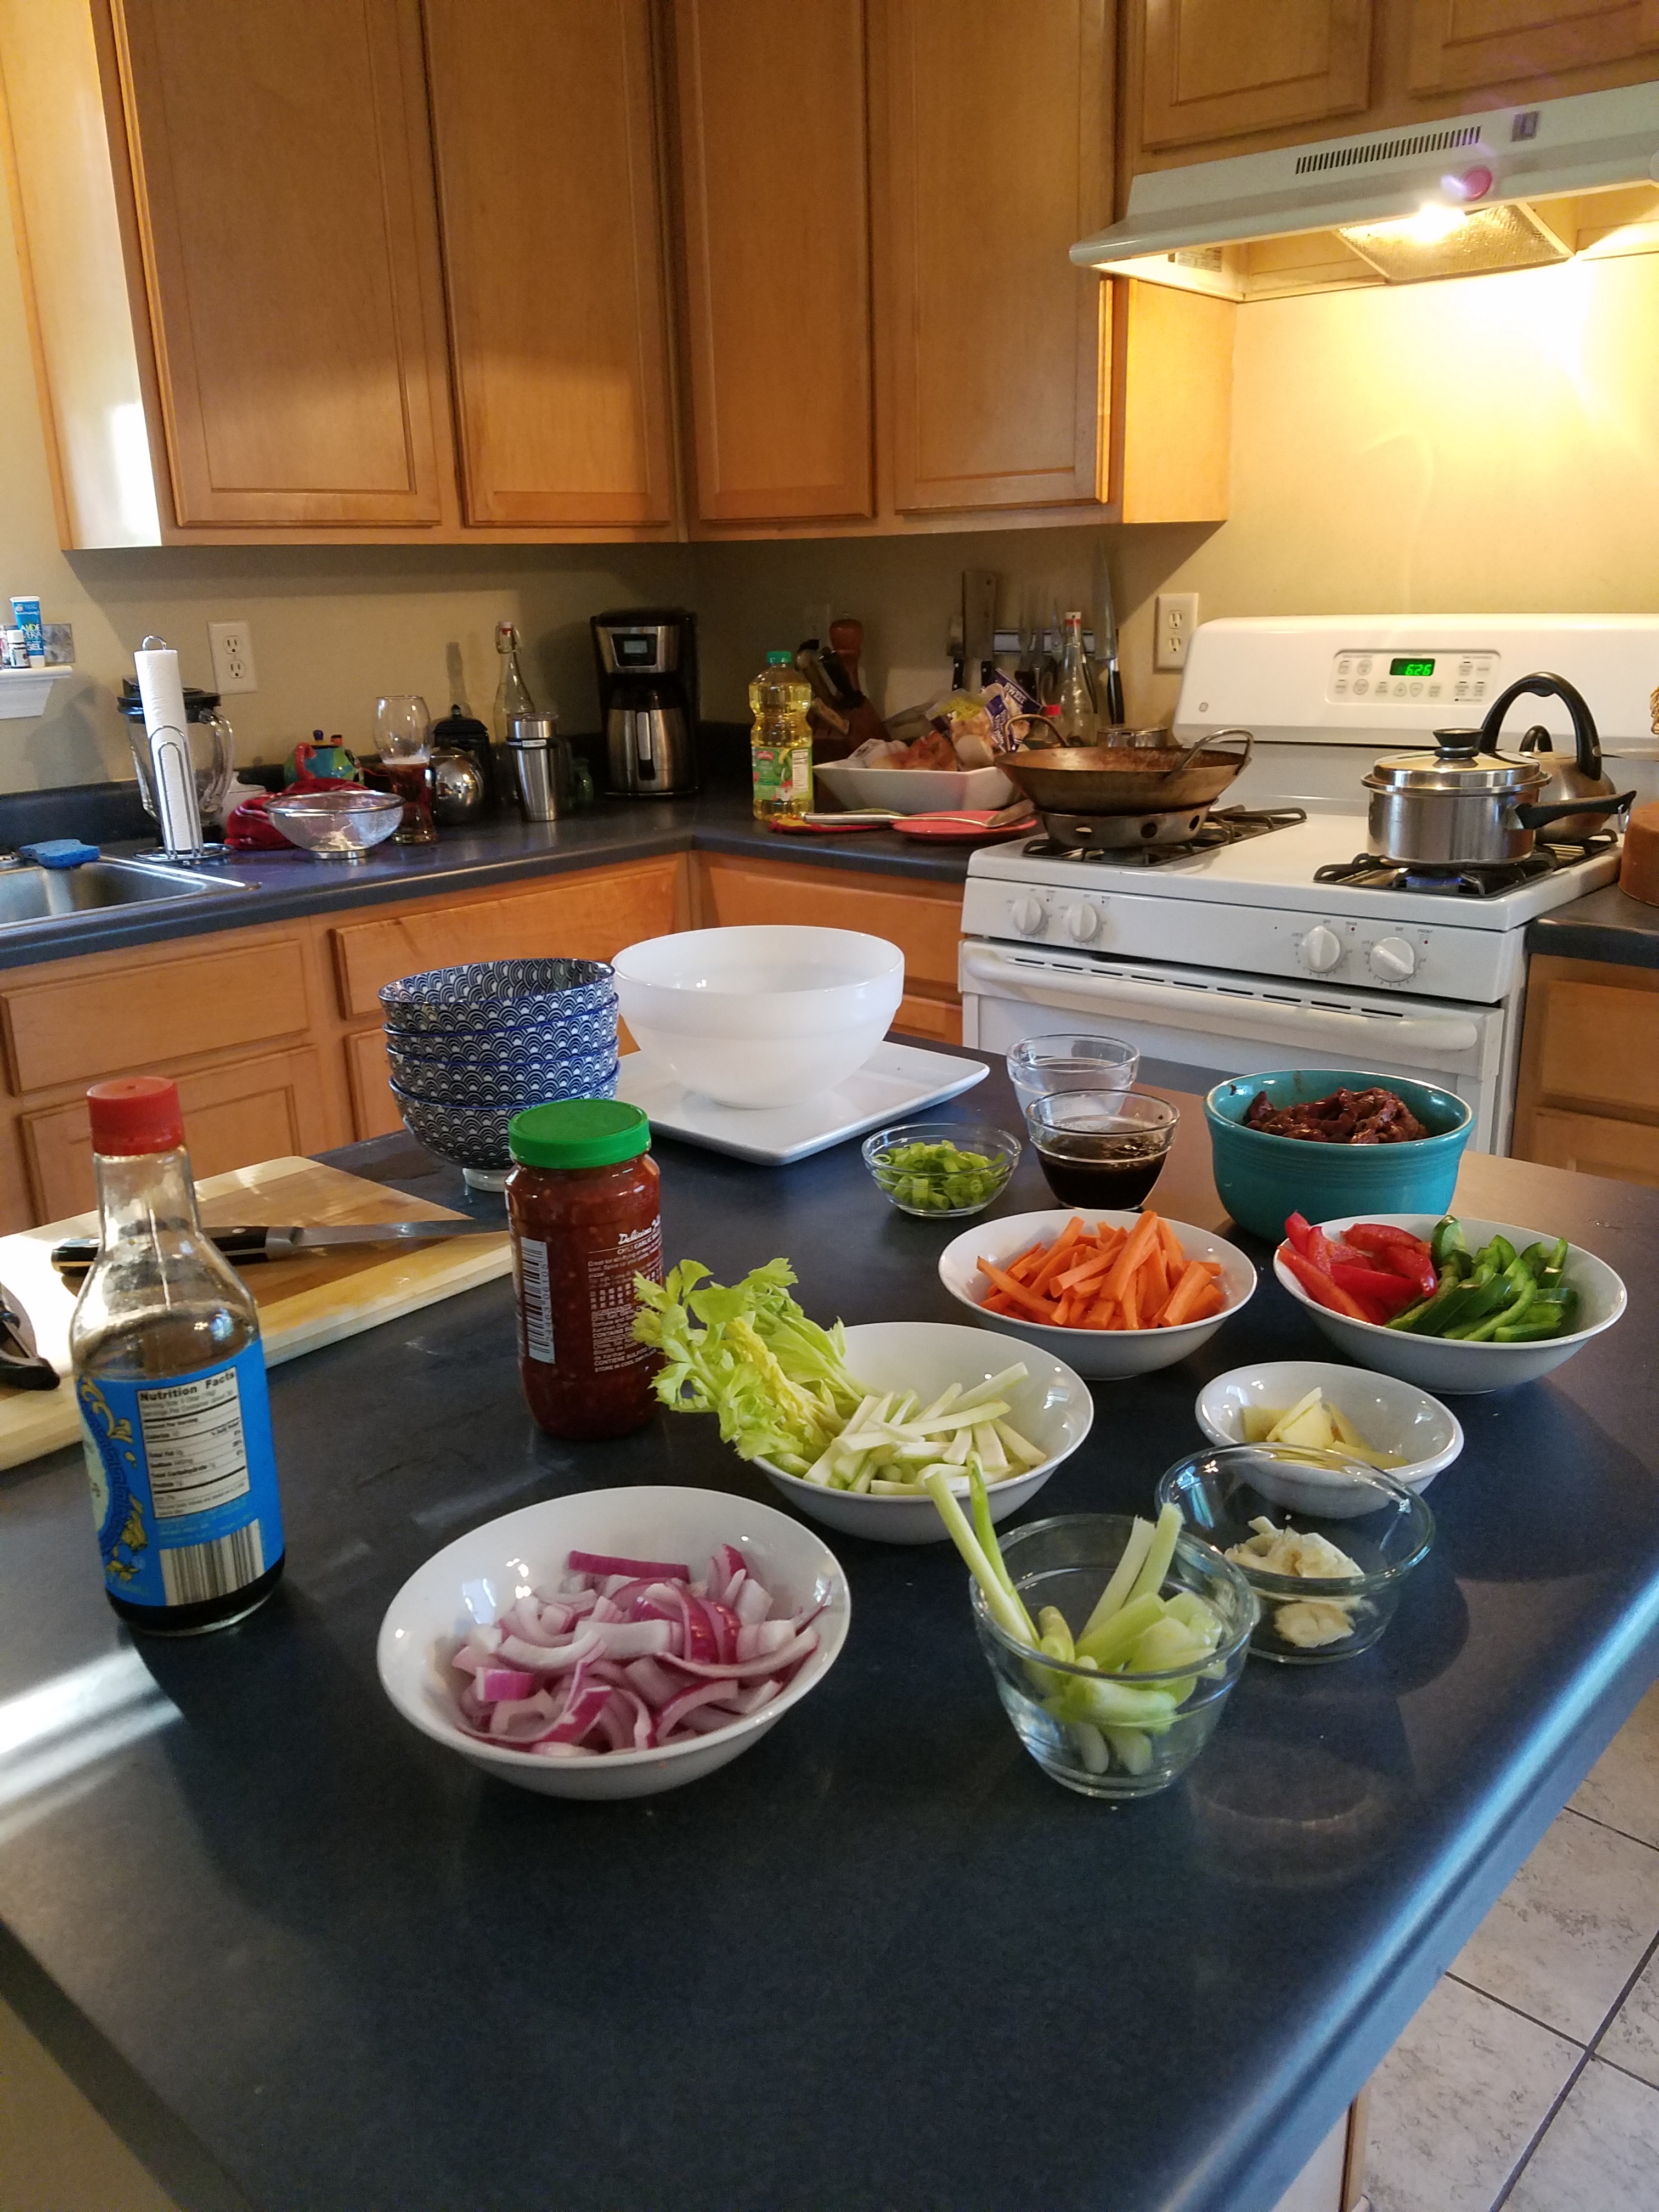
Here is an example of mise en place in practice, as I prepared for a recent stir fry dish. 

Now, I don’t always use this many prep bowls when I utilize mise en place.  Most of the time I just use one or two large, shallow bowls to hold the different items.  I grab what I need from the bowl and toss it in the wok, when I need it.  It makes for a quick clean-up.  But, for this particular culinary adventure, I decided to use lots of little prep bowls.

The rice is steaming on the stove and I am ready to crank up the wok!  After a few minutes of fire and frenzy, it will all be ready to serve.

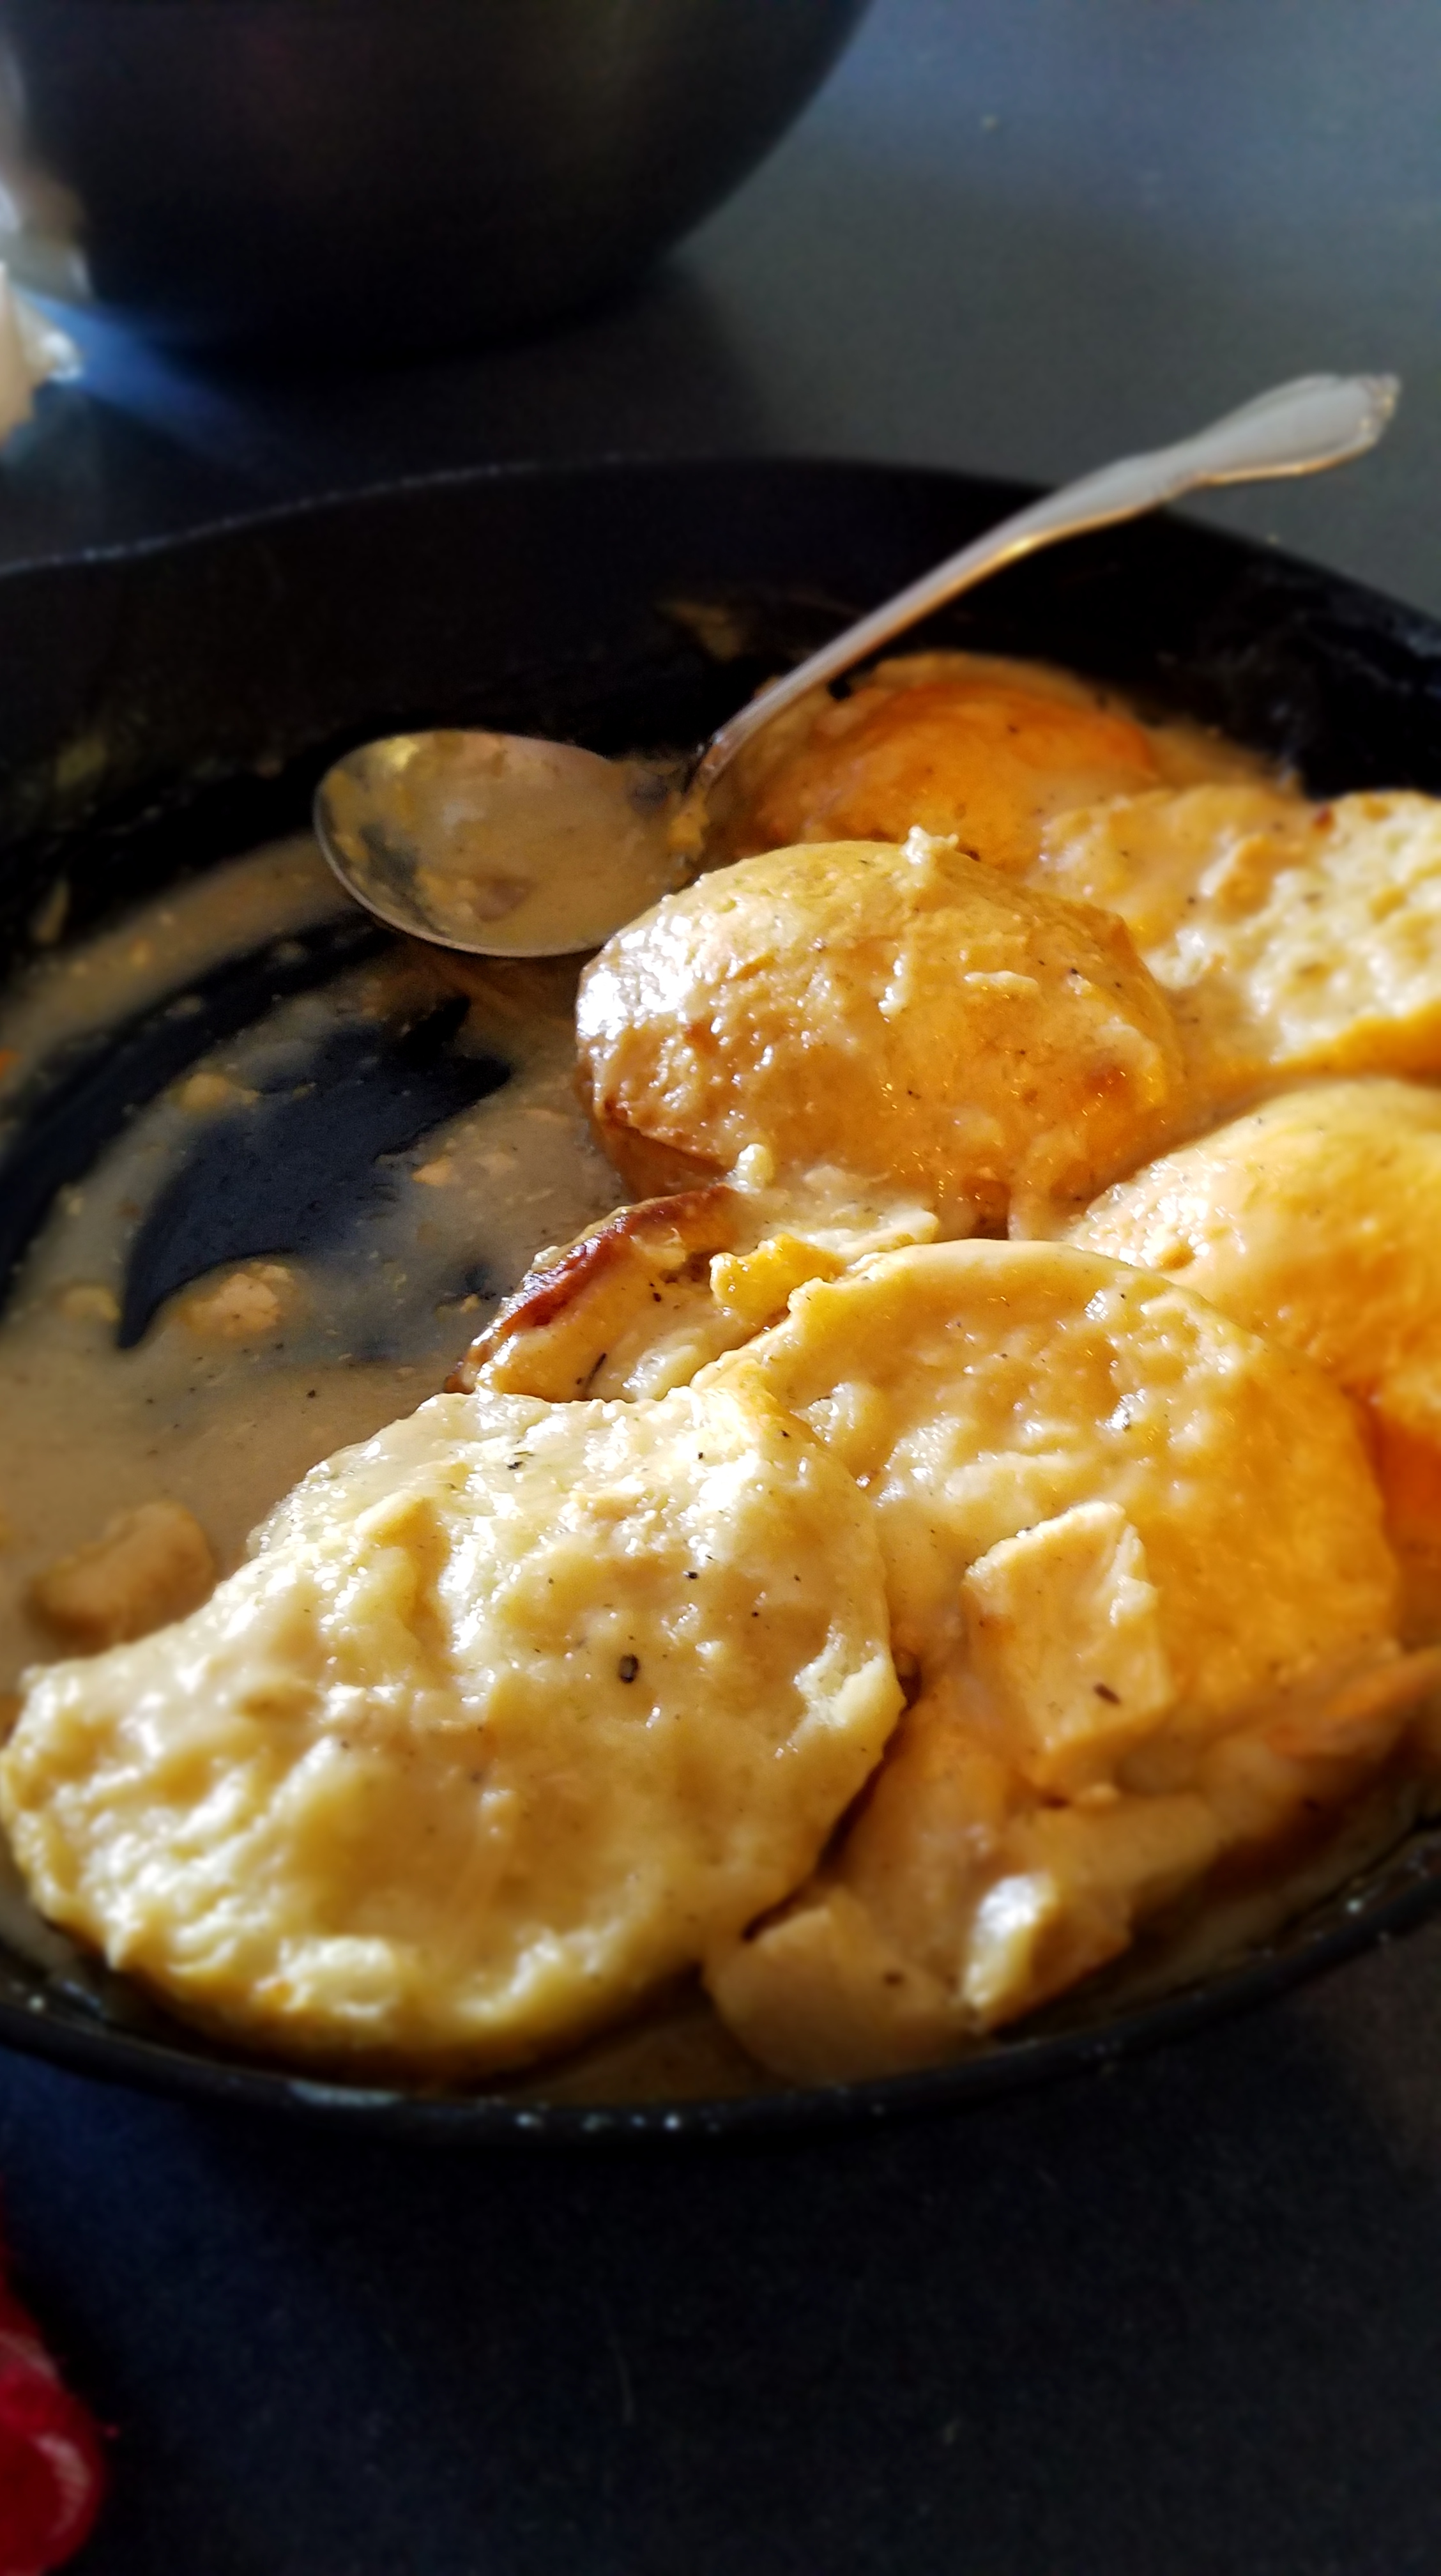
Chicken and Biscuits with Gravy

This is comfort food at its highest level.  As a stress reliever, it is on a par with yoga, neck massages and Xanax.  It is most appreciated during the cold, damp days of autumn and winter but it can warm your heart on any day of the year.  Serve this to your family when you, or any member of your family has had a particularly difficult day.  Your family might not talk much during meal, but that’s okay.  Sometimes we all need a quiet time to heal together.

Ingredients:

2 Tbs. cooking oil (I like to use canola oil)

2 lbs. chicken skinless chicken breast

4 cups of chicken broth (32 ounce boxed broth or stock works well)

1 ½ cups whole milk

6 Tbs. butter

6 Tbs. flour

3 tsp. dried onion flakes, crushed

1 ½ tsp rubbed dry sage

½ tsp coarse ground black pepper

½ tsp salt

1 can of large buttermilk or home-style biscuits (8 count)

Directions:

Add oil to hot, oven-proof pan.  I like to use my trusty cast iron skillet.  Pan fry the chicken breasts at low to medium heat, turning every few minutes. 

While the chicken is simmering, bake the biscuits.  Pull the biscuits out of the oven just as they puff up and before they brown.  They will go back into the oven after they have been added to the chicken and gravy.

Remove the chicken when golden brown.  Cut or shred the chicken into bite-sized pieces.  Set aside.

Let’s pause for a moment to talk about roux.  When I was just a young, fledgling cook I was curious about roux.  I realized that many recipes called for a roux.  I saw chefs on TV, like Paul Prudhomme, prepare roux using intense heat.  They heated the pan, added oil and just as the oil began to smoke, they added the flour and whisked constantly. – – – And, they warned us that a beautiful roux could turn into a burnt mess if it was overcooked. 

By the time I got up the nerve to make a roux, I burned it.  The next time, I under-cooked it and I was left with a gritty roux that tasted like flour.  I couldn’t seem to find a way to control the roux.   I was at a loss.  I didn’t know if I would ever produce a good roux.  And then, I attempted to make a roux by using low heat.  Wow…instant success! 

I discovered that the entire process could be done with low heat.   Melt the butter or oil very slowly.  Whisk the flour in until it becomes a soft paste.  Whisk until all of the graininess of the flour is gone.  Add liquid, little by little, and whisk to remove any clumps.  In fact, I often turn the heat completely off as I add the liquid, to avoid clumping.  I turn the heat off when the roux reaches a white or blonde color.  I don’t push it to a peanut butter or dark chocolate color.  Most of my dishes that require a roux need it for thickening more than flavor and I am happy with that.

Prepare a roux by deglazing the pan with a splash of chicken broth.  Turn the heat down to low and add butter.  When the butter has melted, add flour and whisk until the flour becomes silky, smooth.  Add chicken stock, a little at a time and whisk.  Add the crushed onion flakes, dry sage, black pepper and salt and stir.  Add the remaining chicken stock and milk and continue whisking while the gravy thickens.  Once the gravy has reached your preferred thickness, turn the heat off.

Add the chunks of chicken to the pan and mix with the gravy.  Split the biscuits in half and pack them tightly together on top of the chicken and gravy.  Dab some gravy on top of the biscuits, to prevent them from burning.  Heat in a 350° oven for 10 to 15 minutes.

Serve warm.

Caesar Salad

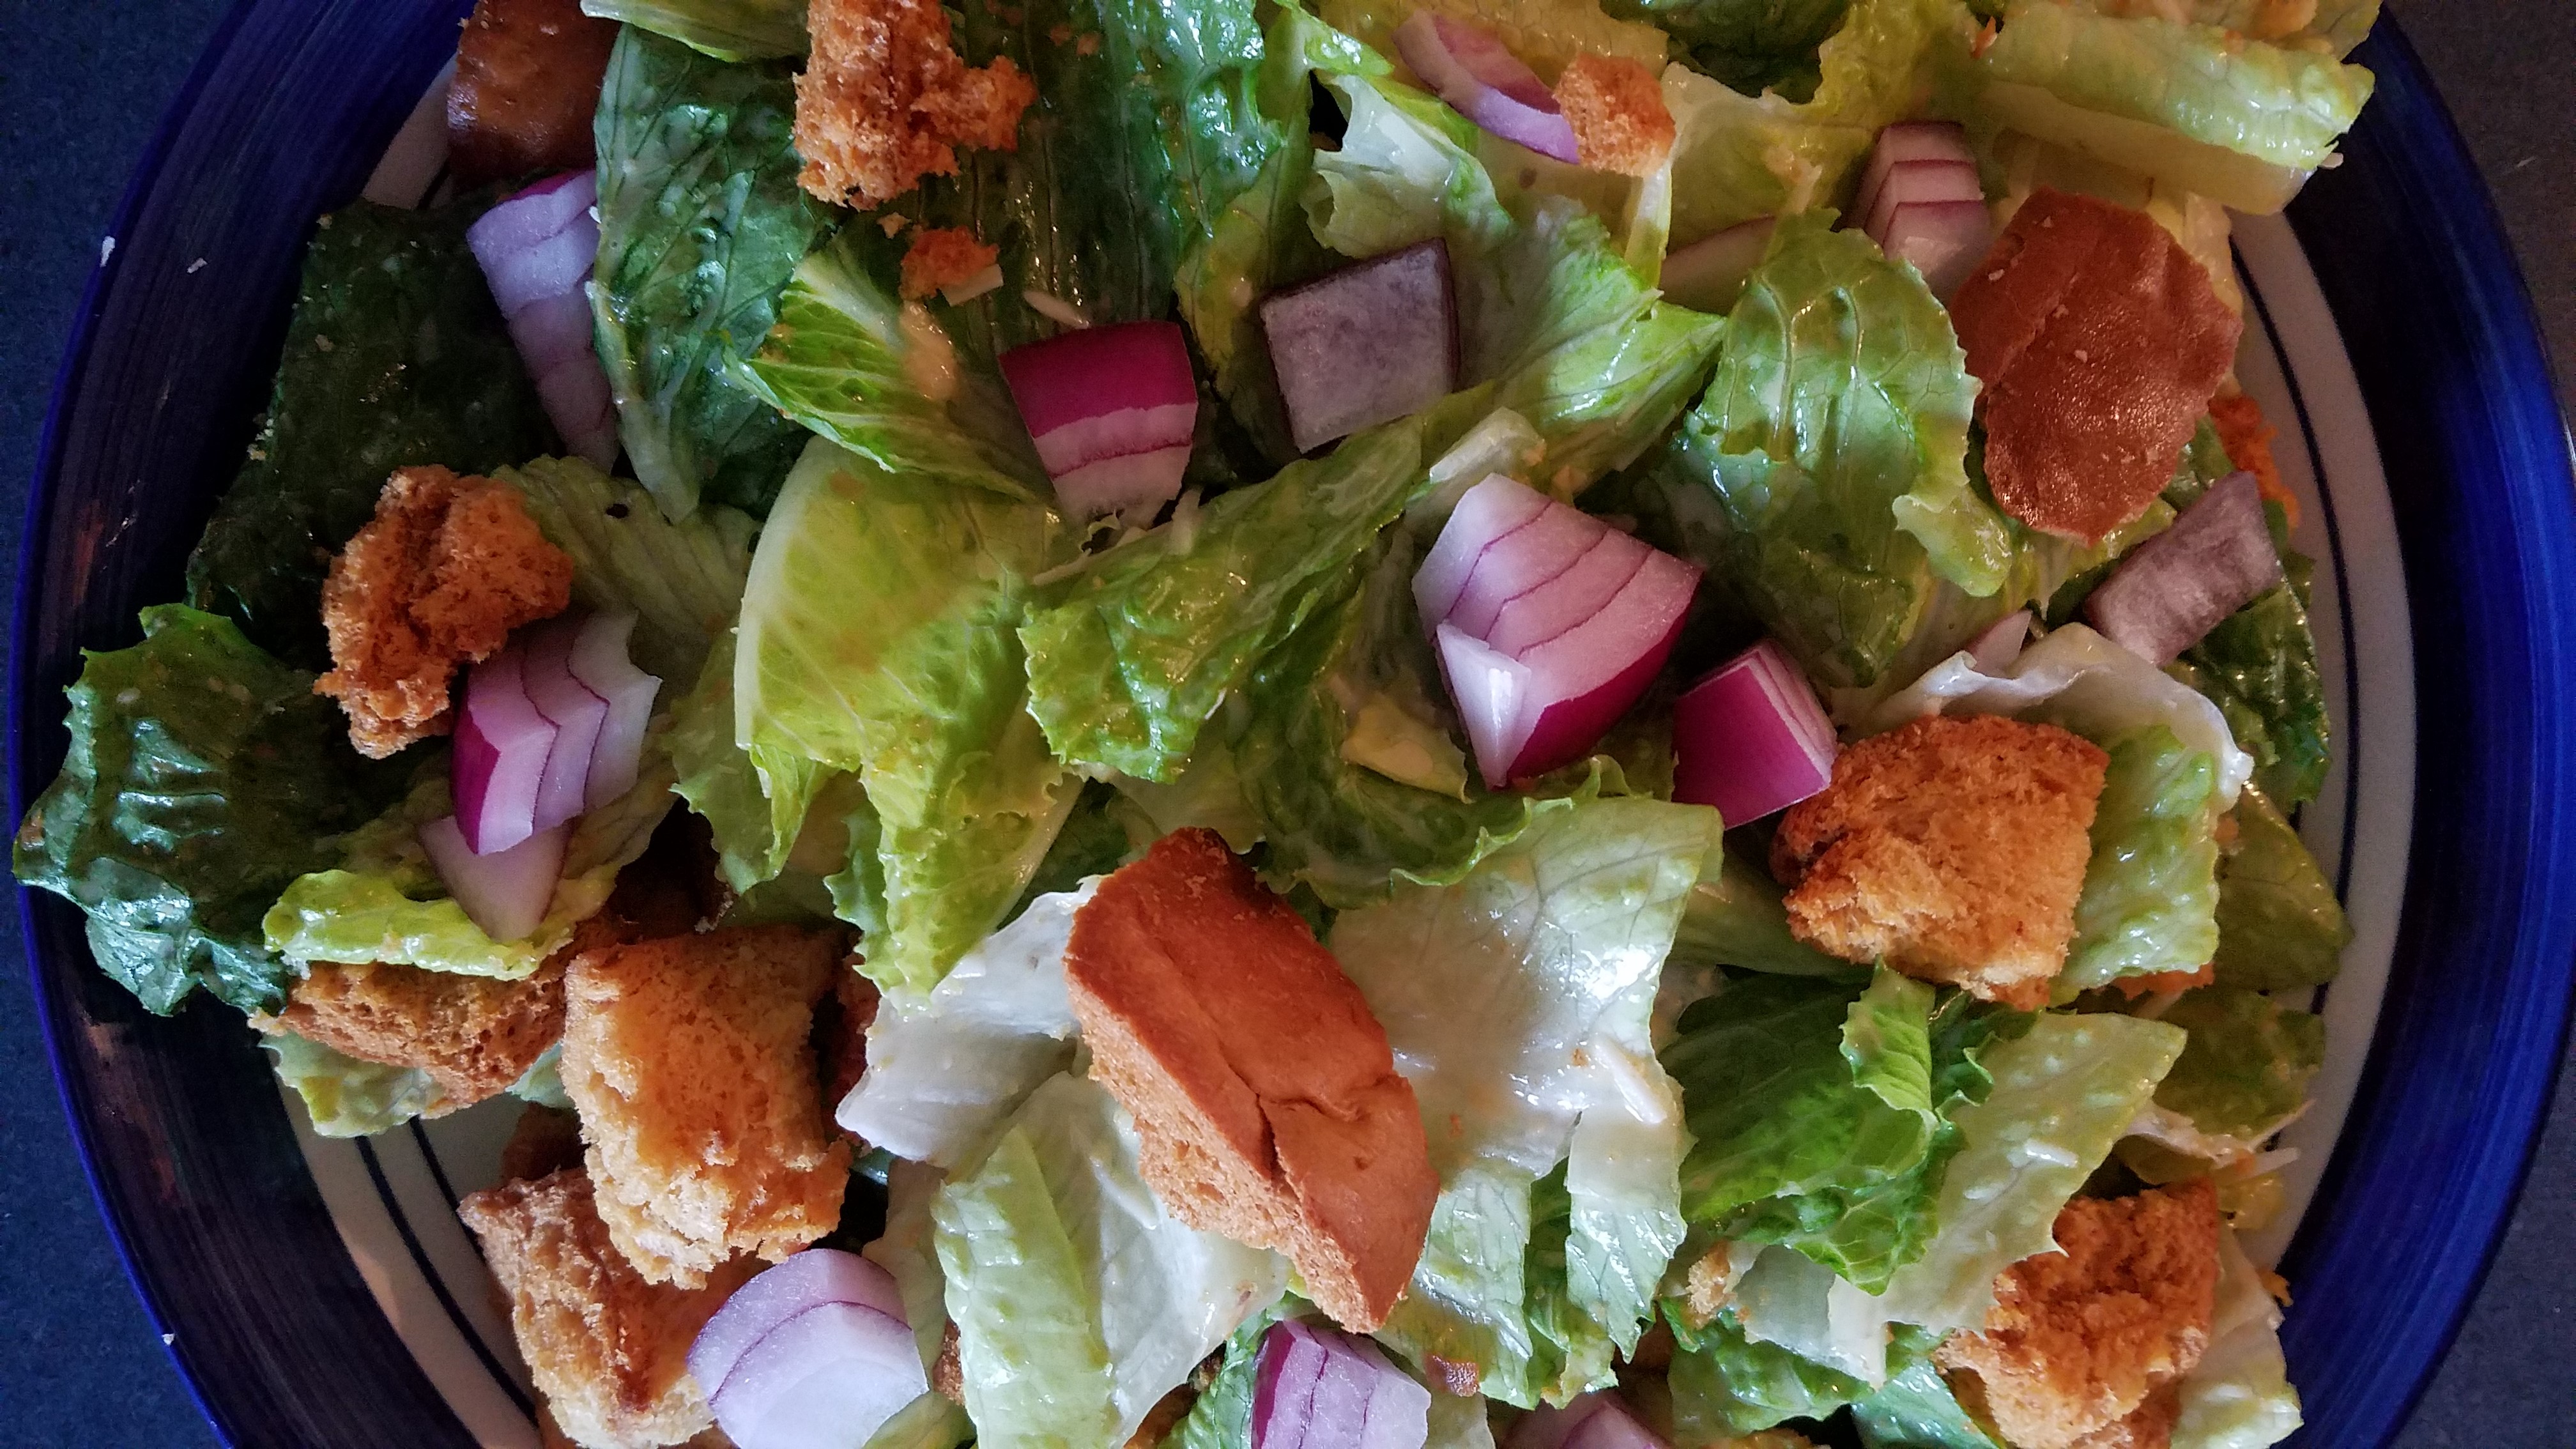
A good Caesar salad is hard to resist.  Crisp romaine lettuce and crunchy croutons are the perfect vehicle for the robust, memorable dressing that accompanies it. 

Italian immigrant, Caesar Cardini is credited with this Italian-American staple.  Caesar immigrated to America in the early 20th century and eventually made his way to southern California and Tijuana, Mexico, where he operated restaurants.  He trademarked his famous salad dressing in 1948.

His storied life is not too different than the many other immigrants that have made their homes here.  It is no surprise that many of our common, day-to-day meals are a result of the imagination and ingenuity of immigrants, like Caesar Cardini.   Immigrants have come to define who we are, as a nation. 

Ingredients:

2 cups Italian bread (or any other suitable bread for croutons)

1 Tbs olive oil

3 anchovies (packed in oil)

2 garlic cloves, chopped

1 egg yolk

2 Tbs fresh lemon juice

2 tsp Dijon mustard

¼ cup olive oil

3 Tbs grated Parmesan cheese

1 large head of Romaine lettuce, chopped into large pieces

½ cup red onion, chopped

2 hardboiled eggs, sliced (optional)

Directions:

Cut the loaf of bread into 1” thick slices. Lay the pieces of bread directly onto an oven rack and heat for about 15 minutes at 200°. Dry the bread but don’t toast it.  Remove the dried bread from the oven and cut into 1” cubes.  Toss the cubed bread in a bowl while drizzling a scant amount of olive oil.  Put the croutons on a baking sheet and toast at 300° for about 15 minutes.  I let mine go a bit too long in the oven and they tasted nutty.  (Note of the brown hue of the croutons in the photo.)

Smear the anchovies, garlic, and salt on a cutting board with the flat side of a large, kitchen knife. Keep working the mixture with the knife until it forms a paste.  I have to admit, I licked my fingers after preparing the paste.  The anchovy and garlic was intense, but oh, so good, especially since I am crazy about anchovy! 

Whisk the egg yolk, lemon juice, and mustard in a bowl.  Once blended, introduce the olive oil very slowly by drizzling the oil into the bowl and whisking briskly.  Keep whisking until the mixture becomes smooth and creamy.  Add a little water and whisk some more.   Add just enough water to achieve a creamy consistency, like you might find in store bought, creamy salad dressings.  Add the anchovy paste and Parmesan and whisk until thoroughly mixed.  Transfer the dressing to a large salad bowl. 

Lay the Romaine lettuce horizontally on a cutting board and make 1 ½” to 2” cuts from one end to the other.  Romaine is a dense, compact lettuce and that makes it desirable for this salad.  Add the chopped lettuce to the bowl and toss gently to incorporate the dressing.  Add the croutons, onion and toss a few more times.  Top with sliced hard boiled eggs, if you like.  Sprinkle a little more Parmesan cheese on top and that’s it. 

Now, since I mentioned that I love anchovies, I have to say that I enjoy adding strips of anchovy on top of the salad, radiating from the center like sun rays, but I know that anchovies are not adored by everyone.  The amount of anchovy in the dressing should satisfy anchovy lovers without offending the rest of the crowd.  In fact, the lemon juice and Dijon mustard tame the anchovy flavor remarkably well.  Balance the dressing according to your own taste. 

If you are cooking for someone who absolutely despises anchovies, consider finding a new friend consider substituting the anchovy in the dressing with a few teaspoons of Worcestershire sauce.  Everyone loves Worcestershire sauce, right?  Just don’t tell ‘em that Worcestershire sauce contains anchovy!

Antipasto with tomato and anchovy – Antipasto con Pomodoro e Acciuga

Summer is in high gear and my garden continues to deliver copious amounts of delicious tomatoes.  Normally, I would prepare salsas full of tomatoes, onions, jalapeños and cilantro but, I find myself treating the tomatoes more seriously this year.  I desire Italian cuisine.  That might explain my recent post on Chicken Parmesan.  Love comes unannounced and unexpectedly sometimes.

Enter the “love apple”, the tomato.  Fresh from the vine or cooked down to a sauce, the tomato is indescribably delicious.  What other fruit, or vegetable, if you wish, can balance sweetness and acidity like the tomato?   

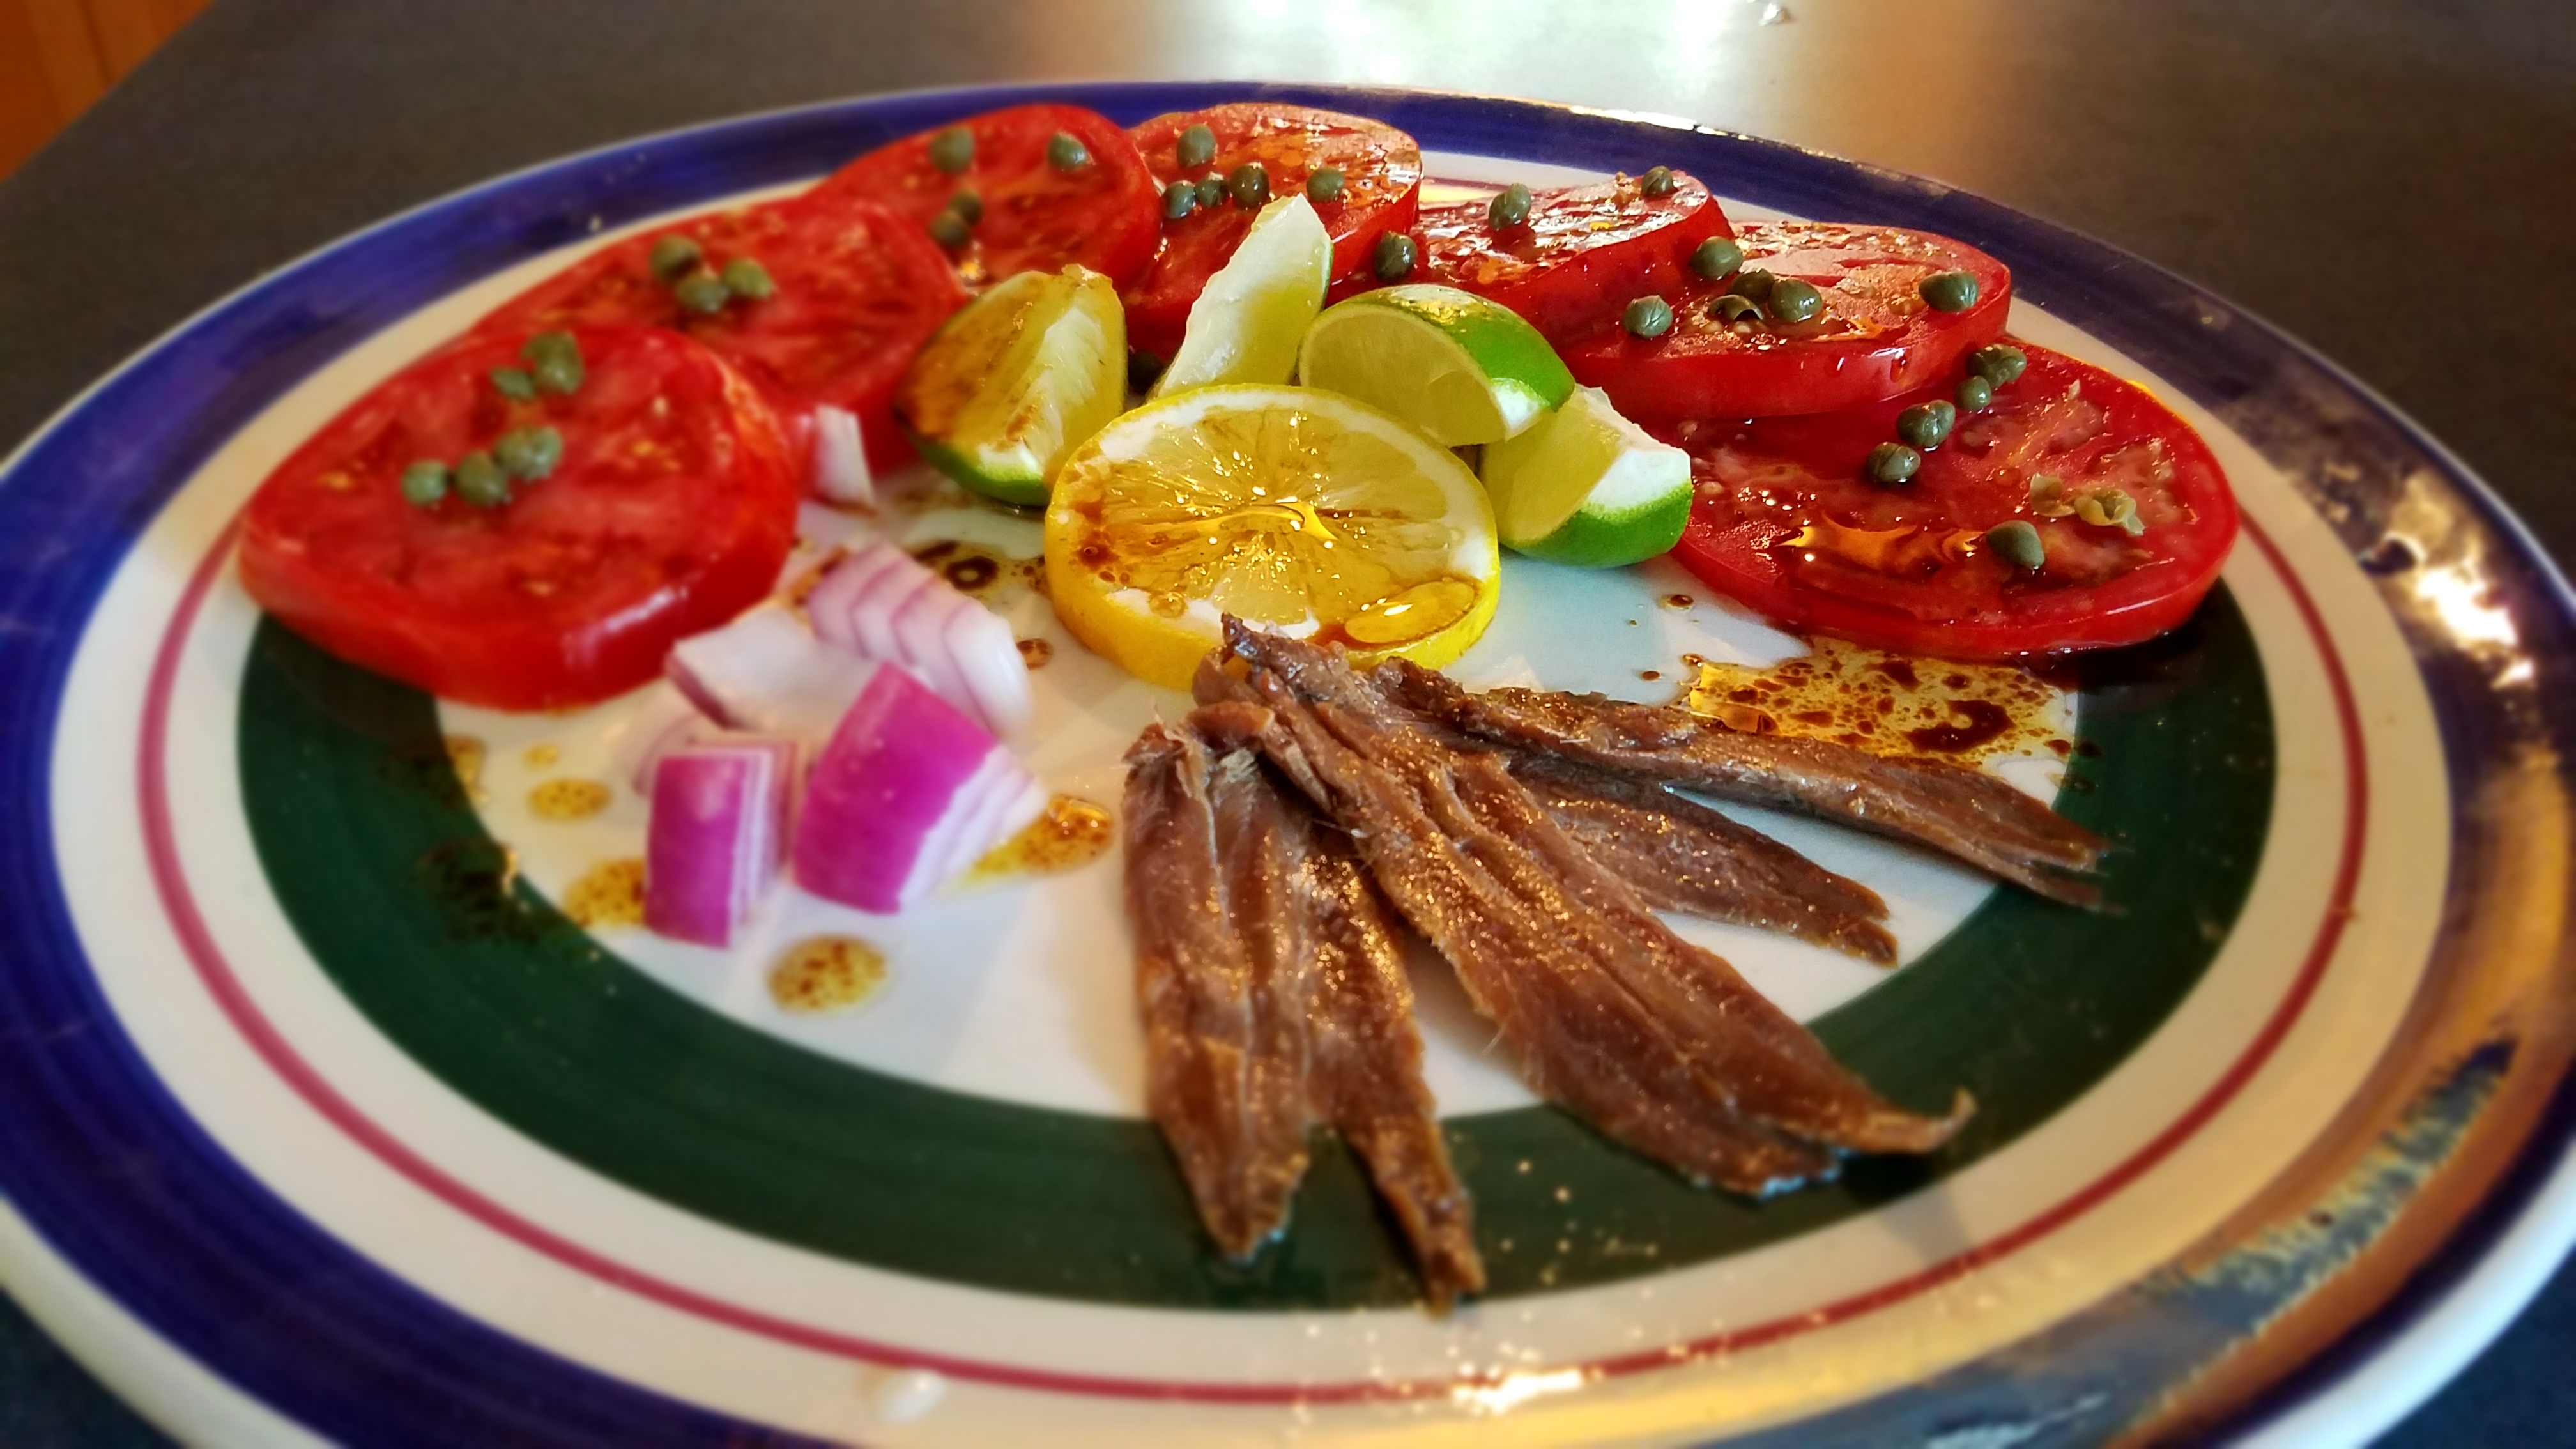
A wonderful way to celebrate the garden-ripened tomato is to serve it an antipasto. As I see it, antipastos are like the first movement of a symphony.  They are presented to the table quickly and briefly.  Antipastos showcase a variety of fresh vegetables, seafood, cheese or cold meats in their simplest forms.  Each item of the antipasto stands by itself, but together, they resonate in harmony.

Ingredients:

Two large fresh tomatoes

2 ounces anchovy (packed in oil)

¼ cup red onion, diced

1 tsp capers

1 lime (cut into wedges)

1 slice lemon

1 Tbs balsamic vinegar

Directions:

Arrange sliced tomatoes, anchovy, lemon and lime on a serving platter, according to your sense of style.  Dot tomatoes with balsamic vinegar.  Sprinkle capers across the platter.  Place the platter in the center of the dining table and ask your guests to sit.  Remove the dish from the table when there is a lull in the conversation or when the plate is empty…which ever one comes first.  Trust me, this is the best way to start a meal with friends or family.

Creamy Tomato Soup – an homage to Helen Van Wyk

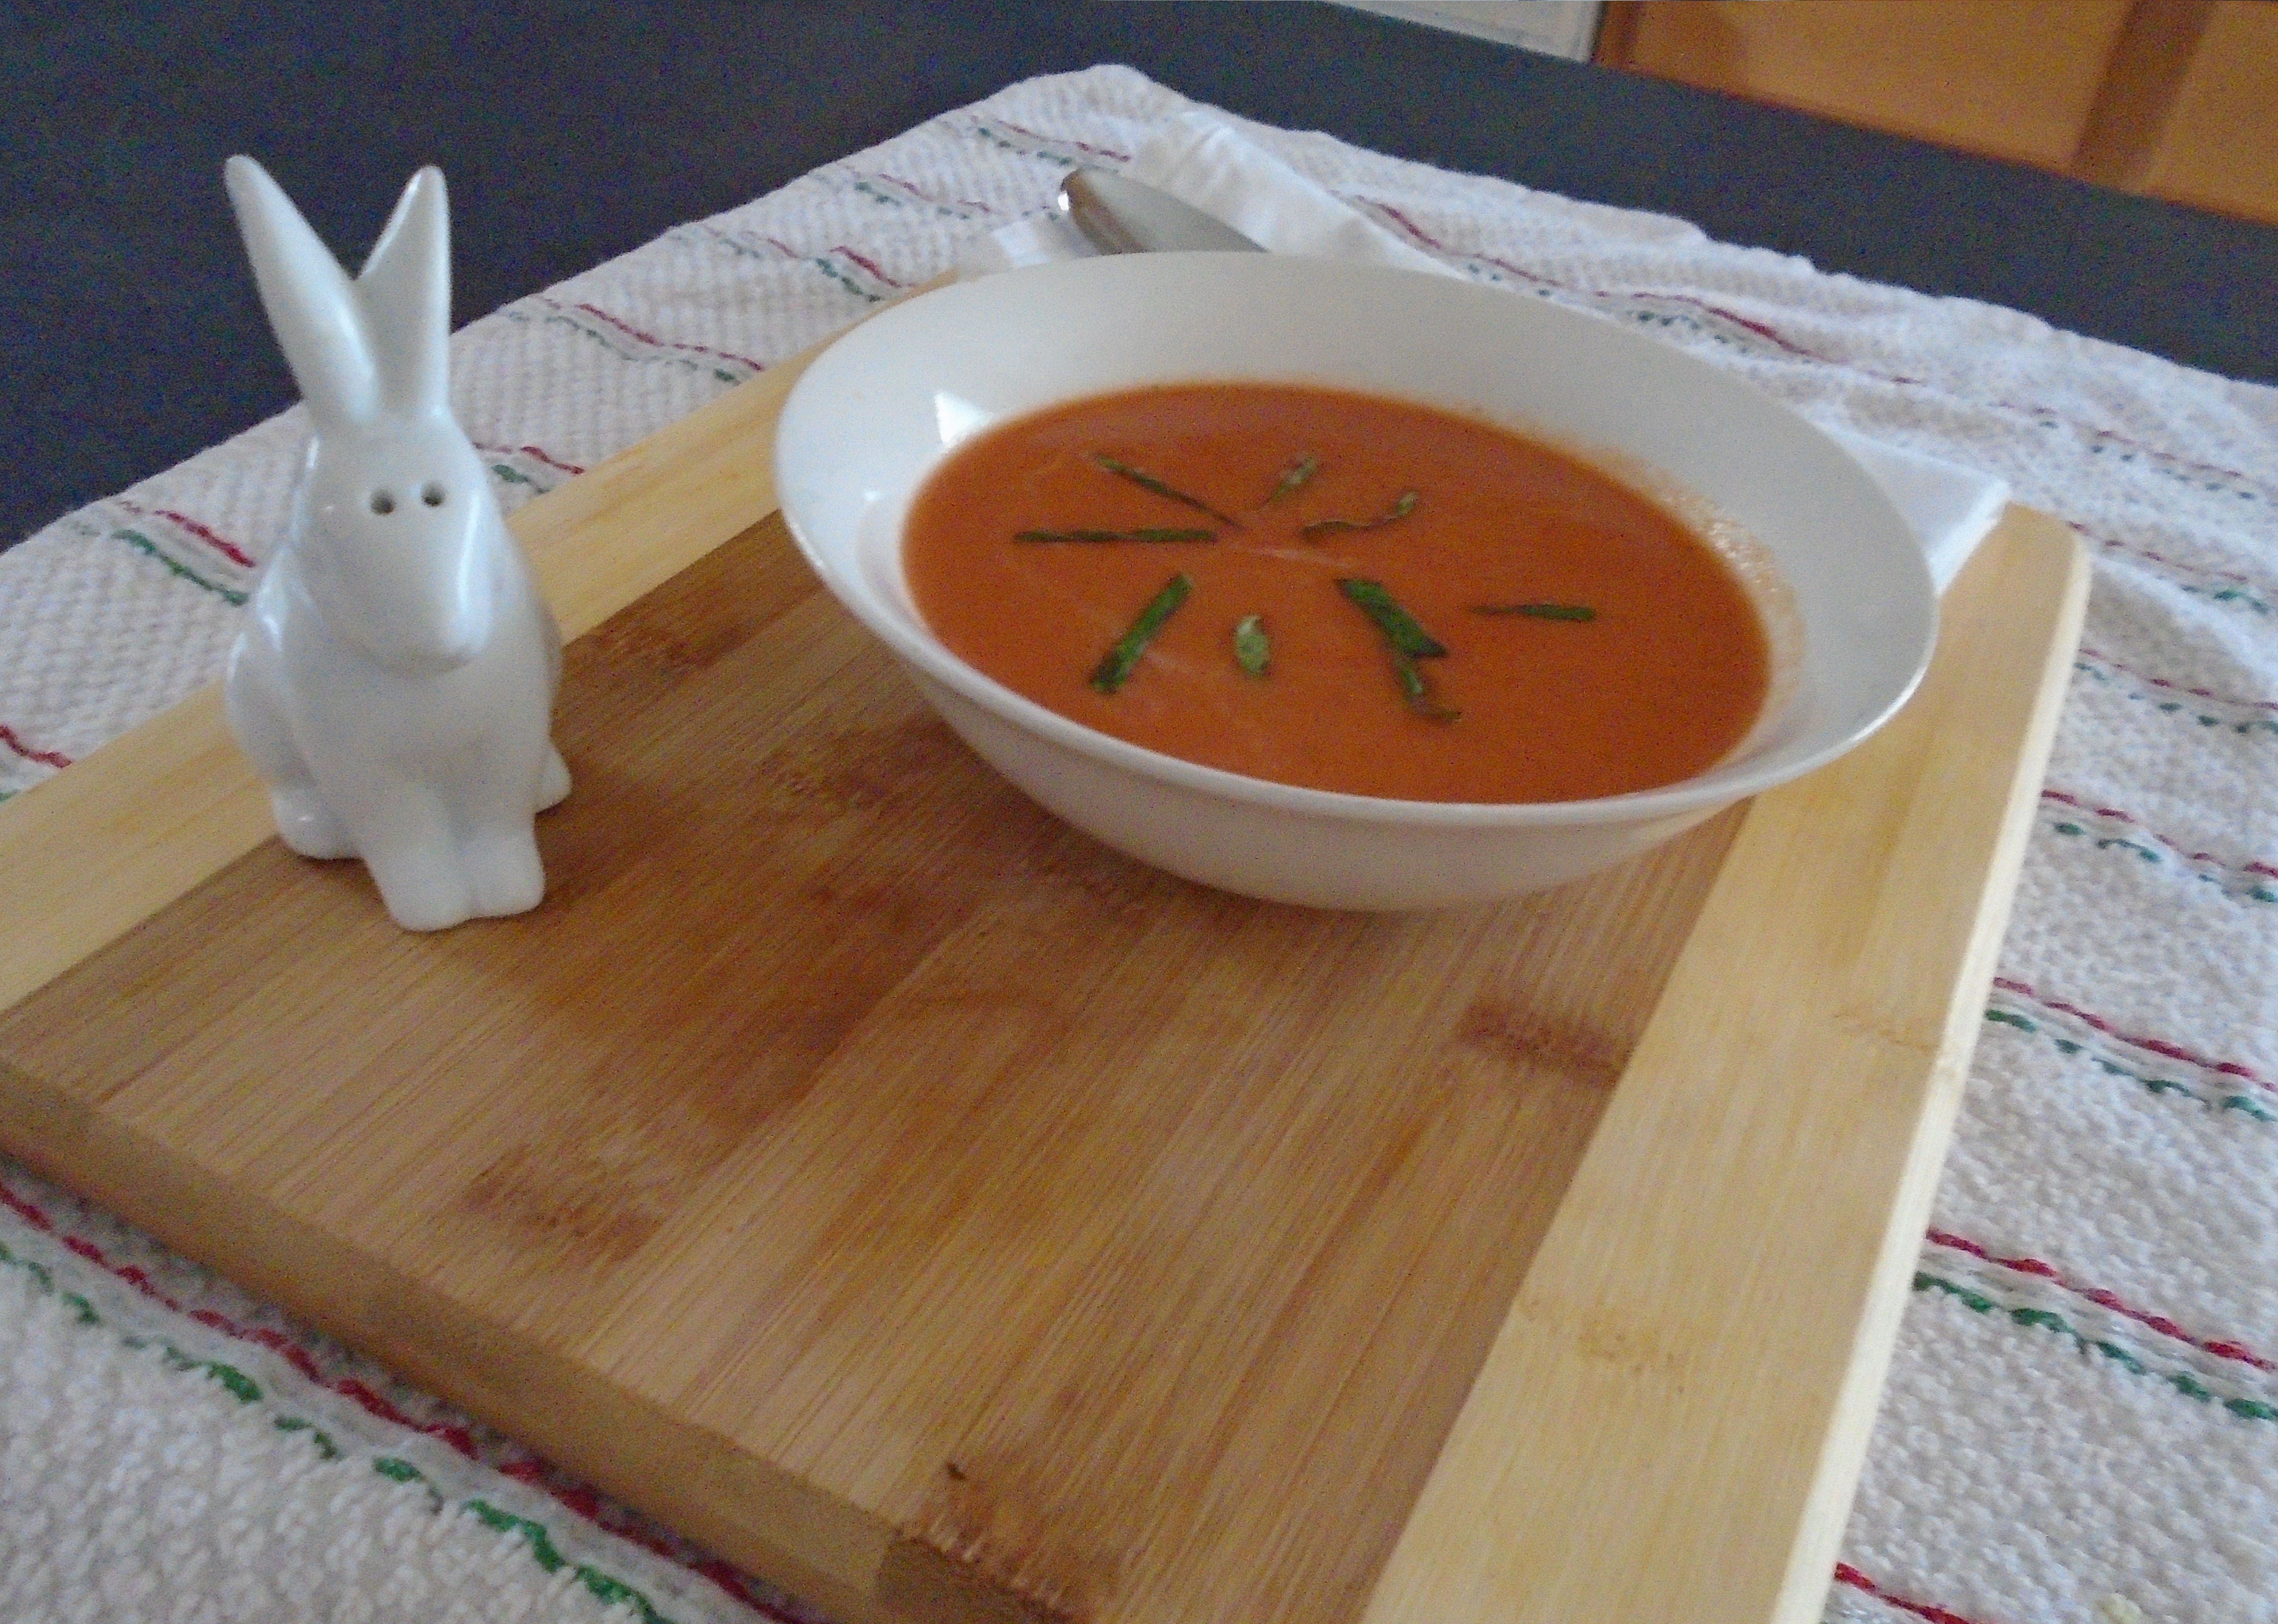
Helen might approach this soup using her painterly style.  What is it the first thing we think of, when we think of creamy tomato soup?  The bold red hue?  The silky smoothness?  The depth of flavors?  Perhaps all of those.  And how will we achieve that goal? 

In my mind, I see Helen approaching this project in phases.  First, establish a suitable foundation and, with that foundation firmly in place, add complexity and vibrancy.  Obviously, the tomatoes will be the foundation.  The tomatoes provide the base color and key flavor.  The onions and carrots will provide an unseen, subtle accent.  The oil and garlic are essential, but they will stay in the background.  The chicken stock adds a new dimension to the rich body of the tomato.  The cream, oh, the cream is the finishing touch that turns this into a masterpiece.  Basil brings the vibrancy with the magician’s trick aimed to appeal to the eyes and palate.  Salt and pepper to taste, because spice is the spice of life!

Let’s begin…

Ingredients:

2 Tbs olive oil

1 1/2 cups onions, chopped

1 carrot, shredded

4 garlic cloves, whole, but mashed

6 large, ripe tomatoes, chopped

1/4 cup fresh basil, chopped

2 cups chicken stock

1 Tbs salt

1 tsp ground black pepper

3/4 cup heavy cream

a little bit of julienned fresh basil, for garnish

Directions:

Heat a large, stainless steel pot to medium/low heat.  Sauté the onions and carrots for about 10 minutes, or until soft.  Add the garlic and cook for about one minute.  Remove the garlic.  Add the chopped tomatoes, chicken stock and basil.  Bring the soup to a boil and then lower to a simmer for a few minutes to allow the flavors to combine.  Add salt and pepper to taste.  Cook uncovered for about 30 to 45 minutes, to soften the tomatoes and thicken the soup.  Stir in the cream and simmer for one more minute.  Pour the soup into a blender and puree.  Pour the soup through a strainer and discard the solids.  Pour the soup back into the pot and simmer for another minute or two.  Turn off the heat and ladle the soup into bowls.  Garnish with slender, slivers of basil leaves.

Serve with crackers or grilled cheese sandwiches.

“Welcome to My Studio”

I would venture to guess that just about everyone in American knows who Bob Ross was.  We either know him from his PBS instructional painting series, “The Joy of Painting” or, for the younger crowd, we know him from countless internet memes and other pop culture imagery.  Either way, he became an American icon.  He was placid and appealing, disarming and charming, thoughtful and charismatic.  Okay, do you know his mentor, Bill Alexander?  Oh, a few of you raised your hands. 

Bill Alexander gained notoriety from his TV series on PBS revealing his “wet on wet” technique with oil painting.  Bill Alexander was also Bob Ross’s teacher for a short time.  Bill Alexander hosted the PBS series called, “The Magic of Oil Painting”, which aired for eight years.  During Bill Alexander’s heyday, he developed and marketed his own brand of art supplies.  After a few years, Bill handed over the gauntlet to his protégée, Bob Ross, giving Bob the opportunity to expand his career.  Bob Ross seized the opportunity and wrote several instructional books on the “wet on wet” technique, and made several How-To videos and even marketed his own brand of paints and art supplies.  Ross was the showman that Alexander could not be.  Ross went on his way to stardom and snubbed his former mentor.  Alexander was resentful and he claimed that Ross had copied his technique.  A bitterness developed between the two of them that continued for the rest of their lives.

The “wet on wet” technique actually finds its origin in Flanders, now known as the Netherlands, during  the 15th century.  Artists such as, Caravaggio, Paul Cezanne, John Singer Sargent, and Claude Monet, were just a few of the artists that utilized the “wet on wet” painting style. 

Bob Ross died in 1995.  Bill Alexander died later, in 1997

Okay, bonus question: Who remembers Helen Van Wyk?  “Bueller…Bueller?”

Just as I suspected. 

In 1990 Helen Van Wyk’s TV series, “Welcome to my Studio”, aired on PBS for the first time.  It was also the same year that she was diagnosed with cancer. 

Helen wasted no time on her show.  When the camera was turned on, she got straight to the point.  She explained color theory, discussed the nature of light and darkness and illustrated elements of good design, all while manipulating her brush and mixing paint on her pallet.  She produced beautiful still life paintings and portraits… not the glib, kitschy paintings that Bill Alexander and Bob Ross cranked out, show after show.   Helen’s work conveyed a sense of sincerity and artistry and, when she spoke to her audience, she often spoke to herself, honestly.  We could hear her praise and criticize her own actions as she painted.  She had a knack for vocalizing the sort of thoughts that every artist experiences during  the creative process.  Her mistakes and victories were exposed.  During those moments, we had the opportunity to see into her mind. 

At the end of each episode, she would end with, “…and next week, I may teach you how to make soup”. 

I have to admit, I watched all of her shows and I waited for the day that she would show me how to make soup.  Helen Van Wyk died of cancer in 1994. 

Fortunately, we can still find many of Helen’s episodes of “Welcome to my Studio” on YouTube.  I encourage everyone to see Helen at work…whether you are a painter or a cook, because the truth of the matter is, painting and cooking are not so different.  Anything that you do with a sense of passion and purpose is art. 

…and next week I may show you how to paint!

Chicken Parmesan (Pollo alla Parmigiana)

Ah, just when you thought this might be a Tex-Mex blog, I packed up and took a trip to Italy.  Chicken Parmesan is actually more American than Italian.  Italian immigrants created this dish but it was inspired by classic Italian dishes, which sometimes included breaded eggplant and sliced ham…sometimes with sauce, sometimes not.  As with so many recipes, I admire different interpretations.  Each variation exists for a reason, whether it is based on taste preference or the availability of ingredients.  Make every meal one that you will enjoy.  If you fall in love with a meal, others will follow.

This dish is simple to make but, admittedly, difficult to make with verve. 

The secret ingredient, this time around, is homemade tomato sauce.  Summer is here and I am surrounded by buckets of fresh tomatoes.  My lovely wife has already sliced many of those tomatoes and put them in them in a dehydrator to make “sun dried tomatoes”.  Sun dried tomatoes are an absolute joy!  They are intensely sweet and are full of concentrated tomato goodness!   They can be sealed in plastic bags and frozen for months.  When they are pulled out of the freezer, they will still seem just as vibrant as the day that they were prepared.  If you want to soften them, just soak them in water for 20 to 30 minutes. They can be used in salads or added to soup stock.  One of the best ways to use them is with pasta.  Prepare any pasta you like and add sun dried tomatoes, mushrooms and basil and you won’t be disappointed.  So simple…so elegant!  Whatever you do, don’t let your ripe tomatoes go to waste!

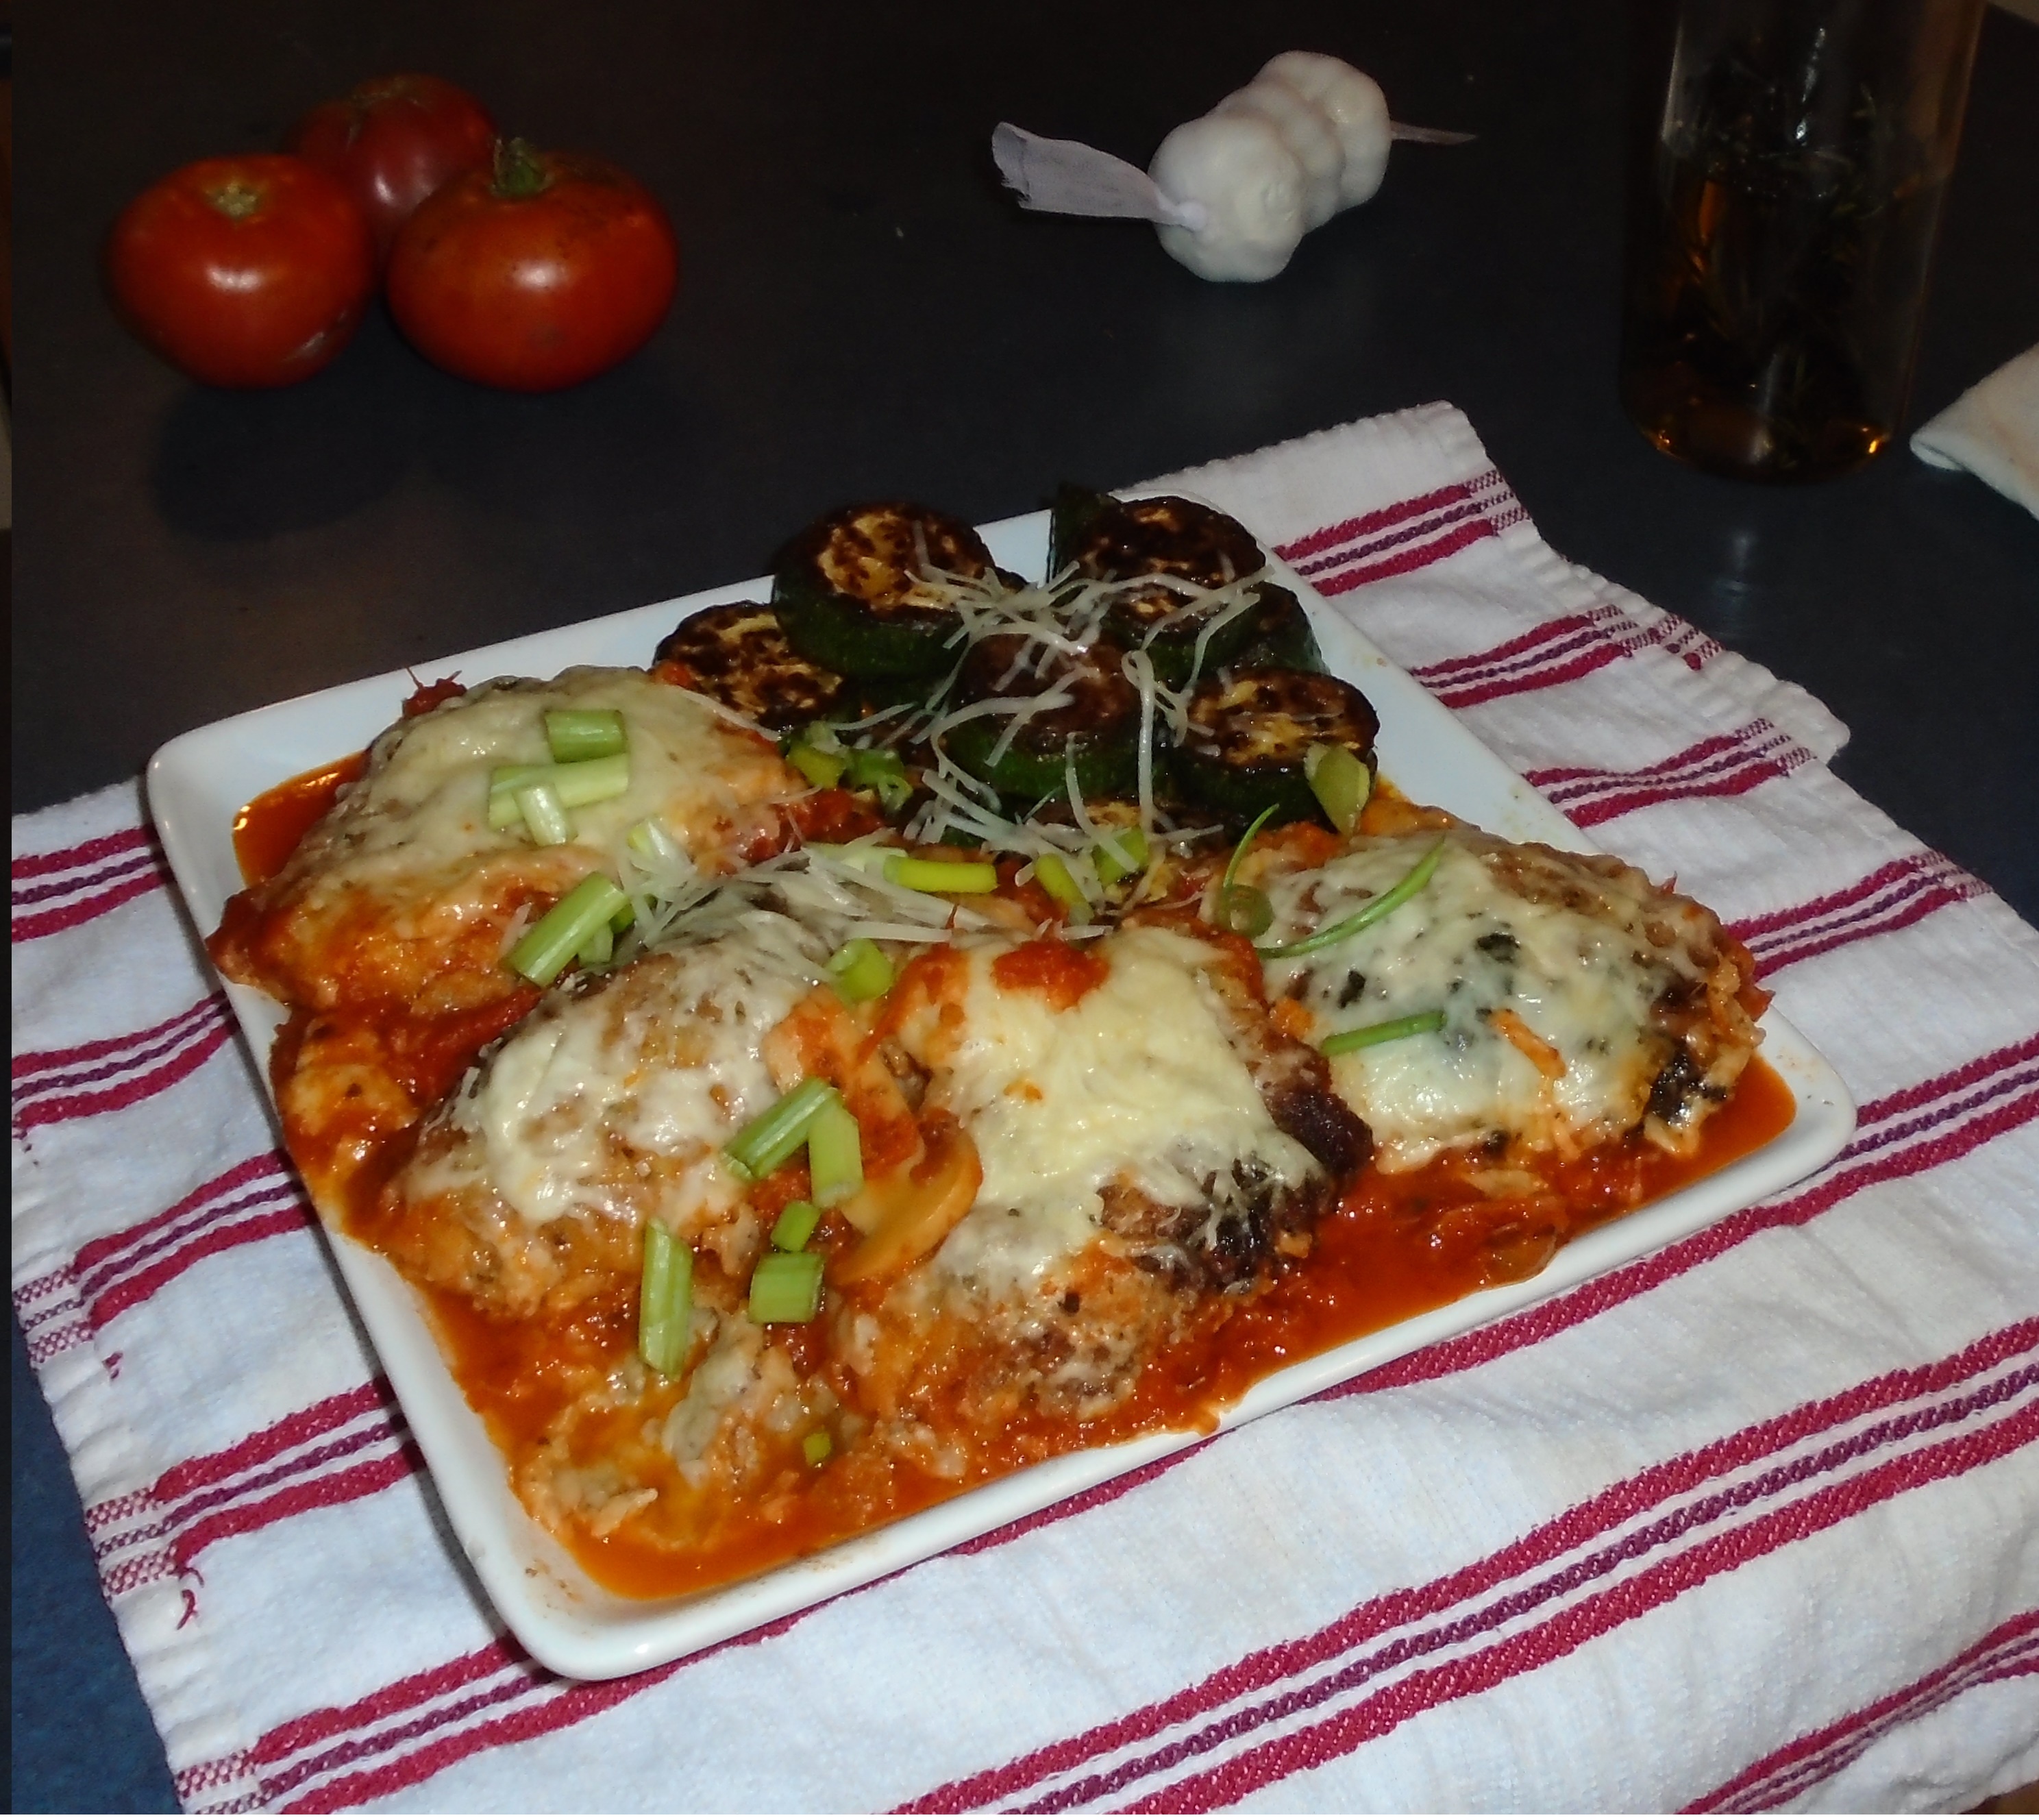
But, while I had fresh tomatoes on hand, I wanted to create a delicious foundation for an American-Italian classic… Parmigiana di Pollo, or Chicken Parmesan.  Sautéed zucchini accompanies the Chicken Parmesan, shown here…

Ingredients for the sauce:

2 gallons whole, ripe tomatoes

6 Tbs fresh basil, chopped fine

6 garlic cloves, crushed

2 Tbs dried onion flake

2 tsp fresh thyme

2 tsp fresh rosemary, minced

½ tsp crushed black pepper

Directions for the sauce:

I picked enough tomatoes to fill two gallon buckets.  After washing them, I cut the tops off and scooped out the seeds and much of the juice with my fingers.  I cut the tomatoes into one inch pieces and put them in a large pot.  I set the stove to the lowest setting and let them simmer for about five hours, stirring every half hour, or so.  Keeping the heat low reduces the chance of burning the tomatoes.  You really don’t want the sauce to have a burnt flavor!  I could have set the stove to medium heat, to reduce the cooking time, but that would have required me to stand at the stove, stirring and stirring, to avoid charring them.  Patience and laziness are a virtue, sometimes.

I allowed the tomatoes to reduce down to about ½ gallon of chunky sauce.  I added the basil, garlic, dried onion flakes, thyme, rosemary and black pepper and then I poured the sauce into a blender.  I pureed the reduction and poured it back into the pot.  In case you are wondering, I didn’t add sugar.   Since I used ripe tomatoes, the sauce was already sweet enough.  I say, let the tomato speak for itself!  Or, in my feeble attempt at Latin phrasing, “res lycopersicum loquitur”!

I reduced the sauce until it was nearly  a paste, which took about ½ hour.  I wound up with about one quart of sauce.  Perfect for a serving of four to six people.

Ingredients for the rest of the dish:

4 to 6 medium sized chicken breasts – or about 1 ½ to 2 lbs.

 (Note: in the good ol’ days a whole chicken breast was defined to be the two halves that were still connected.  For this recipe, I am using the modern definition, which means two or three whole chicken breasts, divided in half.  (Sound confusing?…well, I suppose it is.)

3 Tbs olive oil

1 cup all-purpose flour

1 cup bread crumbs

2 eggs (lightly whisked)

1 cup grated fresh Parmesan cheese

½ cup grated mozzarella

½ cup fresh, sliced fresh mushrooms (optional)

Directions for preparing the chicken:

Dredge the chicken in flour and knock off the excess flour.  Dip the chicken in egg and then coat with bread crumbs. 

Heat an oven-proof pan on the stove at low to medium heat.  Add the oil and then add the chicken. Turn the chicken every few minutes until each side turns golden brown.   Remove the chicken and add the sauce to the pan.  Lay the chicken on top of sauce and spoon some sauce on top of the chicken.  Top with the mozzarella, mushrooms and Parmesan cheese.  Bake in oven at 350° for about five minutes, or until the cheese has melted.

You may serve the chicken from the pan, which will help to keep the food warm, or remove to a serving platter.  Garnish with fresh Italian parsley, or diced green onion.

Don’t fear the gluten!

As a follow up to my previous post about tortillas, I have this to offer…

What’s wrong with people today?  And by that, I mean why doesn’t everyone think like me?!  When did gluten become something that must be avoided?  According to medical research, about 2% of people are intolerant to gluten.  For those people, I say, avoid gluten for the sake of your health.  For the other 98%, I say, do some research before trying to eliminate gluten from your diet.  Gluten has been an integral part of global cuisine for millennia and it hasn’t killed us yet.  Many food products that contain gluten often carry nutrients that promote good health and many of those food items are a good source of fiber. 

So, as with anything we might put into our bodies, “everything in moderation”, is a good rule to follow.  Eat what you love, and know that your body needs balance. 

And, while I’m at it…what’s the deal with lard?  Why do so many people have a revulsion to lard?  Is it possible that they don’t know that lard doesn’t contain trans fats?  Do they not realize that lard is higher in monounsaturated fat (the good kind of fat) than butter?  Is lard as good for you as olive oil, with regard to saturated fats?…No.  But, don’t rule lard out.  Celebrate lard.  Your biscuits, pie crusts, tortillas and fried chicken will thank you!

And, here’s the final kicker…if you were offered one last meal before you were put in front of a firing squad, would you request a gluten-free meal?  Let that thought marinate in your mind as you consider preparing the next meal for your family or friends. 

Homemade flour tortillas

Today’s words of encouragement are, “If at first you don’t succeed, try, try again.”  I did not adhere to that wise old adage many years ago when I first attempted to make homemade flour tortillas.  After two or three failed attempts, I gave up.  Twenty years later, I tried again and produced some of the best tortillas I have ever had.  Now, I consistently prepare quality tortillas.

What was the difference between then and now?  Well, there were some key differences:  Ingredients, Process and State of Mind.

On my first attempt at making tortillas I used solid vegetable shortening.  I am sure that vegetable shortening can produce good tortillas but if you want REALLY good tortillas, nothing compares to good ol’ lard.  Another key to making good tortillas is keeping the dough warm throughout the entire process of mixing, kneading and resting.  Warm water and warm air facilitates gluten production.  Yes, I want that gluten!  A good flour tortilla should be pliable and soft.  You should be able to grip the tortilla with both hands and pull it gently without tearing it apart.  The only way to get there is by kneading the dough.  When making the dough, add the flour, a little bit at a time, to warm water.  By adding flour to the water you have better control over achieving the proper consistency of the dough.  The finished dough ball should be soft and malleable, not dense and difficult to work with. 

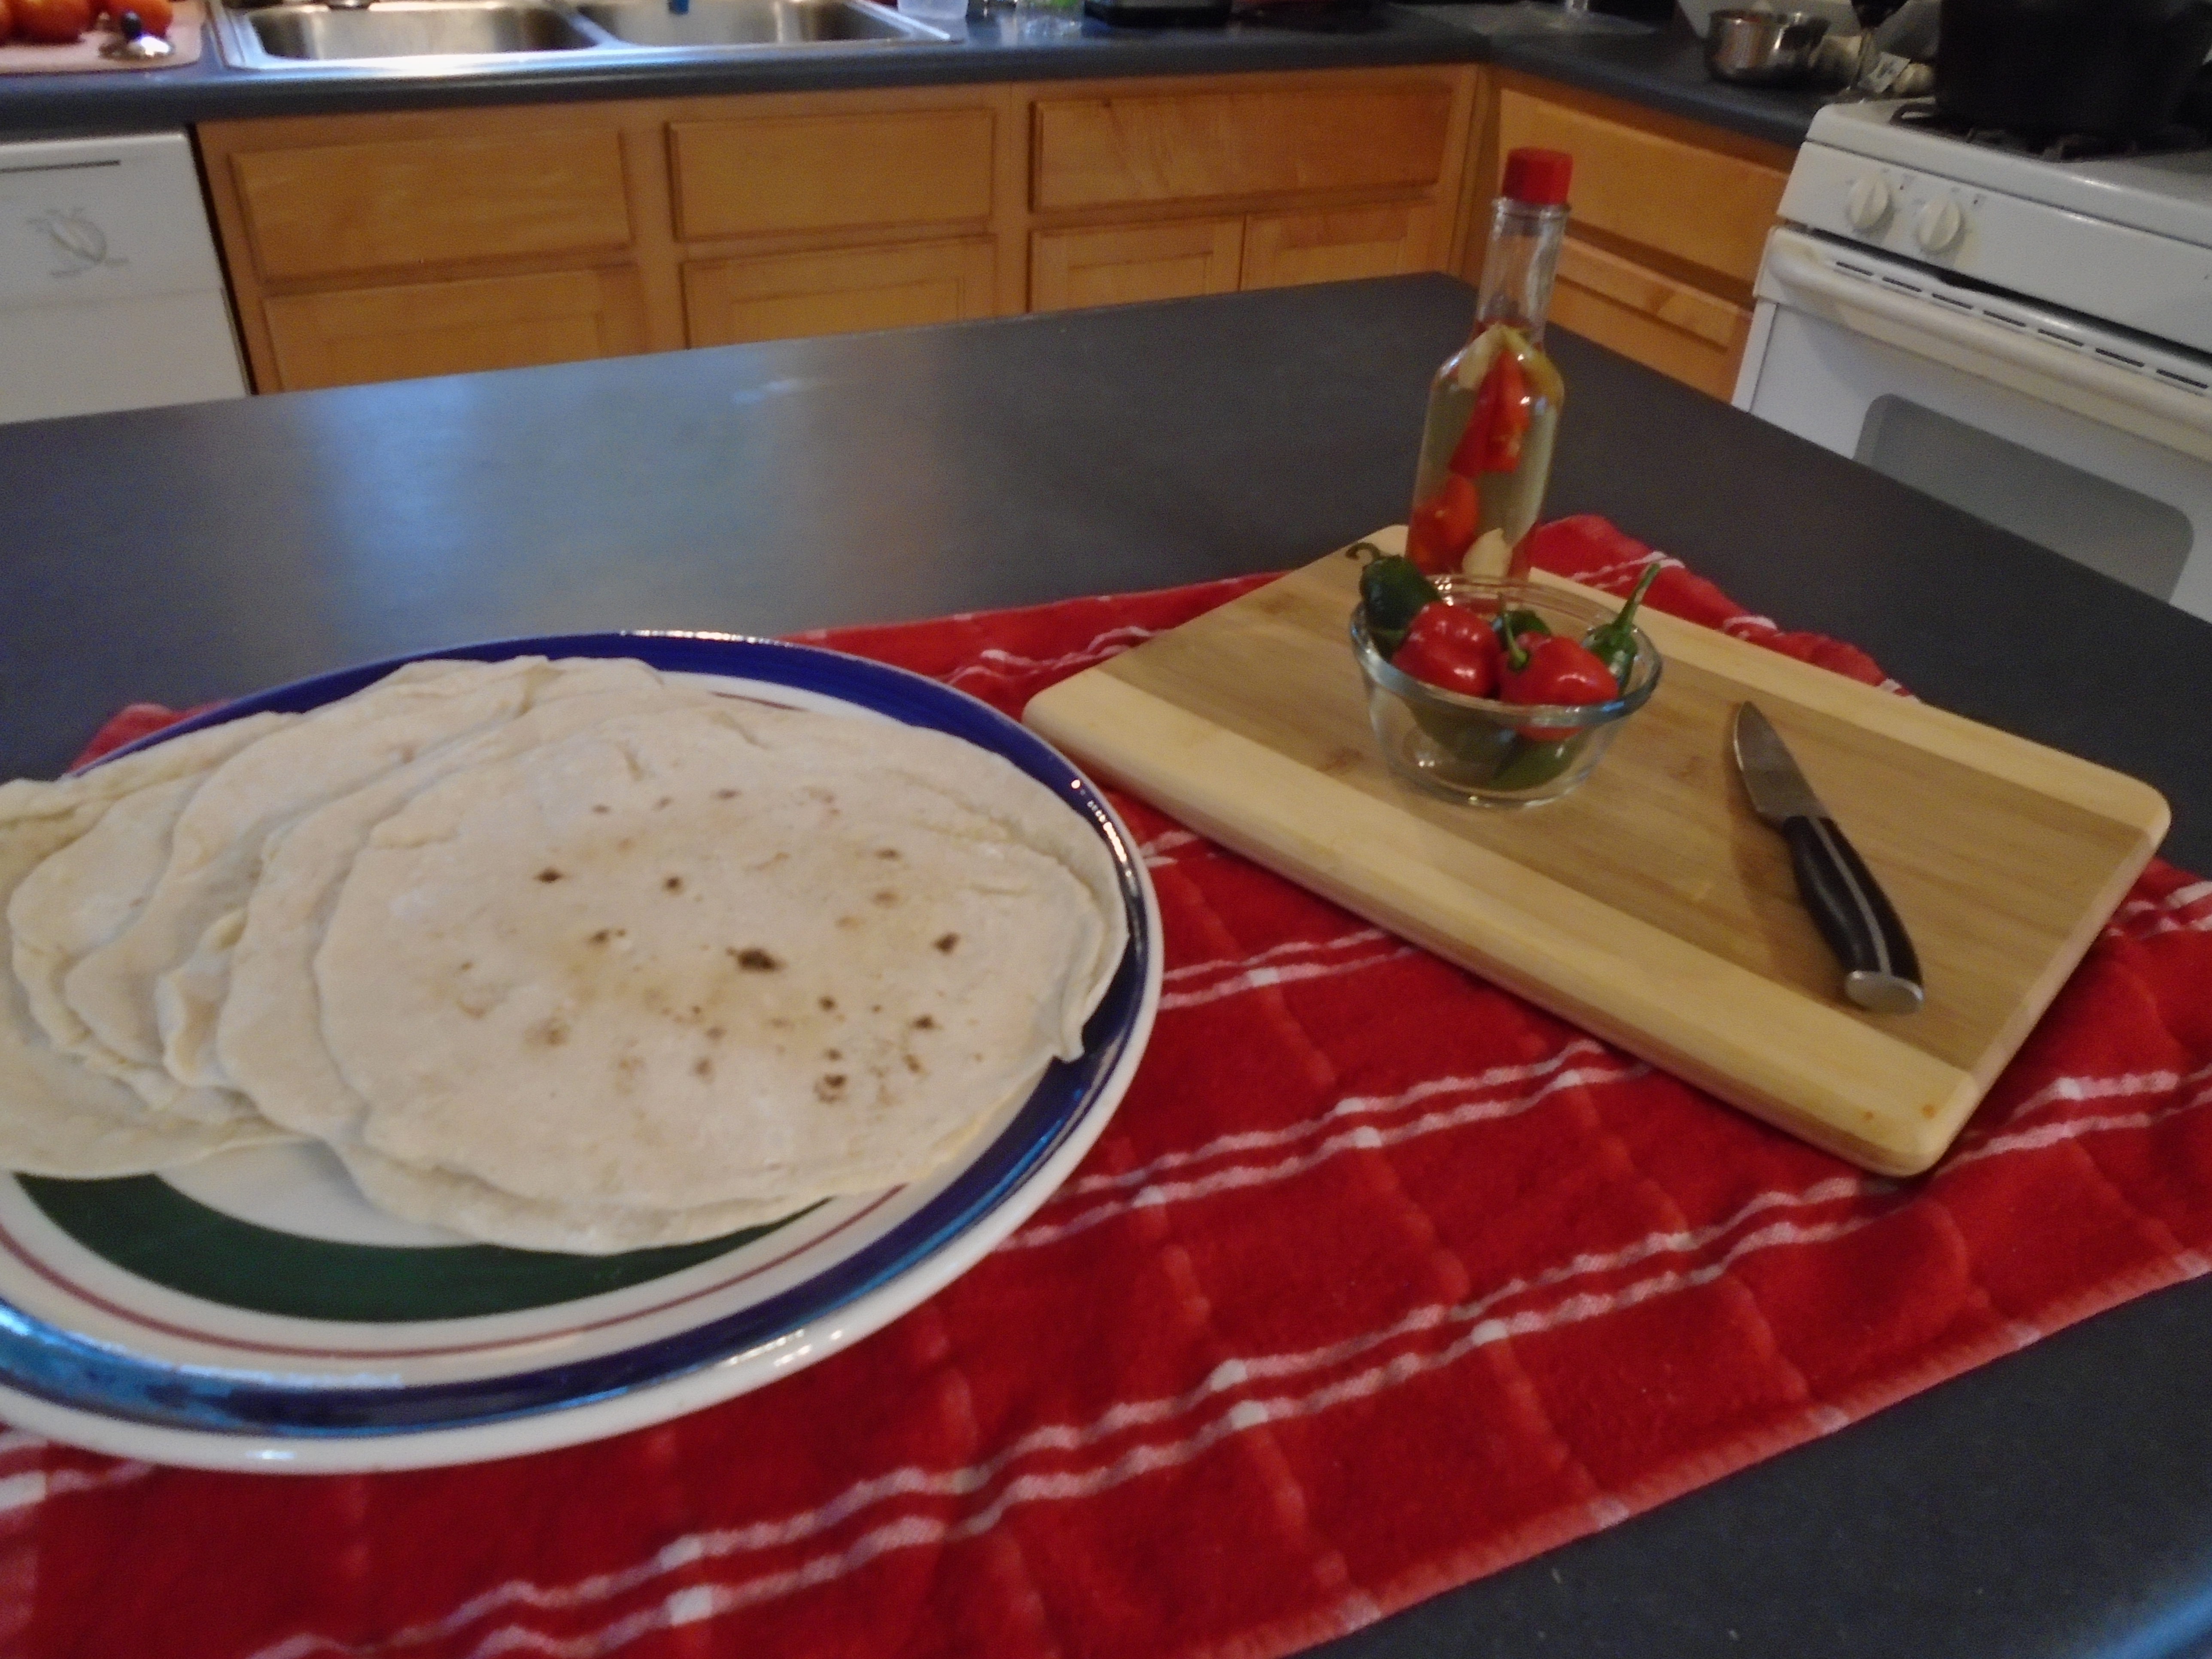
Another key to successful tortillas is using an appropriate pan.  When I first attempted to make tortillas I used a non-stick pan that did not retain heat well.  The sad thing was, I had a cast iron skillet and I did not even think about using it.  What a shame!  A cast iron skillet, or a cast iron comal, which is what I use now, or even a good, dense stainless steel pan will give you the necessary, sustainable heat to produce tortillas quickly, and that is essential.  Tortillas need to cook quickly.  Once you lay the uncooked tortilla on the pan, give it about thirty seconds and then flip to the other side for another fifteen seconds, or so.  If you maintain heat high, the tortilla will puff up and you will get wonderful, slightly browned spots on the tortilla. 

Finally, you need to cook with confidence.  Your state of mind will affect the outcome just as much as proper ingredients and technique.  Listen to your inner self throughout the entire process.  If you feel that the dough is not coming together the way you want, you’re right.  Fix the problem by relying on your intuition and be confident with your decision.  If you think that the tortillas are cooking too quickly and they smell burnt, you’re right…fix that problem.  Turn down the heat on the stove to achieve a better result on the next tortillas. 

And remember, if at first you don’t succeed, try, try again.  If it worked for me, it will surely work for you!

Tortillas Casersas (Homemade Tortillas)

Ingredients:

4 cups all-purpose flour

1 tsp salt

2 tsp baking powder

2 Tbs lard

1 ½ cup warm water

Directions:

Whisk the flour, baking powder and salt together in a bowl.  Add the lard and pinch apart the flour covered lard with your fingers.  Continue pinching apart the clumps of lard, bit by bit, and avoid the temptation to smear the lard together with the flour.  Once you have broken down the clumps of lard, scoop up some of the mixture in both hands and gently rub your hands together.  Continue gently rubbing the mixture together until it is crumbly.   

In a separate mixing bowl, add the warm water.  Introduce some of the flour mixture.  Mix with a sturdy spatula.  Add more flour and continue mixing.  Repeat until the mixture becomes thick, like cake batter.  At this point you will mix by hand.  Keep adding flour and mix by hand until the dough begins to form a ball.  It’s ok to leave the dough a little sticky.  You can always add more flour later, if you wish.  Knead the dough in the bowl and then turn it out to a lightly floured surface and knead for a few minutes.  As you knead, you will feel the dough becoming more stretchy.  Put the ball of dough back into the mixing bowl and cover tightly with aluminum foil or a warm, wet towel. 

Let the dough rest for at least a half hour.  In warm weather, I will take the bowl out to my truck and let it rest on the seat.  The heat of the sun keeps the interior of the truck nice and warm…perfect for the dough.  In colder weather, I will let the dough rest on top of the oven, with the oven set to 250°F. 

While the dough rests, preheat your skillet or comal on the stove.  Clean your work surface and make sure that it is completely dry.  Sprinkle some all-purpose flour on the work surface and rub some flour on your rolling pin.  Turn the dough onto the work surface and knead a few times.  If the dough is too sticky to work with, add a little more flour and knead, to incorporate the flour.  Once you are happy with the dough, pinch off a piece and roll it in your hands.  You’ll want a golf ball sized dough ball.  Place the ball of dough on the floured surface and press it with your hand.  Shape it into circle and then use the rolling pin to flatten it out.  I have found that rolling it out very thinly makes the best tortillas.  Roll it out to about eight inches in diameter. 

Place the tortilla on the skillet for about thirty seconds.  You might see air pockets pop up…this is a good thing!  Turn the tortilla over for another fifteen seconds and then move the finished tortilla to a plate, in a warm area.  Continue in this fashion until you have made all of the tortillas.  If you have a tortilla warmer, place the tortillas in it.  If you don’t have a tortilla warmer, place another plate on top of the tortillas to keep them warm.

Serve warm.