Wordless Wednesday
Flight cancellations are so common now that I plan on extended delays and cancellations when I make travel plans.
I recently faced a flight cancellation on the first leg of my return flight home. What a bummer! I booked the first flight of the day, hoping to increase my chances of starting successfully, but the flight was still cancelled!
My options were to either play the “standby game” and wait at the airport while petitioning the gods of aviation to intervene on my behalf to force another hapless passenger to miss their flight so that I could claim their seat, or I could change my reservation to the next guaranteed available flight, which was 24 hours later!
I chose the 24-hour delay and here’s why…
The last time I faced a flight cancellation, I chose the standby option. My wife and I spent over thirty sleep deprived hours at DFW International Airport, staggering around like caffeine-deprived zombies, roaming from one terminal to another, chasing the standby dream, gambling against the odds like Vegas vagrants, desperate to score precious seats on the next available flight.
This time I was traveling alone, and I wisely built in an extra vacation day on the tail end of the trip to rest and recover before returning to work.
I decided to find a hotel next to the airport and catch the next flight, on the following day.
I burnt an extra day of vacation due to the flight cancellation, but I embraced the moment and I made time to find the joy.
I checked in at a nearby hotel and spent much of the day napping and watching the first Star Wars movie (A New Hope) on cable T.V.
What a luxury to have a hotel room all to myself and to be able to do whatever I wanted.
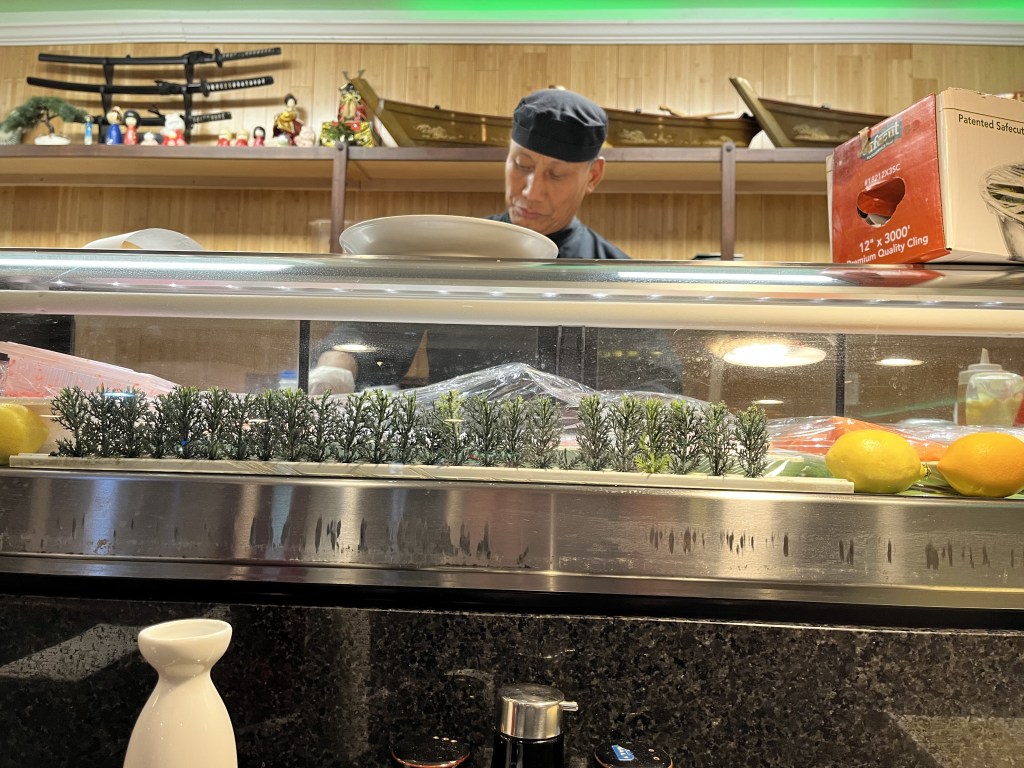
I searched nearby restaurants and found a Japanese Hibachi and Sushi restaurant within walking distance from the hotel. Easy choice, for me!

I like sitting at a crowded sushi bar and striking up conversations with other patrons, but that didn’t happen on this quiet Sunday evening.

On the upside, I had the full attention of the sushi chef, and we struck up a conversation.
We discussed the differences between sushi restaurants in big cities, versus restaurants in smaller cities. Big city restaurants typically offer uni, ika, otoro and chutoro, while restaurants in smaller cities mainly sell sushi rolls with a limited selection of fish.
I evaluate sushi chefs by the quality of their salmon skin handroll, whether I am in a big city or a small city. I measure the salmon skin handrolls against my memory of my first one, which was presented by Arata Koga, at Mr. Sushi, in Addison, Texas, in 1984. It was perfection in a nori wrap!
I was pleased with this chef’s salmon skin handroll and I told him so. He acknowledged my comment with a polite nod, and I sensed a hint of pride in his eyes that told me he didn’t receive a lot of praise, here in Allentown, Pennsylvania.
The chef confided that he used smoked salmon in his handroll. I gave him a thoughtful nod, knowing that smoked salmon is suitable for a handroll, but will not offer a crispy skin like broiled fresh salmon does.
A good salmon skin handroll should offer…
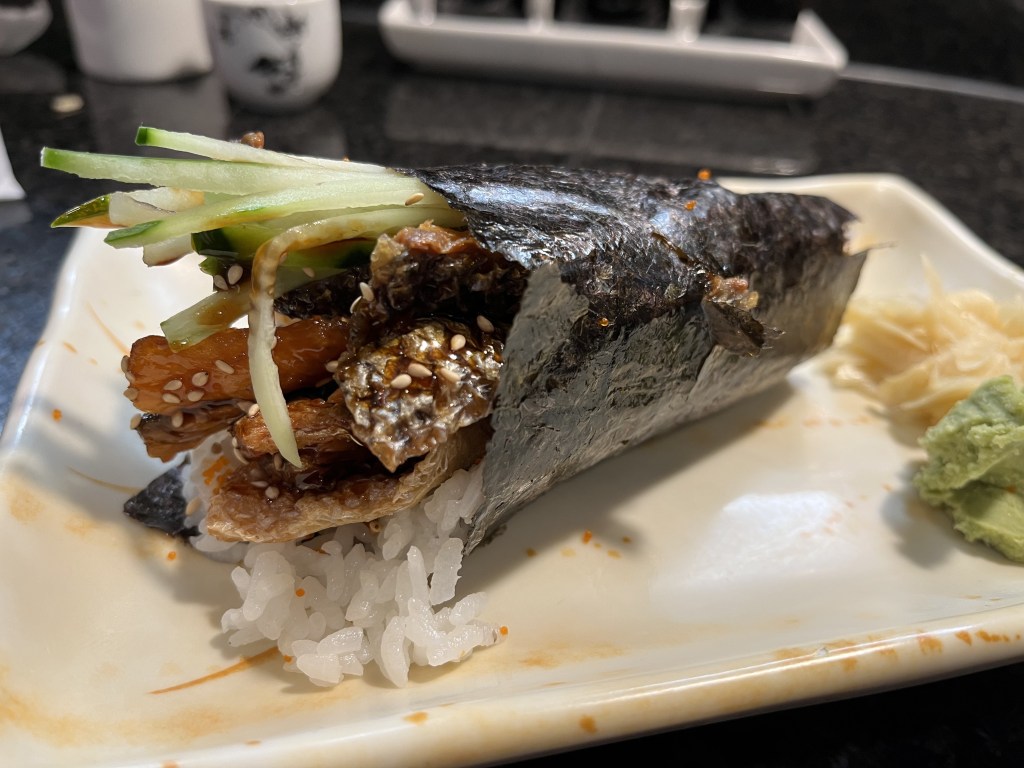
The roll was prepared skillfully, but the chef did not add spouts or toast the nori. Lightly toasting nori gives it a crispier texture.
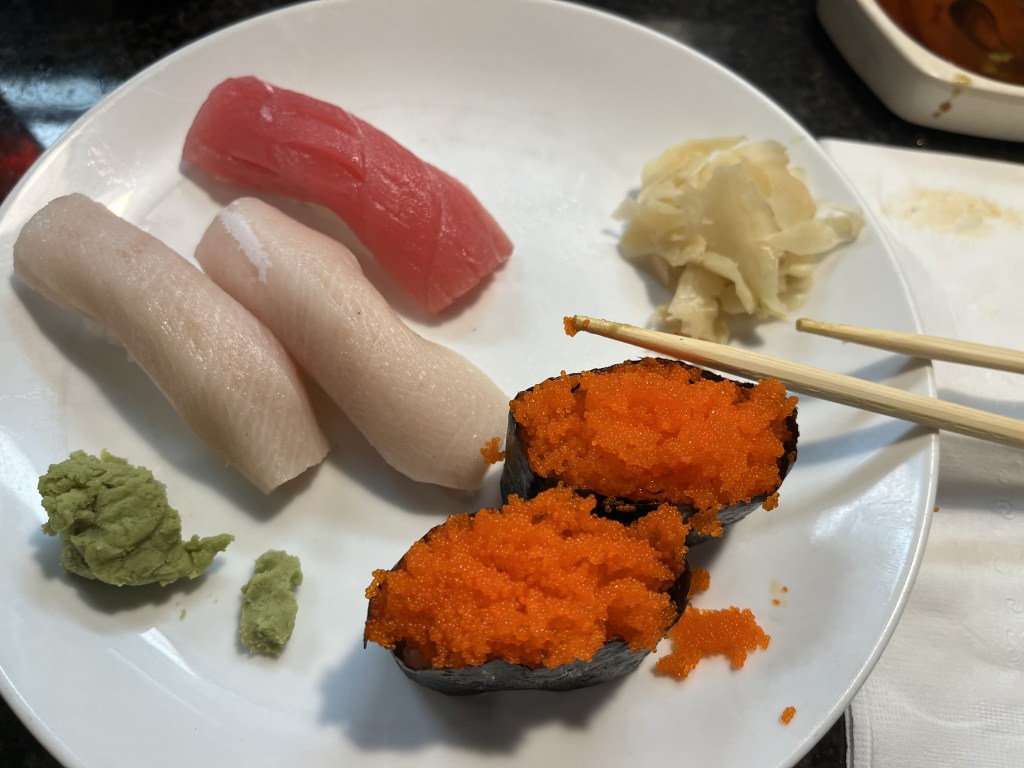
All in all, a very good roll, and the rest of the sushi was above par.

Then, back to the hotel for a restful night’s sleep and dreams of worry-free travel.
Find joy in everything.
Everything…even flight cancellations!
Greetings and salutations my friends!
Time marches on and I, true to my nature, march to my own non-syncopated drummer, which is to say that nobody really knows when I will find the right groove to harmonize with the rest of humanity.
It’s not like I don’t love you all…I do. It’s just that some things have been weighing heavily on my mind and, those things have made me despondent, listless and distant.
I don’t like feeling this way.
So, I have gathered my resolve and decided to push forward.
The events of this year have been disturbing and have filled me with sorrow.
This pervasive feeling of sadness and anger has made me consider changing the theme of this blog to be a full-on rage, aimed at showing anyone who happens to read, how I feel about the current state of my beloved country, and the rest of the world.
But you all have your own opinions and beliefs, and I have to remind myself that you don’t need me to tell you what I think is right or wrong.
(Please be kind to one another. Choose peace at every turn.)
So, on with the show!
I’ve decided to post this without editing, mainly because of the reasons I spoke about earlier. I have been so reticent to write that I feel the need to let the words fly freely. I’m usually a stickler for correct spelling and grammar, but I’m throwing caution to the wind.
I’m sure that I speak for anyone that cooks, and certainly for chefs that face a time when we are expected to cook for a group of people on a moment’s notice. At the best of times, this can be perceived as an honor, but at other times, it can feel like an inconvenience.
Now, if I am hosting, I will cook anything. No restrictions. Ask me to cook something I’ve never attempted before and I won’t balk. Sure, I might be a bit reticent, but when I’m at home and I have time to prepare, I’m going to be on top of my game.
However, when I’m visiting friends or family and they expect me to cook, I lose my bravado, and my skills are shaky.
First of all, how dare you put me on the spot?! Secondly, don’t you realize that I’m out of my comfort zone? Thirdly, have you ever considered that maybe I want to enjoy a vacation? I mean, c’mon, I enjoy cooking but that doesn’t mean I don’t need a break every now and then. And maybe I just want to enjoy the taste of someone else’s cooking for a change.
I feel like a trapeze artist treading on a greased wire when I’m asked to cook in another person’s house, especially if it is an impromptu request.
It’s not so bad when I’m at a house that I’m familiar with, like a family member. I know the layout of the kitchen already and I’m already familiar with the tools available…pots and pans, knives, bowls, etcetera. But when I’m asked to cook in a totally unfamiliar kitchen, I feel like I have two left hands.
I offer these examples, with sincere apologies to anyone who I may offend.
I love visiting my folks in Pennsylvania. It’s where I was born and I still consider it my home, despite being a transplanted Texan in my early years and adopting Texas as my home state, even though I’ve lived in Mississippi for the last twenty-five years.
Yes, I know that sounds strange, but it’s not such a strange concept to anyone that has moved around several times during their lives.
Anyway, like I said, I love visiting my folks in Pennsylvania.
I remember watching my dad make eggs and bacon on the weekends. He only seemed to cook on the weekends when I was young, and it was usually breakfast. He is fastidious in everything he does, which is probably why he had such a prestigious career as an aerospace engineer. His attention to detail can be confounding at times, especially to someone like me, who capriciously dances through life, but his approach to cooking pancakes, bacon, and eggs are forever saved in my mind.
The careful crack of the egg. The calculated tip of the spatula to check the doneness of a pancake. The determination of the condition of bacon as it cooks…is it “flubby” or burnt? Or is it somewhere in between?
And then there is my stepmother, who REALLY knows how to cook. She has been an endless source of inspiration and knowledge to me. Her roots are nestled in American/Italian cuisine, but she has a gravitas that transcends all cultures. She is truly a lover of food and the cultures behind the cuisines.
My parents have made several trips to visit me and my family over the years, and they know that I know my way around my kitchen, which is to say they know I can cook. It makes me proud to cook for my family and I’m glad to do it.
But when it comes time for me to cook in their house, I find it challenging. I’m out of my element. Everything, from the layout of the kitchen to the choice of cooking tools is different from what I am accustomed to. I find myself spending most of my time adapting to the new environment and having less time creating a wonderful meal.
Maybe I’m a creature of habit, or I’m just someone that has to have things “just so”. It makes sense, knowing that I’m genetically tied to a rigorously minded engineer. I don’t know. I always find a way to interpret my ideas, when it comes to cooking at my parent’s house, but it takes more effort than I’m used to.
Let’s stay at an Airbnb in lovely Portland, Oregon, in Spring. Sounds delightful, right?
Yes, it was. The house was gorgeous. Lots of booming flowers and sunshine. Quiet, peaceful, serene. Nothing but good company and light-hearted fun.
But imagine my surprise when I was asked to grill a three-pound salmon fillet on an outdoor grill that I had never used before.
I’d never grilled salmon before, but everyone knew I liked to cook, and I suppose they thought I would be a cinch for the job. I didn’t protest because they had already bought the salmon. I guess I could have confessed that I was out of my comfort zone, but I didn’t.
I cranked up the gas grill and gathered my tools, which of course, were not tools that I had take from home. So, armed with two flimsy plastic spatulas and a set of oversized tongs, I set out to grill the heck out of that salmon.
I placed the salmon on the grill and closed the cover, hoping to steam the fish quickly. In less than a minute, I could see fames bursting to life through the side vents of the grill. The flames grew quickly and I sensed impending disaster.
When I raised the lid of the grill, the flames leapt up like Satan being unleashed from the pits of Hell.
I took a moment to assess the situation and quickly decided to attempt to pull the salmon off the grill and onto the platter that I had readied. I tried to be as careful as possible, because I wanted to maintain the integrity of the beautiful salmon fillet, but I knew that if push came to shove, I was going to do whatever it took to get that fish out of the fire. I would finish it in the oven, if necessary.
I managed to pull the salmon off the grill without burning off all of my arm hairs, and I felt a feeling of accomplishment.
After bringing the fish indoors, I inspected it. The flesh flaked as I prodded it with a fork, and I realized that it might have actually cooked sufficiently, but I didn’t know for sure.
As it turns out, when I served the fish, it was a big hit. Everyone said it was cooked perfectly.
Eh, what do people know?
Twenty years ago, hurricane Katrina blossomed from a Category 3 hurricane to a Category 5 in just 9 hours. The hurricane churned its way through the Gulf of Mexico and made landfall on August 29, 2005. It devastated much of southern Louisiana and Mississippi
I remember tracking the storm on the internet during the morning that it made landfall and feeling so lucky that my family was 300 miles north of the storm. I was fortunate, but everyone on the coast was in peril. Many people lost their houses. Many people lost their jobs. And some lost their lives.
During the ensuing months, north Mississippi saw an influx of people fleeing the destruction on the coast. One of those people fleeing was a man who I only knew as “Skip”.
Skip relocated his family to northern Mississippi. He and his wife enrolled their kids in the same school that my kids went to, and within a short time, he had not only assimilated into a new culture but also became a valuable member of the community.
Skip joined the PTO (parent teacher organization) of our small school and was quick to offer his services when we reached out for someone who would be willing to help with our annual fundraiser dinner.
Skip was a real character. He promised that he would give us a fundraiser dinner that would blow our previous fundraisers out of the water. He asked us to promote the dinner with all of the local Catholic churches in the area and promised us that he would not disappoint. He was confident that his New Orleans style cuisine would be memorable. A Spring dinner replete with gently baked catfish, savory seafood gumbo, Cajun coleslaw, with a crisp salad and fresh garlic bread. As I was about to find out, this was right in Skip’s wheelhouse. I witnessed his masterful meal and was honored to be his sous chef. It was almost surreal, and it pulled in lots of cash for the school.
This is where the rubber meets the road! Here was a man that not only was in an unfamiliar kitchen, with unfamiliar people, but had lost all of his personal belongings to a devastating storm and had to relocate his family to another city, only to be faced with the challenge of preparing a meal for hundreds of people, with the risk of failing and, thereby causing the school to lose its reputation and fail to meet its financial goals.
As I alluded to, I took on the role of sous chef to Skip. He was clearly in control, and I was happy to assist. I learned a great deal about adapting to situations during the experience. And I learned a heck of a lot about Cajun cooking!
Here’s just a few of the challenges we faced when we started cooking:
I could go on, but I’ve forgotten most of the hardships. We were both working in an unfamiliar space with awkward tools. Skip seemed unfazed, but I was tasked to make coleslaw with a six-inch knife! Imagine…chopping down a head of cabbage with a small, flimsy knife and then trying to mince onions with the same small knife. What should have taken twenty minutes lasted almost two hours. I’m glad we both started working early!
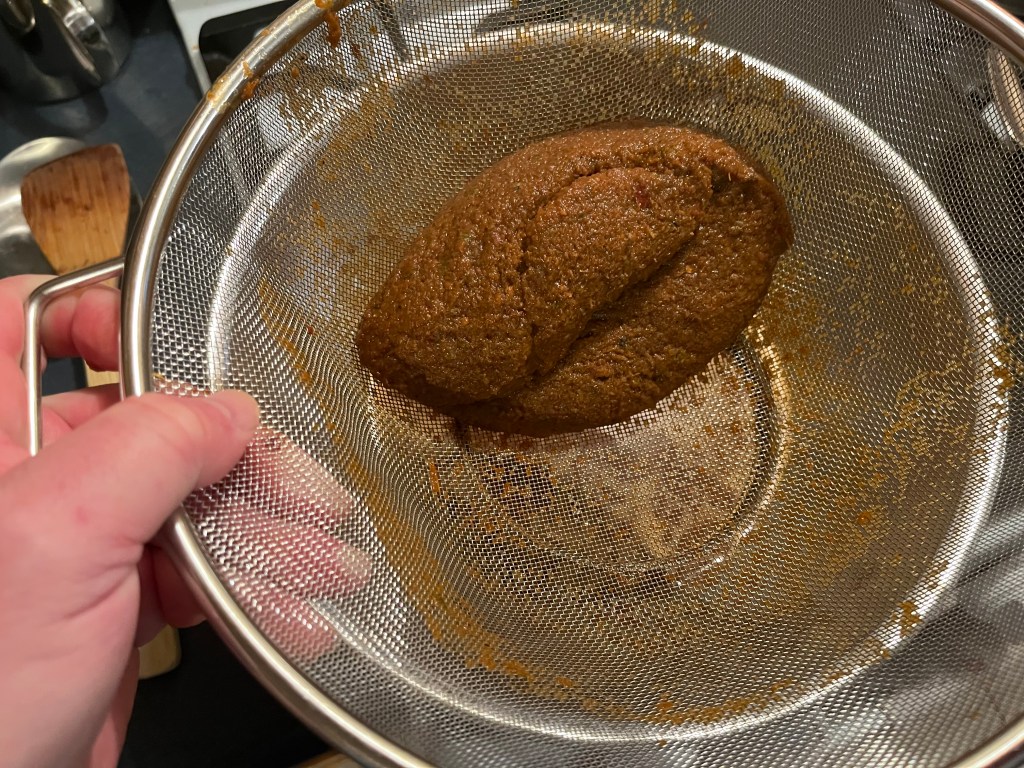
At one point, Skip started a roux for the gumbo. He poured a large amount of cooking oil into a 5-gallon pot and set it to boil. When the oil was hot, he added the flour and began stirring. He made sure to tell me that the most important part of making a roux is to have a drink in arms reach. By this, he meant bourbon. Making a big pot of roux requires constant stirring and careful attention. It also helps to use a pot and stove that you are familiar with.
At one point, Skip called to me and asked me to taste the roux. He thought it might have over cooked. I wanted to tell him that it was fine, because it was a huge roux, and I didn’t want to concede that the roux had started to burn, but he already knew it had, and he just needed me to confirm his suspicion.
It broke my heart to tell him that it had gone too far. There’s no fixing a roux that has even the faintest hint of a burnt flavor or odor.
We were about 1 1/2 hours away from dinner time and we had to act fast. We didn’t have enough flour on hand to start another roux, so I had to make a run to the grocery store to buy more flour. Skip was visibly nervous when I came back, but he managed to whip up another roux within 20 minutes and pulled off one of the best gumbos I’ve ever had.
The catfish was a true delicacy. The gumbo was silky smooth. The slaw was crunchy and had just the right amount of fresh jalapeño, mayonnaise and seasoning. Skip had fresh French breach shipped from the coast and he toasted it and slathered it with butter and garlic. Skip’s attention to detail was remarkable, despite all of the hardships he faced, (including a novice sous chef, like me.)
All throughout our experience that day, Skip kept saying how he wished his other friends could be with him to help. I helped Skip all day and poured myself into the job. I felt hurt and offended for a little while until Skip confided that he considered himself a junior to his friends, when it came to cooking. He missed his home. He missed his friends. He missed a lot of things.
Skip shined as brilliant as the sun that day, and after some time, he was able to relocate his family back to Gulfport. Skip taught me a lot about adapting to difficult situations and now, I don’t complain too loudly about cooking in other people’s kitchens.
Learn your lessons whenever and wherever you can.
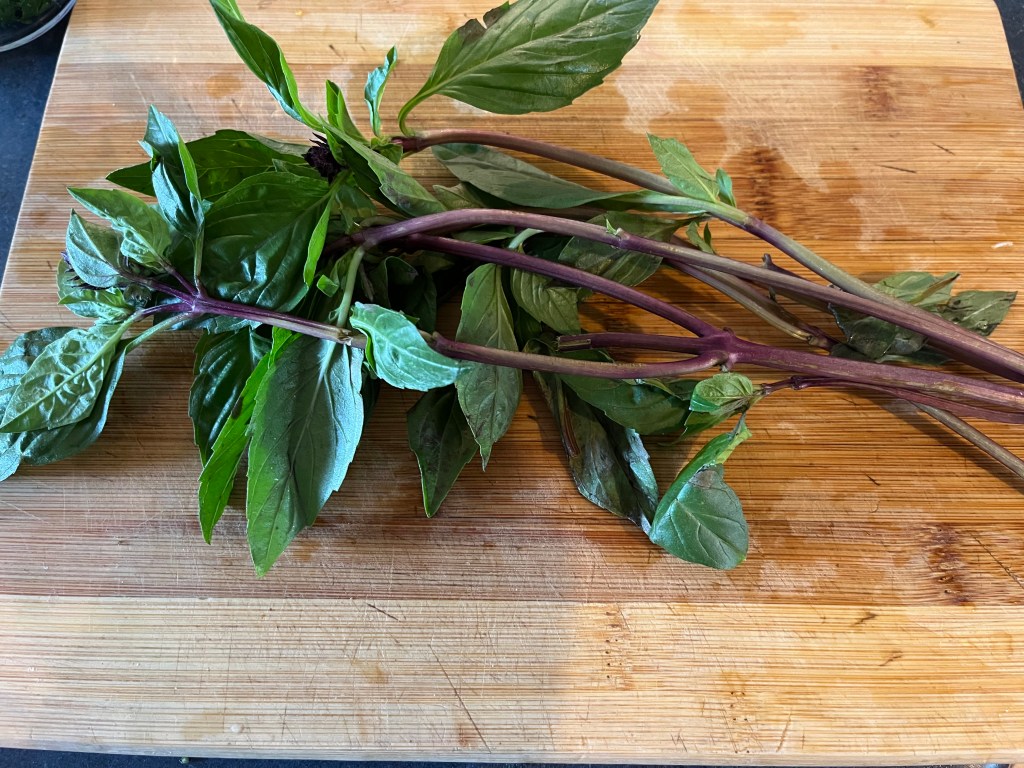
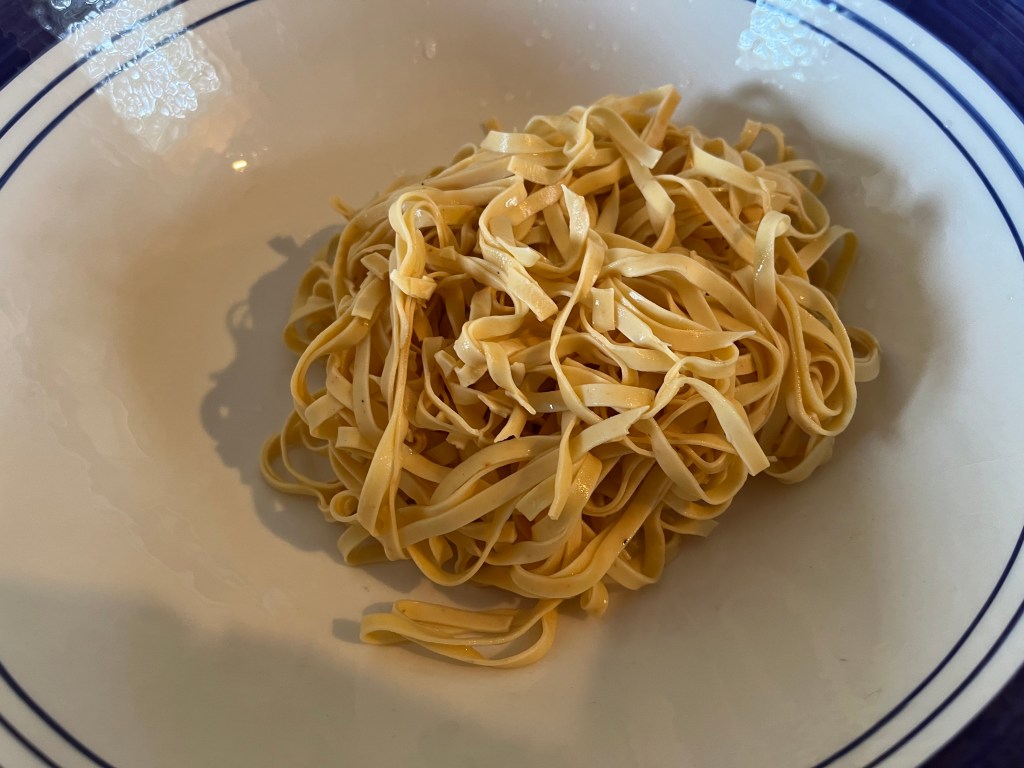
This is a Thai inspired recipe, but it’s Americanized for sure! The addition of crispy fried chicken is a dead giveaway. If I had intended to make Pad Krapow Gai (Thai Basil Chicken), I would have used chicken thighs and the chicken would have been chopped into small pieces and pan fried, along with onion, garlic, and chilies. I also used Vietnamese flat wheat noodles instead of white rice.
Anyone who knows me knows that I blend food cultures to suit my taste and this example is no exception. I relied on estimating the volume of ingredients, rather than using precise measurements.
Okay, let’s build a dinner…
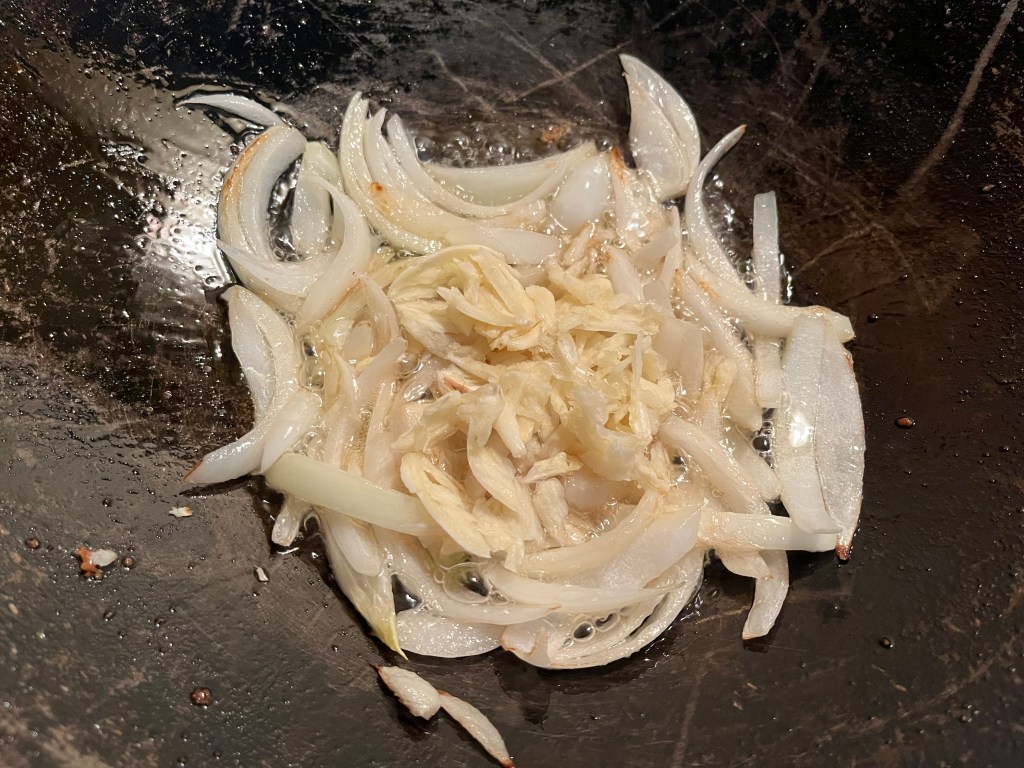
Preparation is key. Once the wok is hot, you want to have everything ready. Chop and slice everything in advance and set aside.


I followed the instructions on the package of noodles and soaked them in cold water for 20 to 30 minutes. I pulled the noodles out and heated the water to a boil and added the noodles back in for about 10 minutes, until they just became tender. I set the noodles aside.


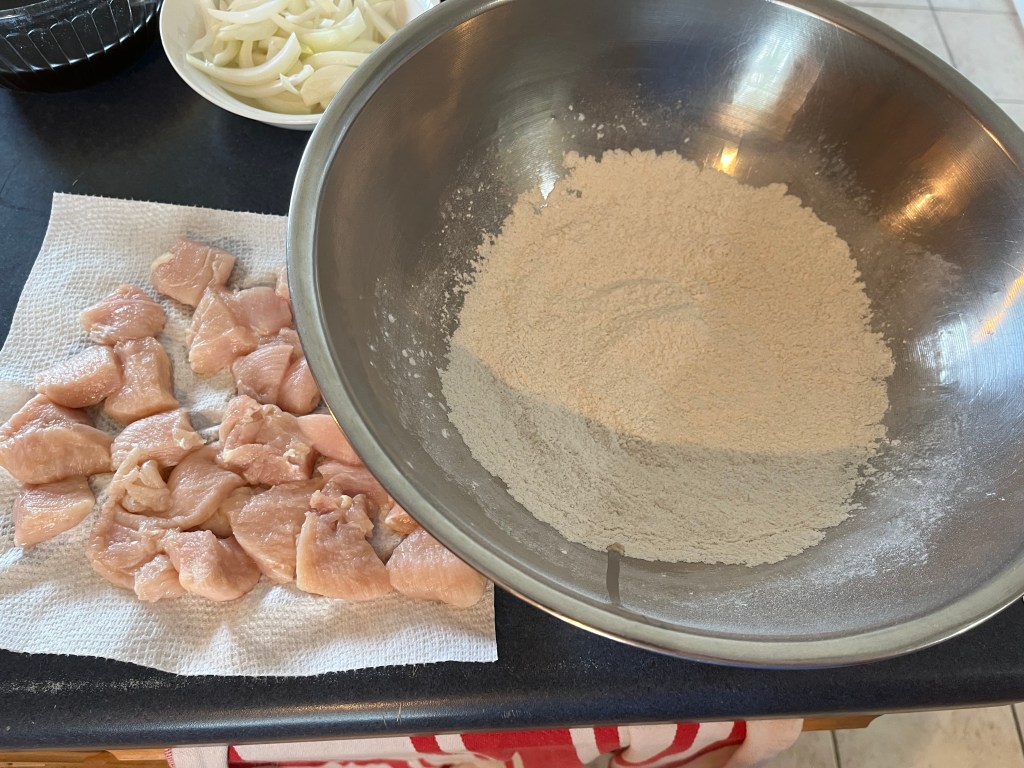
While the noodles were soaking, I cut chicken breast meat into bite sized pieces and added them to a mixture of flour and cornstarch (about 4 to 1 ratio, flour to cornstarch). I tossed the chicken pieces until they were fully coated.

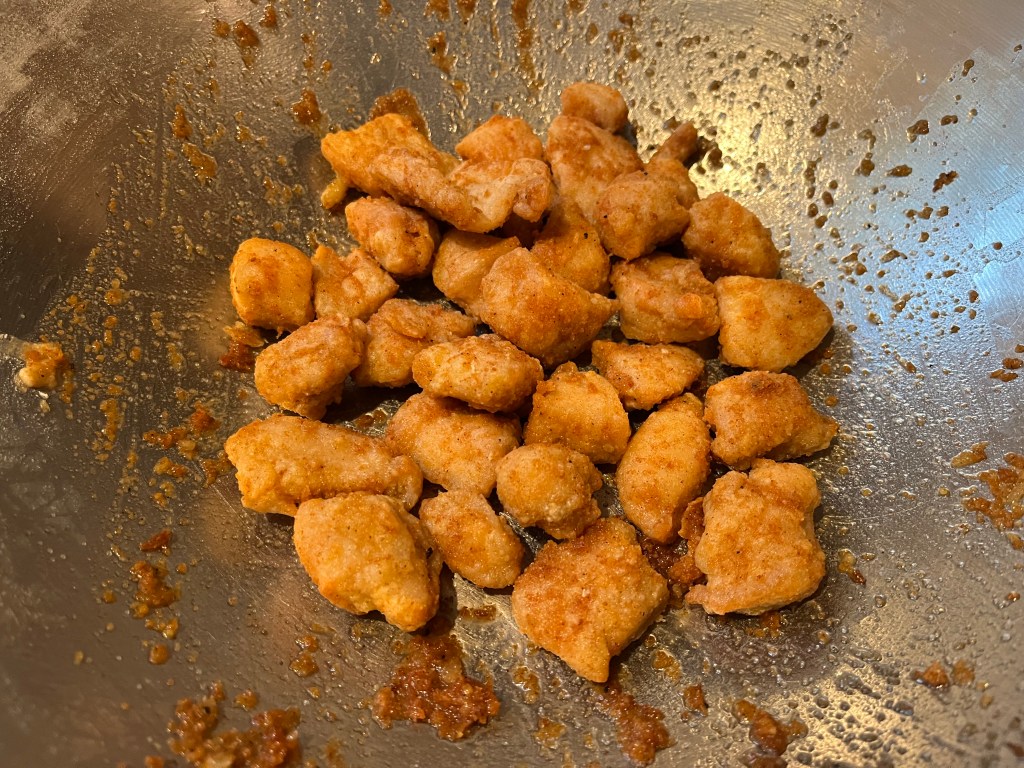
I double-fried the chicken in the wok, which is to say, I fried the chicken and then pulled it out for a minute and then put it back into the wok to finish with a crisp fry. I set the chicken aside and removed all but about 2 tablespoons of oil.
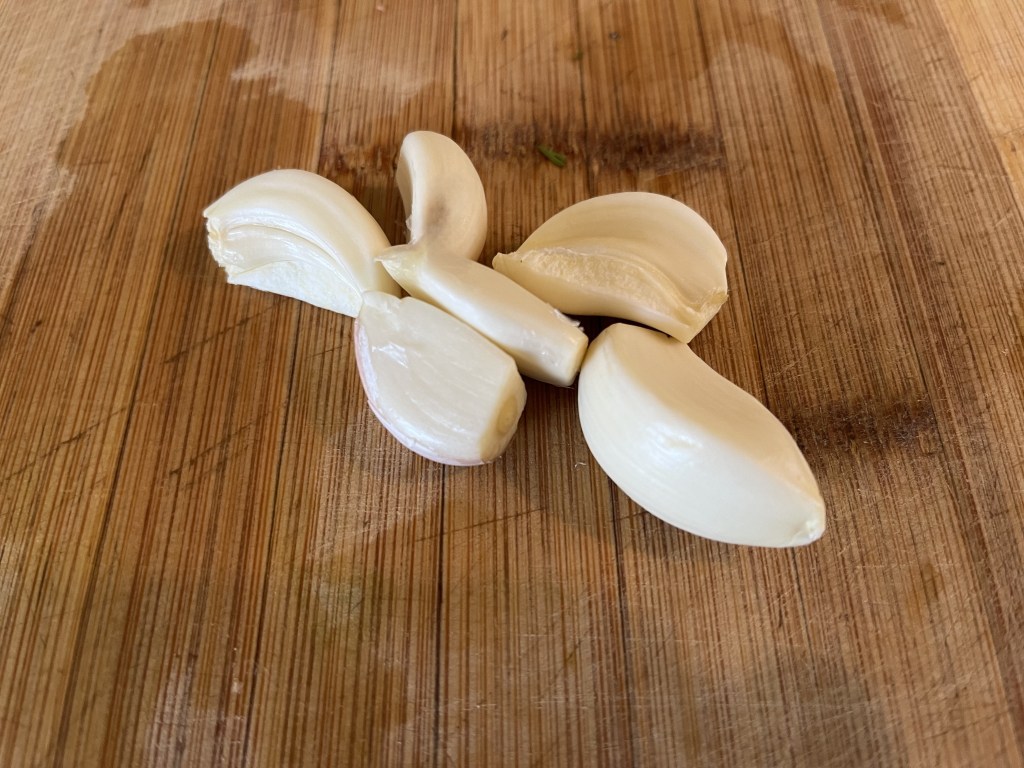
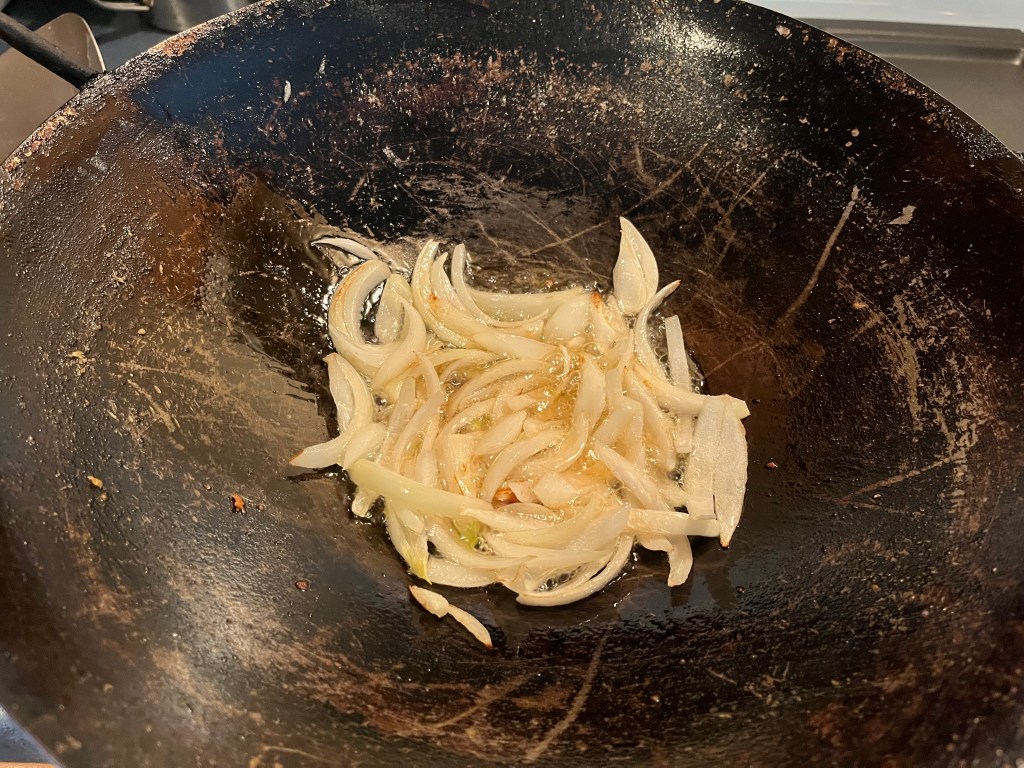
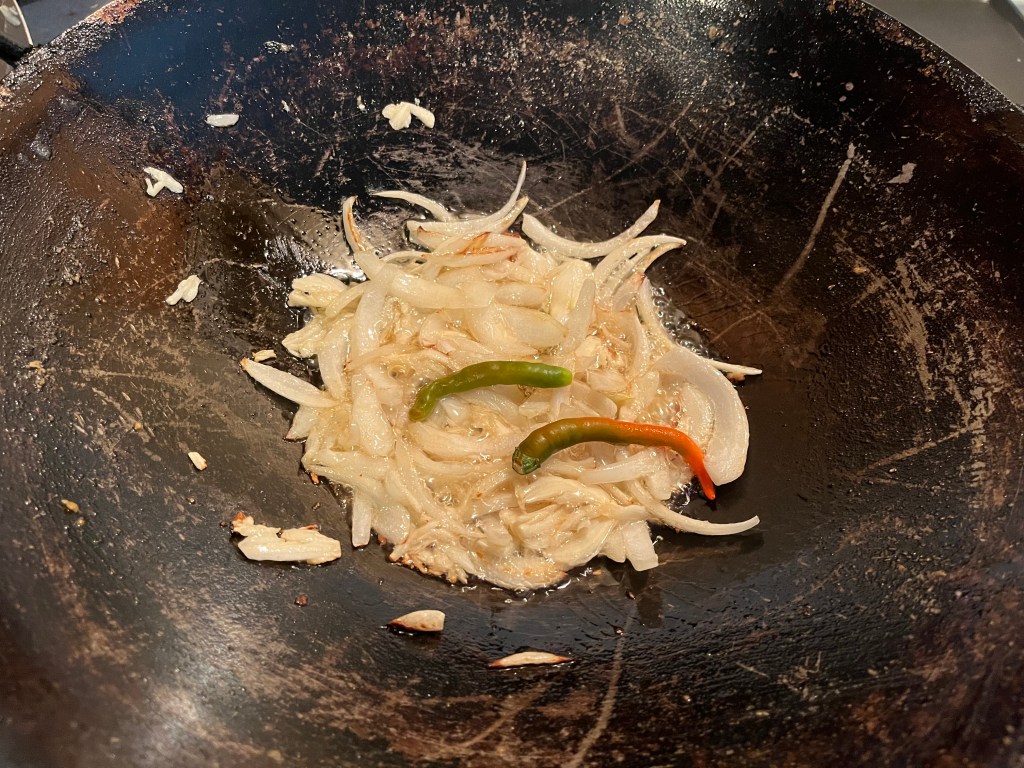
Now that the noodles and chicken were ready, I heated the wok and I added the julienned onions and stirred for a minute, then I added the mashed garlic and stirred another minute, and finally add the Thai chilies. After a minute more of stirring I removed the onion, garlic, and chilies and set aside.
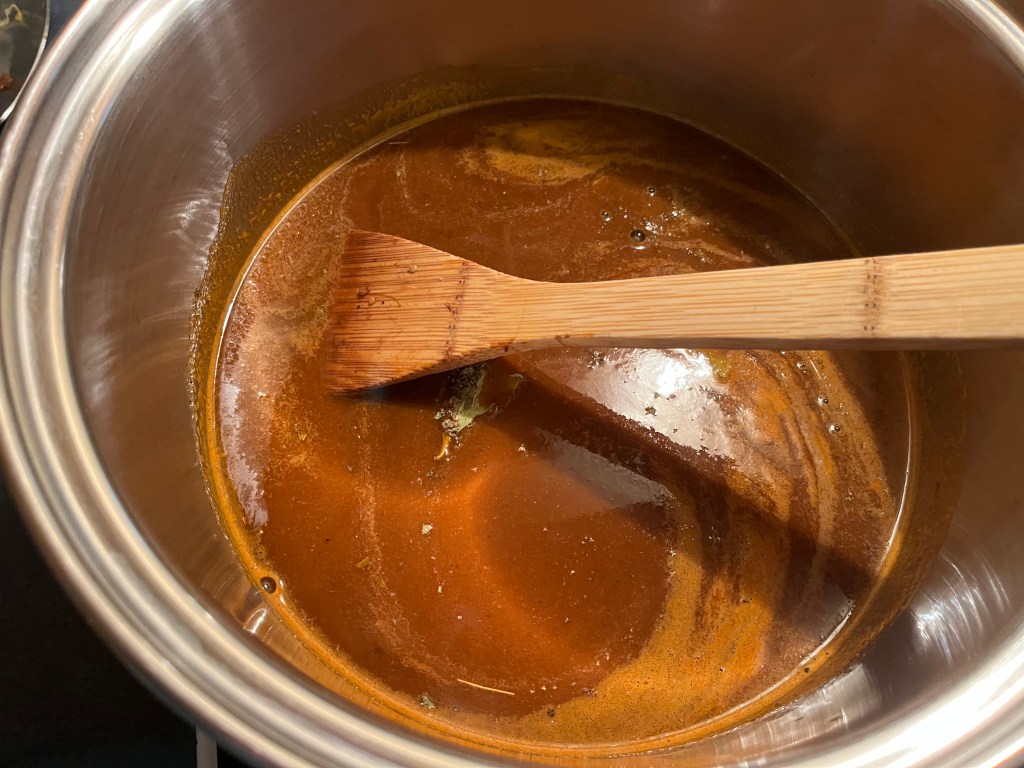
I prepared a sauce by combining chicken stock, dark soy sauce, soy sauce, oyster sauce, sugar, and vinegar. As I mentioned previously, I estimated the amounts, but this is probably close…
1 cup chicken stock
2 Tbs. dark soy sauce
2 Tbs. soy sauce
2 Tbs. oyster sauce
1 tsp. sugar
1 tsp white vinegar
I added the prepared sauce and simmered it at medium heat for a minute and then added the cooked noodles and swirled them in the wok for a minute so that the noodles could absorb some of the sauce, and then I removed the noodles and set them aside.
I pulled out a bit of the sauce from the wok and added some cornstarch to make a slurry. I added the slurry back into the work and whisked for a minute, until the sauce thickened a little.

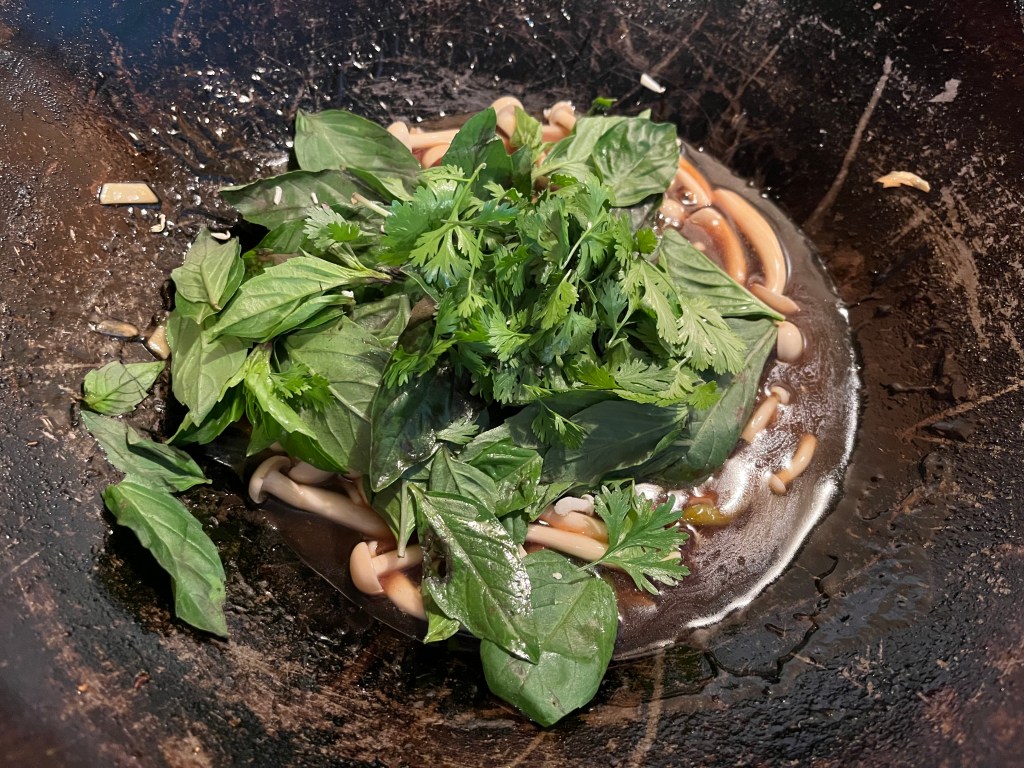
I added the enoki mushrooms and simmered for a minute.

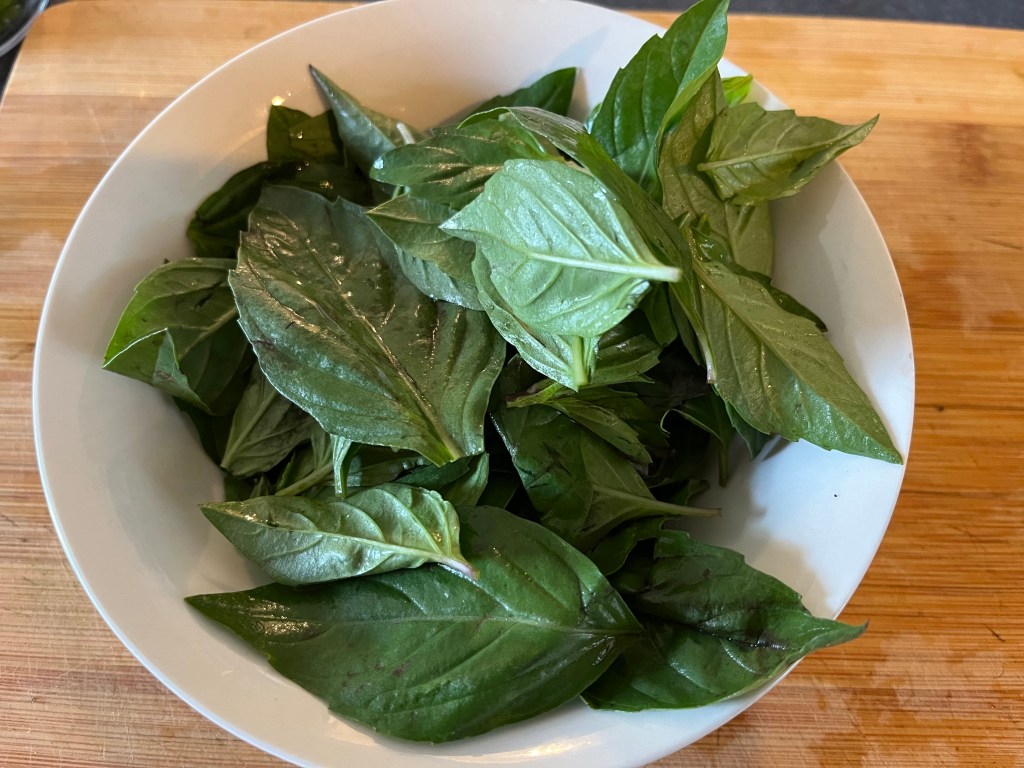
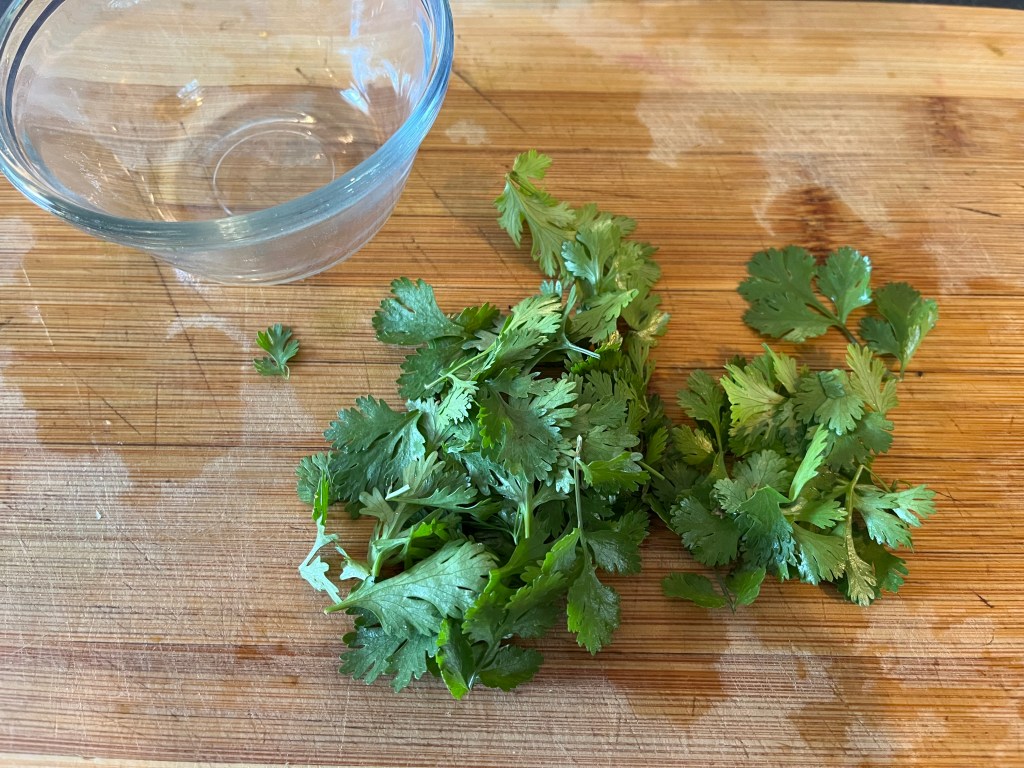
I added the Thai basil and cilantro and turned the heat off. The basil should wilt, not cook.
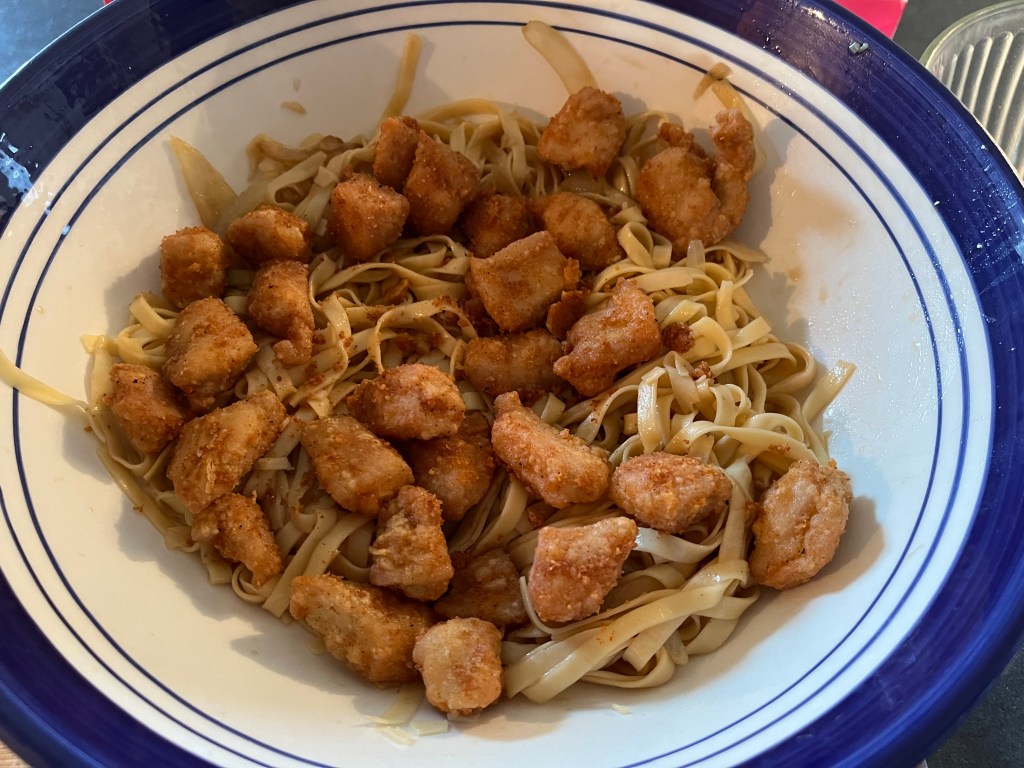
I added the noodles to a serving bowl and topped it with the cooked chicken. I poured the contents of wok over the serving bowl and dinner was served.

The whole process took about 3 hours, but I was taking my time and having fun. This could have been accomplished in less than two hours, including prep time and cooking time.
I have to say that I wanted more Thai basil. The sauce was delicious, full of umami flavor, but the Thai basil played a supporting role, and I really wanted it to be more prominent. Next time I will add more basil!
It occurs to me that some recipe ingredients are simply not replaceable. Oh sure, shallots might be substituted with some white onion and a sliver of fresh garlic, or a splash of ketchup might suffice in a pinch, instead of a dollop of tomato paste, but some food items are so unique that I just can’t make an exception. Cilantro is one of those, and habanero chile is another. Their flavors are so unmistakable that their omission, or substitution is noticeable. I’m adding another item to the list: Thai basil.
If I had to describe Thai basil, I would say that it is a bit like a combination of regular basil and mint, but that falls short of the full range of flavor. There is also a hint of anise, and the leaves and stems are bigger and sturdier than regular mint.
Food memories are some of my most indelible memories and I can easily recall the first time I had Thai basil. It was 1987, in Dallas, Texas, at a neat little restaurant called Thai Soon. The owner, “Soon,” ran the restaurant on trendy Lower Greenville Avenue. (Last time I checked, she’s still in the restaurant business, but has moved to nearby Richardson, Texas.)
I experienced a few “firsts” at Thai Soon. First time to have Thai chilis, first time to walk into a restaurant kitchen, uninvited, just so I could salute the chefs. But my favorite first was my introduction to Thai basil.
Thai Basil played a reoccurring role in many of Soon’s recipes. Pungent and pervasive, and often playing second fiddle to delicious soups and spicy chilis, Thai basil was subtly woven into many delicious recipes, like threads of wool, woven into a comfortable, warm sweater.

Fresh Thai basil can be found in many international markets. Use the leaves to liven up a soup or salad, or add them to a stir-fry dish, or add them to a pita wrap, burrito, or a spring roll rice paper wrap.
I can’t wait for springtime. Trees are budding and the daffodils have bloomed and waned. Pretty soon, I’ll be tilling the garden and planting vegetables and herbs. We will probably have another frost in the near future, so all I can do is wait.
In the meantime, I can celebrate the imminent arrival of spring through food.
Botanas are snacks, in Spanish. They are often small items, like tacos, empanadas, or nachos, and when several different items are arranged together you have a botanas platter.
This botana spread celebrates fresh vegetables and fruit, more than the actual tasty fried treats that are a common staple of botanas.


Colorful peppers, tomatoes, onions are arranged in floral patterns. Sour cream, guacamole, pico de gallo, and grated cheese make for good toppings.
Crispy taco cups and flautas act as a vehicle to carry all of the other good ingredients.


Make your dining experience festive, whenever possilbe.
Special thanks to Janet Kushner at Jauja Cocina Mexicana for this recipe, which I have unabashedly stolen!
My wife was raised in the Catholic faith, which came with all manners of rituals, rites and traditions. One of these is avoiding meat during the Lenten season, which is the 40-day period that begins on Ash Wednesday and ends at sundown, Holy Thursday. Eating meat from warm blooded animals is forbidden, but fish, and other seafood, is permitted because they are cold blooded. There’s a lot to unwrap there, but suffice it to say, Lent is something I can get behind, especially since I love seafood.
I come from a Protestant background, specifically an evangelical, Pentecostal, fire-and-brimstone sort of sect that has its own dos and don’ts, which include things like prohibiting alcohol, dancing, and gambling. Eat anything you want, but don’t dare have any fun while doing it!
Over the years I’ve realized that living a good life requires nothing more than treating people with decency and respect. It seems to me that religion can muddy the water, making it difficult to see the important things in life. Be kind. Be generous. Be sincere.
All that said, I still enjoy Lent when it rolls around each year! Let’s have some fish!
Note: The sauce from this recipe is a very versatile soup base. You could substitute the fish with meatballs, rice, lentils, or anything else that strikes your fancy. Control the spiciness of the sauce by adding or subtracting the chile de arbol.
Ingredients:
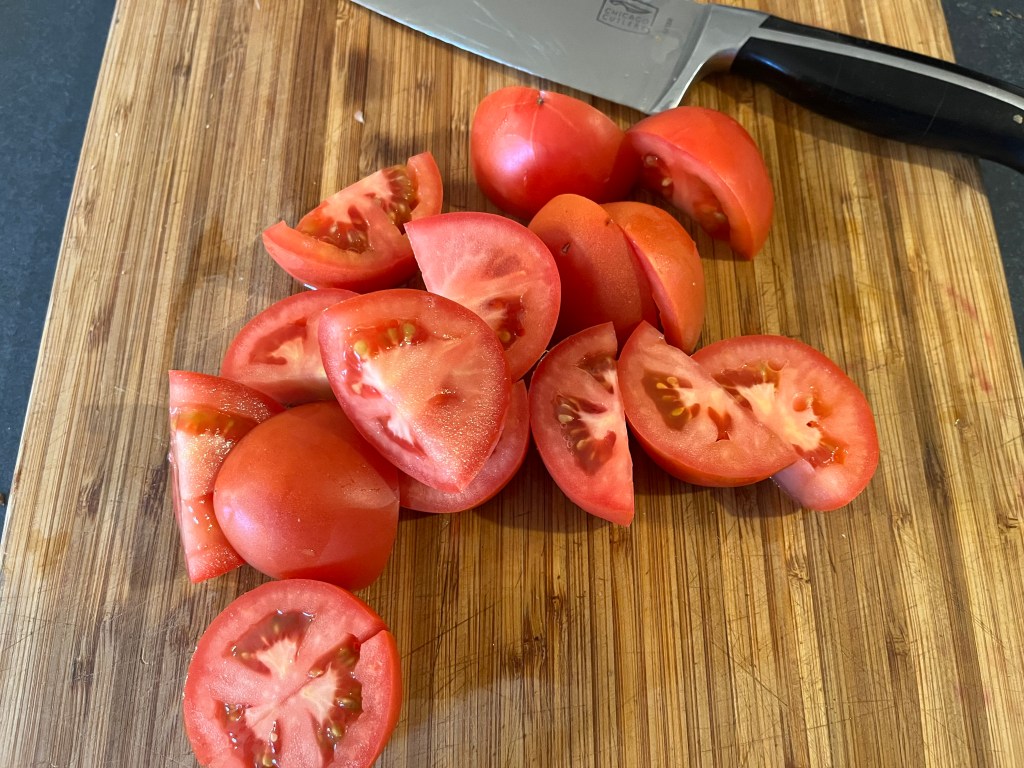
1 ½ lbs Tilapia filets, sliced into large pieces


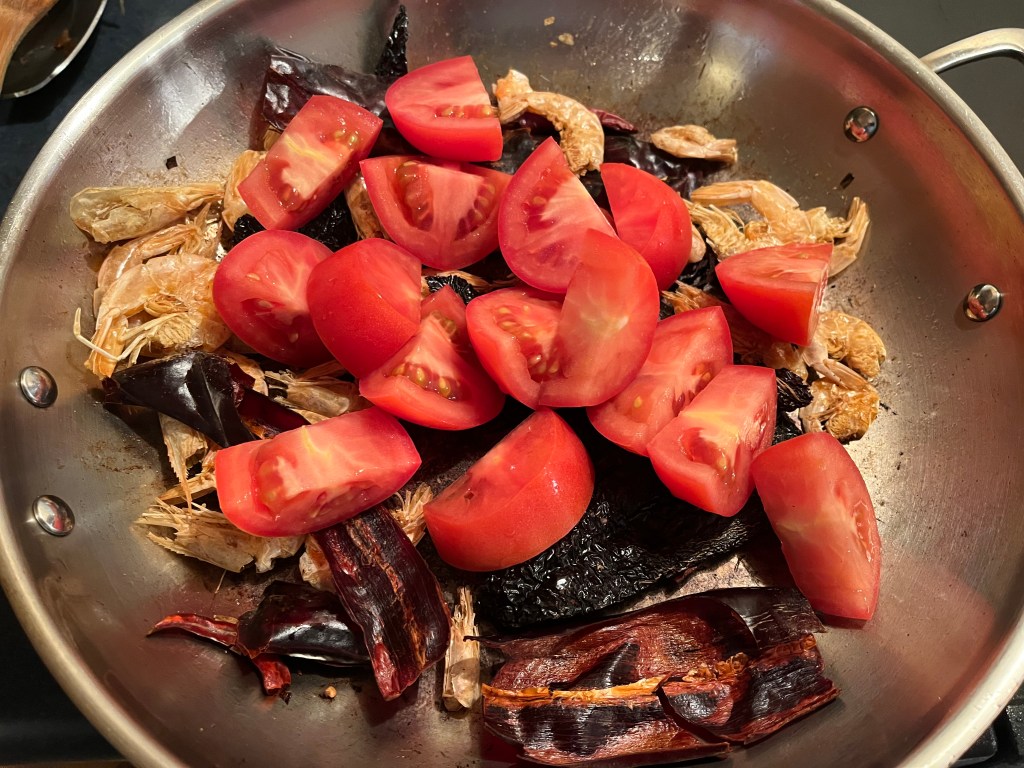
1 oz. dried shrimp (eyes removed)


4 Roma tomatoes (quartered)
2 chile guajillo
1 chile ancho
A few chile de arbol, optional


½ onion, sliced
3 cloves garlic, peeled.
1 large leek, thinly sliced


1 bay leaf
1 Tbs oregano, crushed

Salt to taste
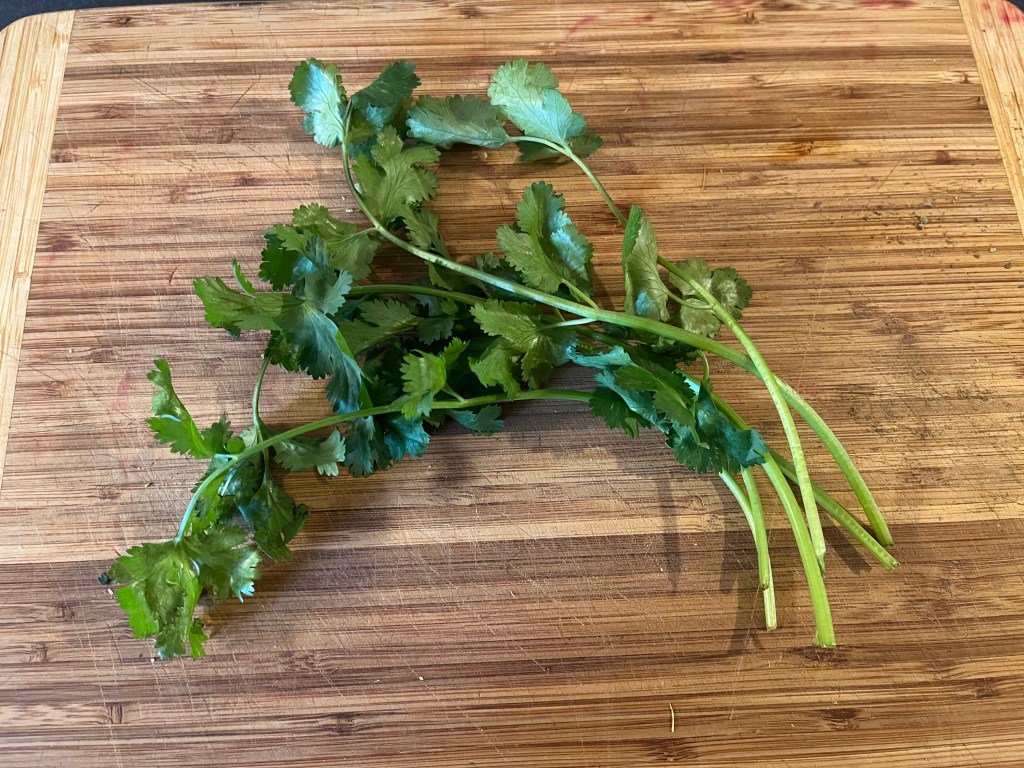
1 small handful cilantro leaves
3 carrots, peeled and cut into ½” pieces
2 medium potatoes, peeled and cut into ½” pieces


Directions:
Cover cut potatoes in water and soak until needed.
Sauté onion, leek, and garlic for 5 to 6 minutes. Set aside.


Sauté dried shrimp for 1 minute.

Add chiles. Sauté for 2 minutes.

Add tomatoes. Sauté for 2 minutes.

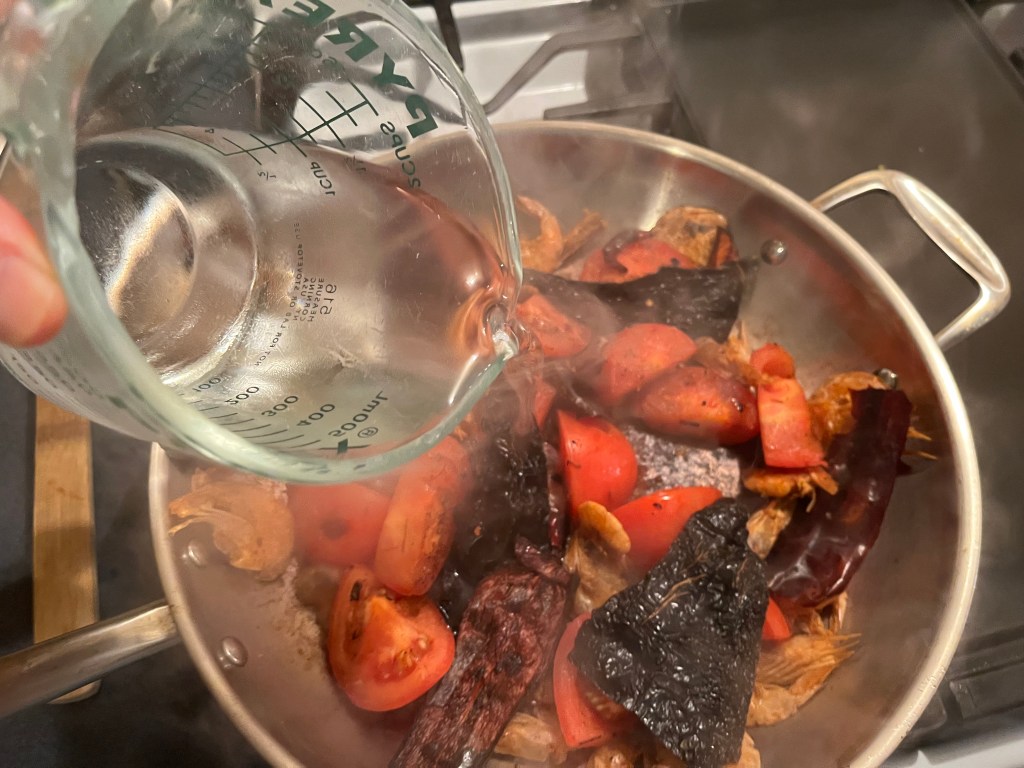
Add 1 ½ cup water. Cover and simmer for 10 minutes.


Add cooked salsa to blender. Add onion, leek, and garlic. Add 1 ½ cup water. Puree and strain into large bowl.


Add pureed salsa to a large pot.
Add bay leaf and oregano.

Cook uncovered over medium heat for 10 minutes. Stir frequently.
Add potatoes and carrots.
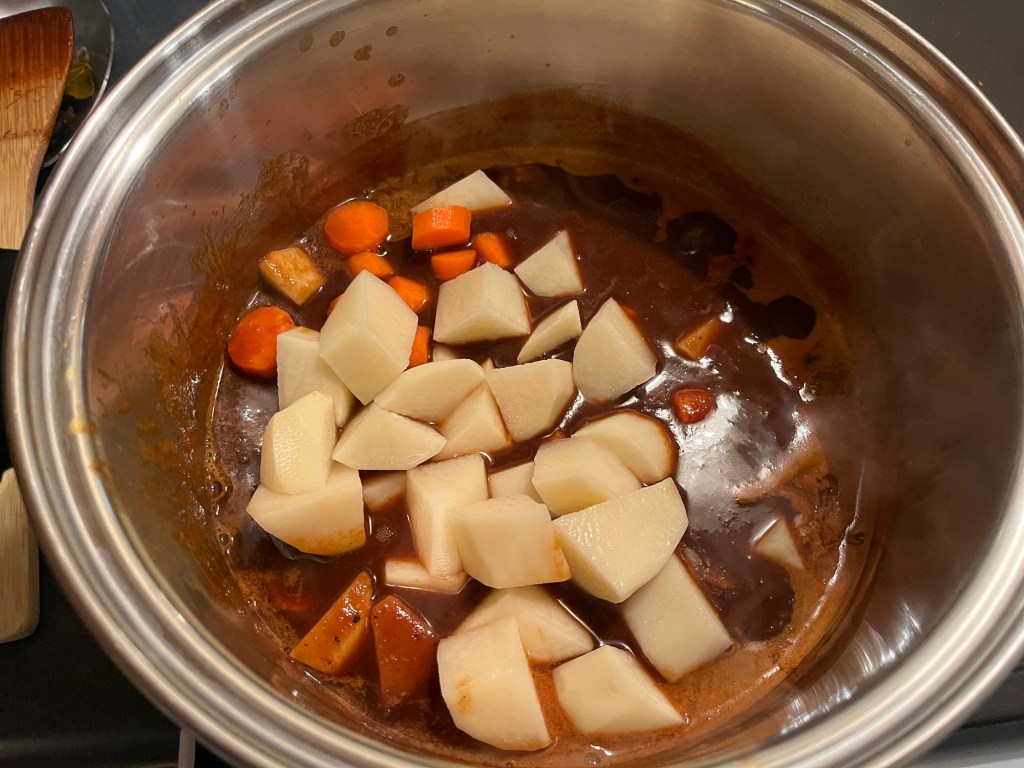
Add 5 cups water and salt to taste.
Cook uncovered over medium heat for 20 minutes.

Add tilapia and cilantro.

Cook for 5 minutes and serve.

Top bowls with minced onion and jalapeño.

Serve with warm corn tortillas.
Enjoy good food with friends!
Our tomato plants have done well this summer, despite the insane heat that we have been experiencing, and that means we have buckets and buckets of tomatoes to deal with.
There’s nothing that refreshes the soul like a vine-ripened tomato! For me, it is the quintessential taste of summer.
We have 24 tomato plants in the garden this year, which is way more than we need for a supply of fresh tomatoes, so we are canning the rest.
Roma tomatoes are perfect for making tomato sauce. I’ve spent the last five weekends making a variety of Italian-style marinara, as well as barbecue sauce, and spicy chili sauce.
All in all, I’ve made 40 quarts of 43 pints of sauces. It takes about 45 gallons of tomatoes to make that much sauce, so it requires a lot standing and stirring to complete the job!

The result is a year’s worth of delicious homemade sauce.
There’s lots of books and plenty of online resources for anyone interested in canning. Who knows, maybe I’ll post a recipe or two and offer some advice on canning someday!
Tired of humdrum pico de gallo, laying listlessly in bowl? Rearrange and redefine the elements.
The possibilities are myriad. A little creativity goes a long way when making something visually appealing, as well as delicious.
Case in point, is this mosaic of tomato and jalapeño. I started with the idea of making pico de gallo and, just before I diced the thin strips of jalapeño, I looked at the chopped tomato and thought it would be more interesting to arrange the pieces together to resemble a pineapple.

Seeded and sliced jalapeño
Chopped tomato
Pinch of oregano
Pinch of garlic salt
A slight squeeze of fresh lime juice
Go ahead…change your world. By doing so, you change our world.
My good friend, Graham and I met through WordPress waaaaaay back in 2019. He was a veteran web poster when I first stumbled upon his food blog and I remember reading his “About Me” page for the first time and thinking, “Wow, there’s another dad in the world who likes to cook for his family!” I started following his blog and commenting on his posts and, not so long after that, he started following my blog.
It didn’t take long for me to get the hang of posting recipes and visiting other sites to see what others were up to, and before I knew it, I was following lots of people and people even started following me.
I have to say that Graham has always graciously posted comments about the things I post, and his commentary contains colorful prose like:
“You have exactly the same recipe as I do, which is strange or maybe normal.”
and…
“Great recipe and one I would totally enjoy eating but can never make, my wife hates olives. Will remember to eat the next time I am eating alone.”
and…
“That really looks good even given it’s chicken. I prefer Kung Pao beef.”
Graham and I trade good-natured barbs as well as good advice in equal proportions, which, in my opinion, makes us good friends.
By now, even Graham is probably thinking, “What does any of this have to do with Mac and Cheese?”
Well, here are the last two comments I received from Graham:


So now, without further ado, I present a link to a Mac and Cheese recipe that I posted waaaaaay back in 2020.
I recreated this recipe a few days ago, but as anyone who knows me, I had to change it up a bit. I used equal parts Cheddar and Gruyere cheese.
Here’s a picture of the finished product.

.
So, there you go, Graham. Are you happy now?!
I’ll end with what might be my favorite comment from Graham…
“LOL! I think it’s just because you’re a want-a-be Canadian. You’re too much like me sometimes, just grab what’s in the fridge and make something out of it that ends up tasting good.”
Indeed! Good night all, and good night, Graham.
