Often times, my approach to cooking is wham-bam-get-it-done! This is the sort of cooking that I tend to do when I prepare dinner, after coming home from work. It’s a fun, energetic romp that usually results in a good meal and doesn’t chew up a lot of time. That kind of approach allows for more time to sit down and enjoy a meal with the family, rather than slave away in the kitchen only to be faced with a need to eat quickly, clean up from dinner, and get ready for bed.
There are times that I enjoy a more relaxed, gentle approach to cooking, and I usually reserve those times for weekends. That’s when I like to prepare meals that require a little more time for preparation and, today’s chile rellenos are a perfect example.
It takes a gentle touch if you want to make delicious chile rellenos. Every step requires equal amounts of skill and care. I recommend watching one of the many tutorial videos that can be found online before making chile rellenos, for the first time. Pay attention to the way a chef gently handles the chiles throughout the process.
I’m always amazed at the versatility of Mexican food, and I feel like I say that every time I talk about Mexican food, but it bears repeating! Poblano chiles are probably the most common chiles used for chile rellenos, but you can use any fresh chile that you like. The same goes with the stuffing. Most chile rellenos include cheese, and any cheese is suitable, if it melts nicely. Other items for stuffing can include meats, grains, vegetables, or fruit.
I went with Queso Oaxaca (a Mexican cheese from southern Mexico), and I added a little cooked, ground breakfast sausage that we had, left over in the refrigerator.
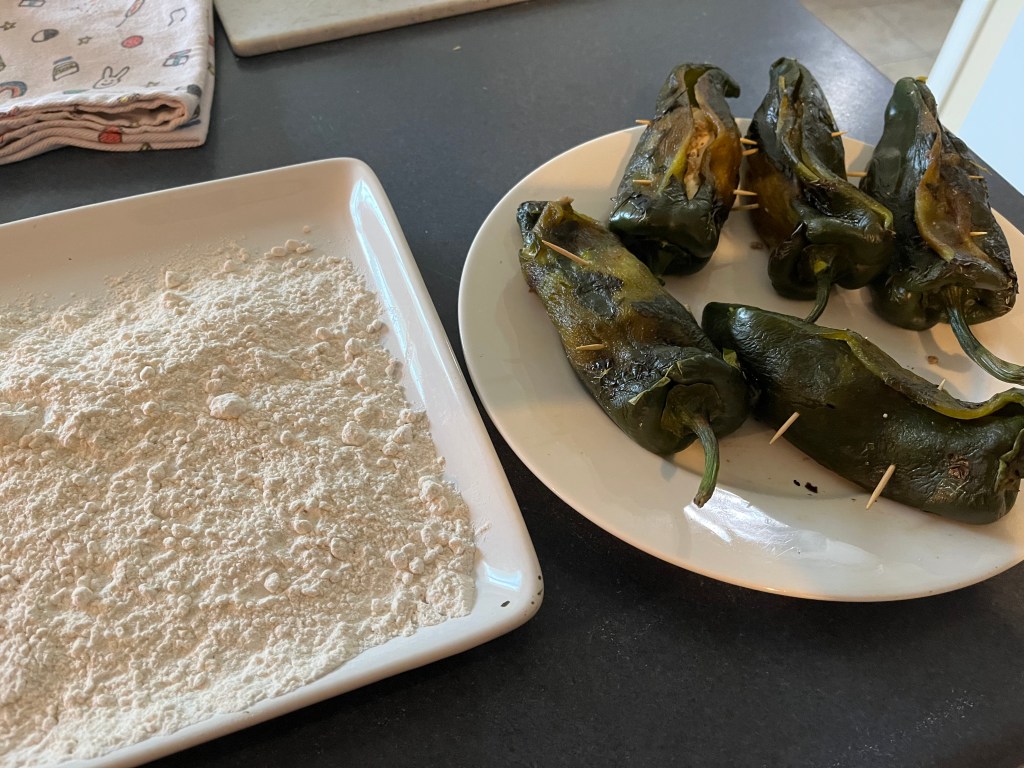
I prefer roasting the chiles over an open flame, rather than broiling. I lay the whole chiles on top of my gas burner and gently turn them until all sides are slightly charred. After the chiles have charred, I store them in a paper bag for several minutes, so that the chiles can gently steam. A sealable bag can be substituted for a paper bag.
With a small, sharp knife, gently make a slit down the length of the chiles, just large enough so that you can reach in and gently remove the seeds from the top of the chiles, with your fingers.
Form a ball of stuffing mixture in your palm and gently insert it into the cavity of the chile. Gently seal the chiles with toothpicks.
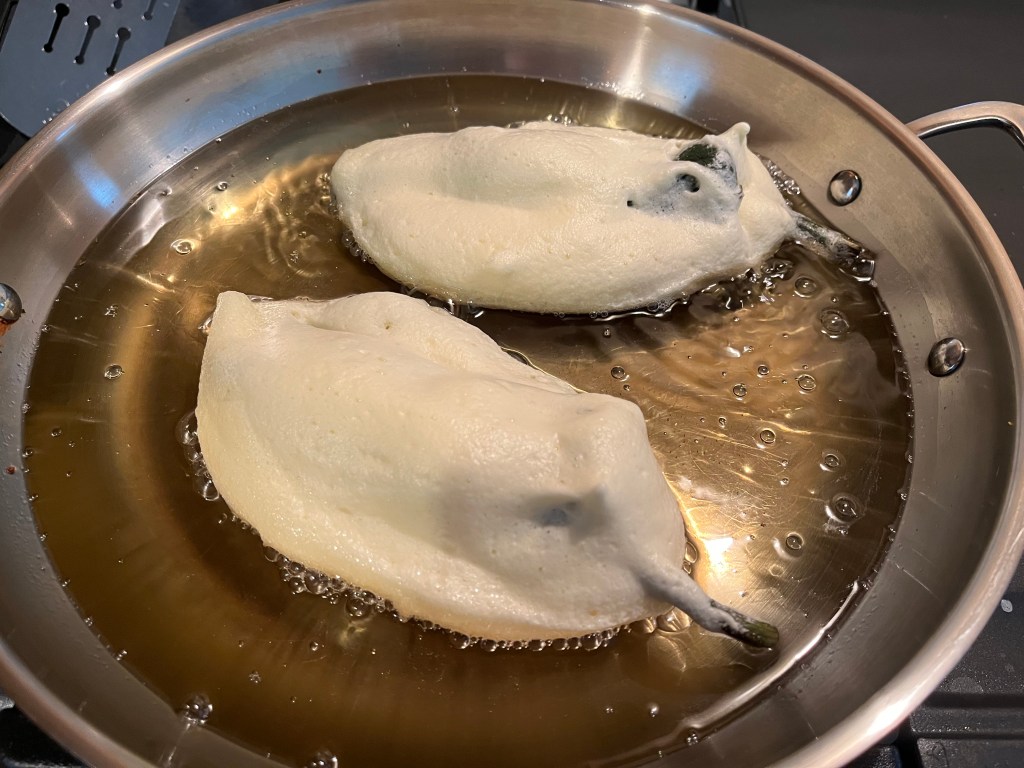
Whip egg whites to form stiff peaks and then gently fold the egg yolks into the batter.
Gently dredge the chiles in flour.
Gently submerge the chiles in batter, to coat the chiles, and gently place them in a pan of hot cooking oil. The cooking oil needs to maintain a temperature of about 350º throughout the cooking process. If your oil is not hot enough, the chile rellenos will be greasy and, if the oil is too hot the batter will brown and burn quickly.
After about one minute, gently turn the chiles over to cook on the other side.
Gently remove the cooked chiles and rest on rack, so that any residual oil can drip off.
The chile rellenos are ready to eat at this point but, you might want to consider adding an additional step.
I prepared a warm tomato sauce that I used to bathe the chiles in, before plating. I also spooned some of the sauce on top.
I am totally sold on the idea of adding tomato sauce! The slightly acidic and sweet sauce brought the chile rellenos to a whole new level!
To make the tomato sauce, I added some fresh Roma tomatoes, a little chopped onion, a few garlic cloves and about 1 cup of water to a blender. After the sauce was pureed, I simmered the sauce in a pan, over medium-high heat to reduce a bit. While the sauce reduced, I added some chicken bouillon, cracked black pepper, onion powder and some fresh, chopped epazote leaves. In case you are unfamiliar with epazote, it’s a Mexican herb that is commonly used when preparing beans, soups, or stews. Don’t worry if you don’t have epazote…it’s not essential, but it’s a nice addition, if you happen to have some on hand.
One chile relleno was enough to satisfy me, but my tastebuds wanted more!
Traditional Chile Colorado is a stew made with beef and red chile sauce. Even the toughest cuts of beef will become tender when cooked slowly in the sauce for a long period of time. I don’t always have the luxury of time when I cook, so I find ways to improvise.
This meal took about an hour and a half to make, which could have been trimmed down to about 45 minutes, if I had used canned enchilada sauce, but I wanted to use my dried Guajillo and New Mexico chile pods for the sauce.
I didn’t record the amounts of the ingredients I used for this dish because I was in a hurry, and I only took photos of the finished product. That said, this is an easy dish to make, and proportions are easy to figure out, on the fly.
I started by seeding the chilies and then steamed them. I added a small amount of beef stock to the chile pulp and simmered over medium heat for a few minutes, to thicken.
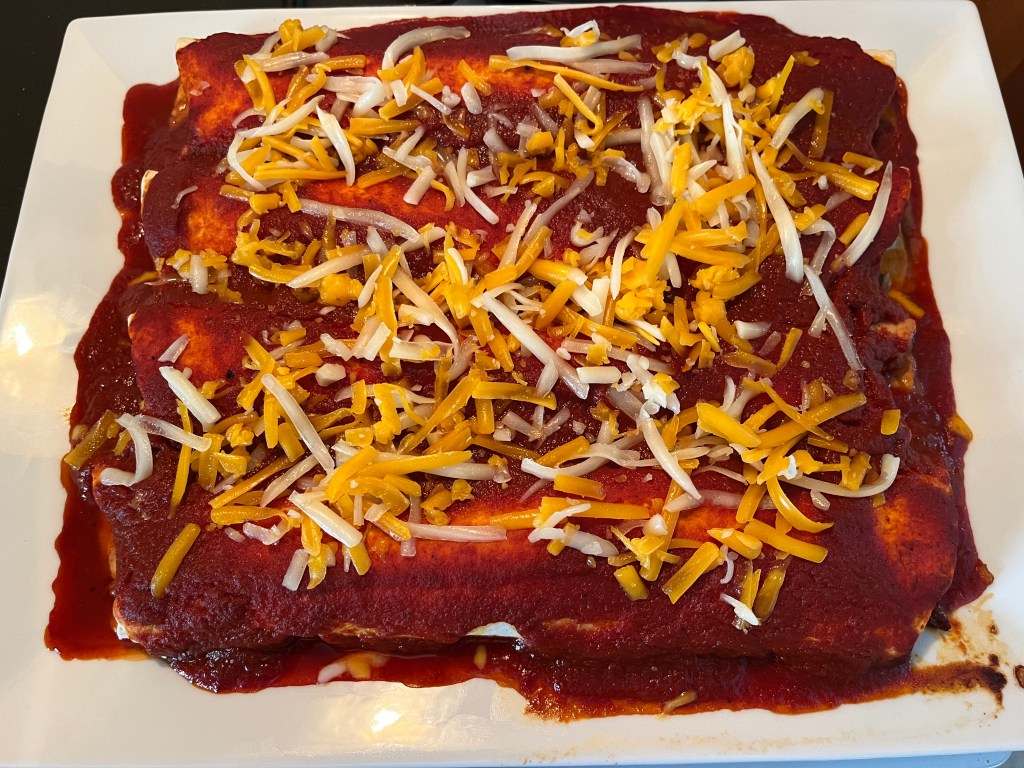
I pan fried thinly sliced steak over high heat to medium-rare. After a little chopping, I added the cooked beef to 14” burrito sized tortillas.
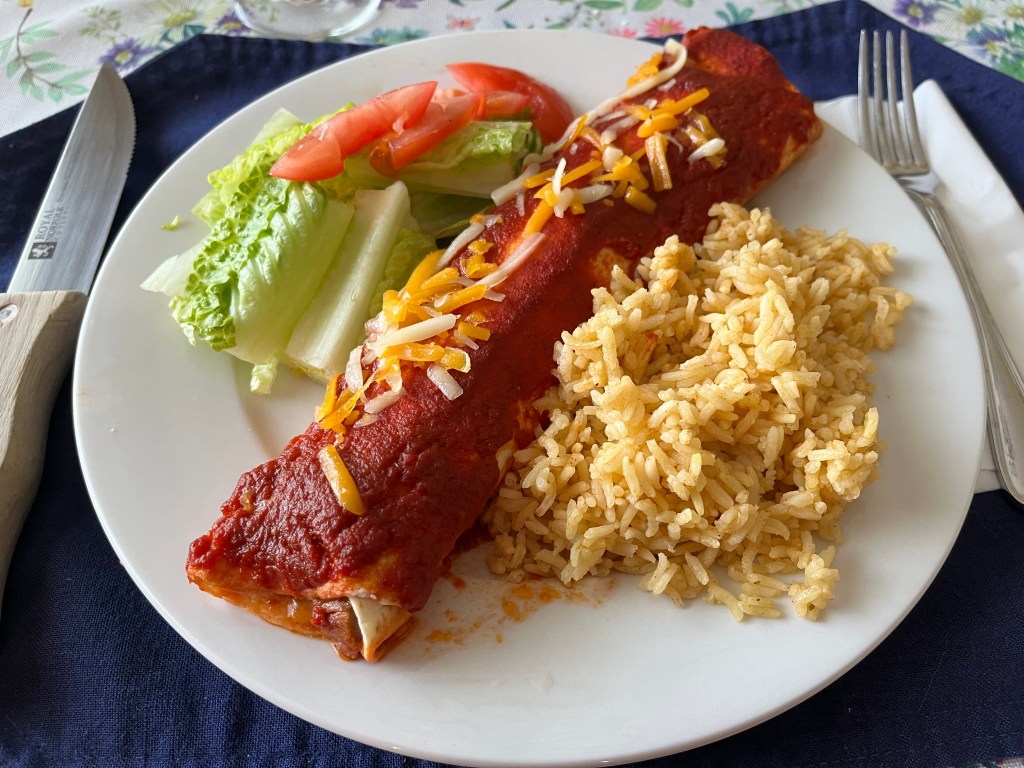
I added the rolled burritos to a large skillet and topped them with the sauce. The burritos baked at 350º for about 15 minutes. I added some shredded cheese to the top, after arranging the cooked burritos on a serving plate.
A little salad and Mexican rice completed the deal.
People use all sorts of things to measure time. The obvious choice, of course, is a clock, but when you think about it, there are other more subtle ways to measure time.
Your newborn baby sleeps through the entire night. Congratulations, you just made it to six months, or has it been a year? Your neighbors have their trash cans lined up on the street. Oh, it’s weekly trash pickup day. You see Christmas decorations pop up at local stores when there wasn’t any the day before. It must be September already.
The kitchen is full of time measuring devices, aside from a clock on the stove or microwave oven. The refrigerator and pantry are full of time reminders. Expiration dates and “best sold by” dates are on just about everything. They tell you the necessary information, which is, “use this item before this time, or you will risk making everyone sick”. What they don’t tell you is when you bought the item. All you care about is the expiration date, and that’s OK.
Some food items are like time bombs. Their life clock starts ticking from the moment you put them in your shopping basket until the moment you eat them. King among those sort of items is common, white button mushrooms.
I look at mushrooms like this…
Day 1 – The mushrooms are nearly perfect. Rinse off the dirt, pat them dry and you can use them in fresh salads or any other purpose.
Day 2 – The mushrooms have barely changed. You might want to trim off the bottoms of the stems because they have turned a little brown, otherwise they are still good for any use.
Day 3 – Why haven’t I used these yet? If I use them now, I will need to pluck the stems out of the mushroom caps. They’re still fresh enough for salads, but just barely.
Day 4 and 5 – Critical warning! Mushrooms look a little smaller and browner than they did a few days ago. They also feel wet, in a not-so-good way. Use them now, or risk the death throes of Day 6, or dare I mention, Day 7!
Day 6 and 7 – Well, I really screwed up! I knew this was coming. I open the package and inspect the mushrooms. They have big, soft brown spots on them, and they aren’t white anymore, and wow, what’s that awful smell?
Fortunately, I’m only on Day 4 with my mushrooms. They aren’t salad worthy, and I need to find a way to disguise them and showcase them at the same time. Sauces are great solutions for vegetables and fungi as they enter their “autumn years”.
Let’s make some jägerschnitzel!
First of all, if your menu choice contains an umlaut in its name, you earn bonus points, and possibly a James Beard award! Secondly, if it is a compound German word, you receive the smug satisfaction of knowing a compound word when you see one.
Jägerschnitzel is a hunter’s schnitzel with mushroom gravy. Jäger means “hunter” and schnitzel means…well, schnitzel means schnitzel. Schnitzel refers to the pounding and breading method used when preparing the meat.
I made a few substitutions along the way, like sake instead of white wine and panko breadcrumbs instead of traditional breadcrumbs and I’m happier for it! I only took a few photos, but trust me, this is fairly easy to make and is very satisfying.
Mushroom Gravy Ingredients:
2 tablespoons olive oil
2 tablespoons butter
½ onion, chopped
2 garlic cloves, minced
8 ounces mushrooms, sliced
¼ cup flour
½ cup white wine (I used saké)
2 cups beef stock
2 teaspoons Dijon mustard, or whole grain mustard
1 tablespoon Worcestershire sauce
Salt and pepper, to taste
Mushroom Gravy Directions:
Heat the olive oil in skillet. Add butter and chopped onion. Stir for two minutes.
Add garlic and continue stirring for another two minutes.
Add mushrooms and stir for three minutes.
Add flour and mix to combine.
Add wine and cook for three minutes.
Add beef stock and stir sauce for about five minutes, until thickened.
Add mustard and Worcestershire sauce.
Add salt and pepper, to taste.
Schnitzel Ingredients:
1 cup cooking oil
4 boneless, center cut pork chops, pounded to about 1/8” thick
2 eggs
2 teaspoons water
1 ½ cup breadcrumbs (I used panko)
1 teaspoon salt
1 ½ teaspoon black pepper
2 teaspoon smoked paprika
½ teaspoon caraway seeds, crushed
Schnitzel Directions:
Pound the pork chops until they are very thin, about 1/8” thick. I like to lay the chops on wax paper and add another piece of wax paper on top and then pound the chops with the flat side of a meat cleaver.
Mix the eggs in a large bowl with water.
Spread the flour across a large plate.
Spread the breadcrumbs across a large plate.
Dredge the pork in the flour, dip in egg wash, and dredge in the breadcrumbs.
Fry the thin pork chops in hot oil for about three minutes and turn them over. Continue frying for another three minutes, or until golden brown, and remove them to warm place.
I serve the schnitzel with fried potatoes on a platter with the mushroom gravy on the side. This allows each person the option to add as much gravy as they like to the schnitzel. I like to pour the gravy over everything!
When did “Taco Tuesday” become a thing? Well, according to sources on the internet, we can thank New Jersey’s Gregory’s Restaurant & Bar, in 1982, Wyoming’s Taco John’s, in 1989, and more recently, LeBron James’ Instagram posts about his weekly dinner habits, and the amazing thing is that all three sought to trademark the term, “Taco Tuesday”.
How silly is that?
Tacos have been known to make an appearance on my dinner table more often than just one day a week. I could make tacos for dinner every day for a month and never have a repeat recipe!
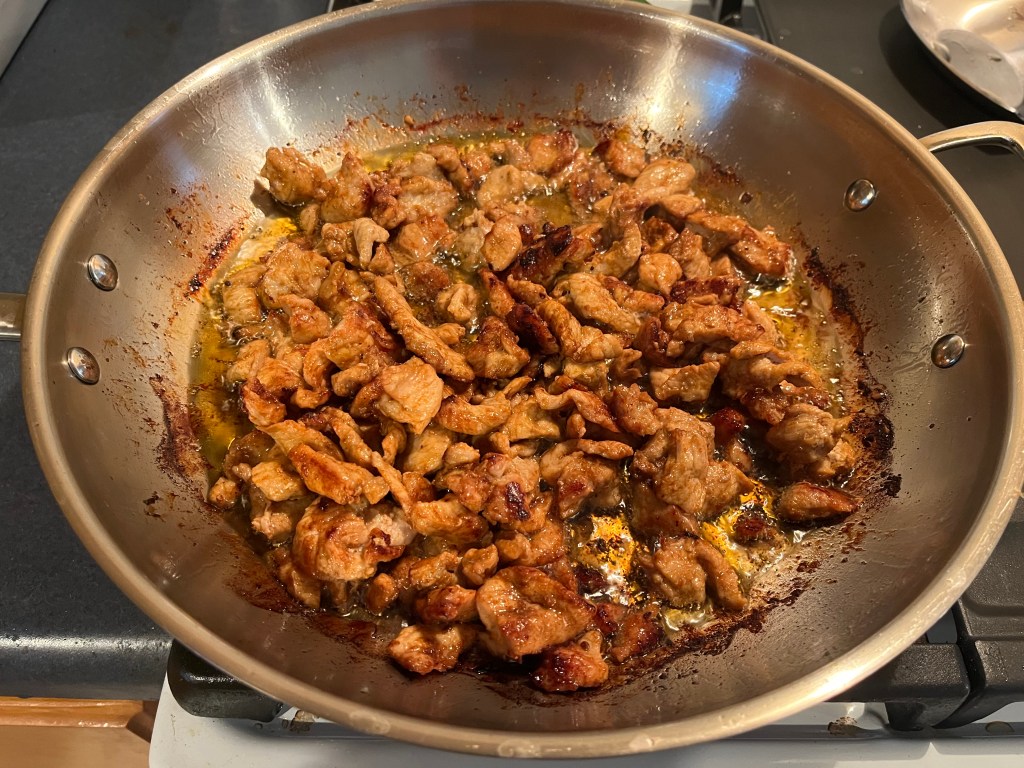
Tonight, it’s quick carnitas. Classic Mexican carnitas recipe requires simmering pork for several hours, until the pork is tender and shreds easily. My method is much quicker and better suited for making dinner in a hurry. I use country-style ribs, which, surprisingly do not contain bones and are not actually meat from the rib. Country-style ribs come from the fatty, muscular portion of the shoulder, which gives them a good amount of marbling, making them well suited to fast or slow cooking.
I sear the pork on all sides, in a hot pan, in a little oil. I remove the meat and cut it into tiny pieces and return the pieces to the pan. I add some chopped white onion, cumin, red chili powder, garlic powder, salt, black pepper, and a pinch of oregano and then mix everything together. I cover the pan with a lid and simmer at low heat for about 20 to 30 minutes, stirring occasionally.
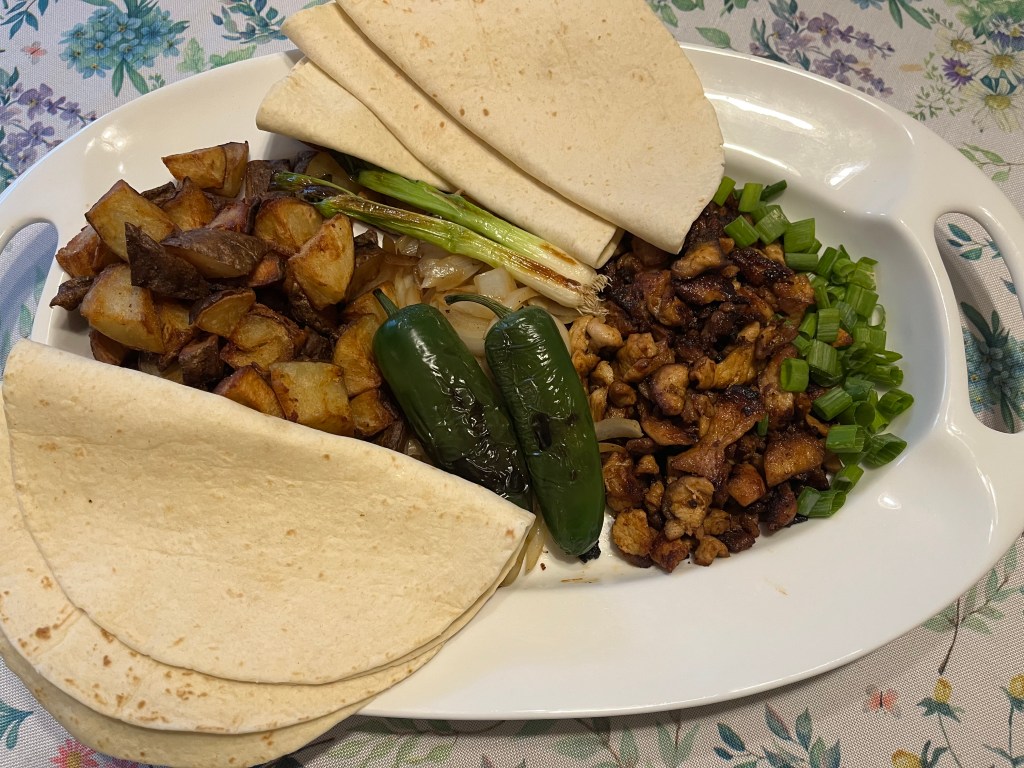
As with any dinnertime meal, I like to be efficient while preparing everything, so I start cooking the potatoes in hot oil at the same time I start cooking the pork.
I roast a few jalapeños over the gas burner on the stovetop.
I chop some lettuce, tomatoes, and green onions while the pork and potatoes cook. I arrange the vegetables on a serving tray, along with some cooked corn, sour cream and salsa.
I steam the flour tortillas, just before the pork is ready.
Expect cooking time, including preparation, to be 45 minutes to 1 hour.
Just for fun, anyone who played Advanced Dungeons & Dragons, way back in the 1970’s and 1980’s might appreciate THACO Thursdays. That’s a very obscure reference, so don’t feel bad if you don’t get it.
Just about every Chinese New Year I get the urge to make Chinese food. Sometimes I keep things simple and at other times, I go all out and make a feast, and when I don’t have the urge (or the time) to cook, I just go out for Chinese food.
This year I wanted to cook, so I went to my favorite little Asian market to look for ingredients, including Chinese long noodles. After searching the aisles for several minutes all I could find were clear rice noodles and curly egg noodles. I was left with two options: 1) Admit defeat and forget about the noodles, or 2) go to the front of the store and ask the woman at the check-out counter for help. I know from previous experience that the woman at the counter, who might be the proprietor, spends much of her time barking out commands, in Chinese, to other store employees, sticking price tags on items, and working the cash register. She also understands very little English, and I don’t speak even the tiniest bit of Mandarin or Cantonese. So, my choice was clear.
I navigated my way through the narrow aisles up to the register counter to have a chat with the Asian woman.
I feel like I should, at this point, paint a picture of the scene.
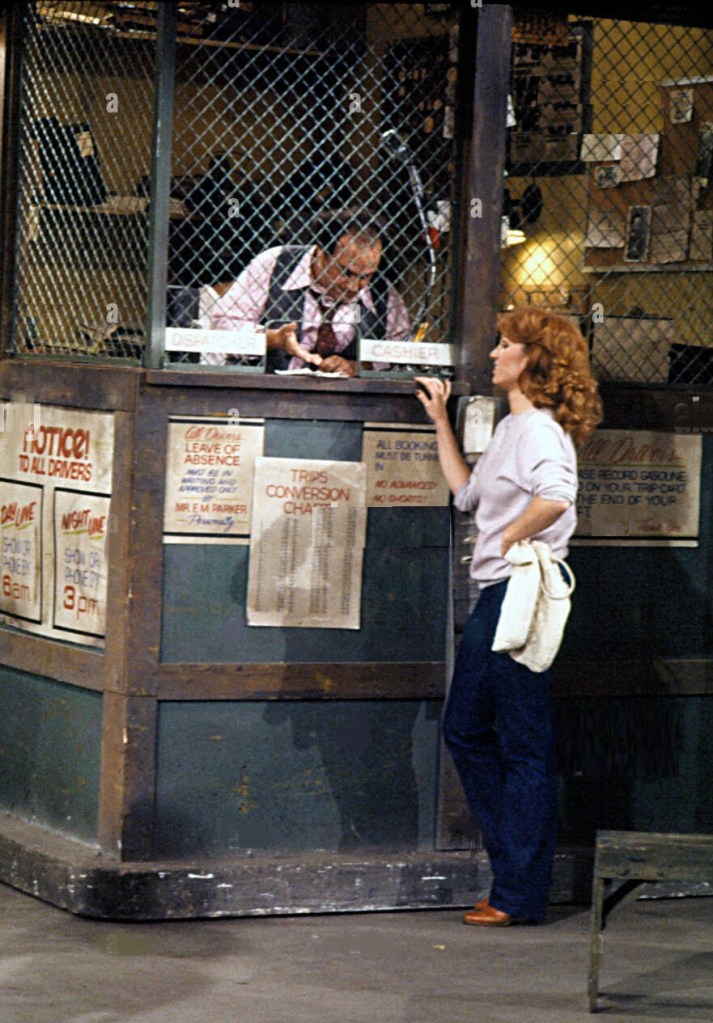
The register counter is elevated above the rest of the store floor and is enclosed by wooden panels and a clear, protective plastic curtain, installed at the onset of the Covid-19 pandemic. Every place in the store feels tight and claustrophobic and the front counter is certainly no exception. There, raised above the store patrons, behind the hanging plastic curtain, that had become blurred by grime during the last few years, sits the middle-aged Asian lady, wearing a surgical mask, covering her mouth and nose. It is reminiscent of a dystopian Terry Gilliam movie, but it also reminds me of Danny DeVito, from the TV series, Taxi.
“Do you have Wu Mu noodles?”, I asked, with my best, clear and precise diction, hoping that would help her understand me. Her response was not in English, and it sounded to me like she said, “I take jaguar.” She shook her head as if to signify that she didn’t understand my question. I rephrased my question a few more times to see if she could latch onto something I was saying. I eventually stripped it down to “Chinese noodles.”, and she perked up a little and climbed down from her perch and waved at me to follow her.
We went down one of the aisles that I had already visited and she began pointing to different kinds of noodles as I shook my head at each of her suggestions. I sensed that she was getting tired of this little game as much as I was, so I decided to try pantomime. I pretended to make noodles, by stretching my arms and hands outward and slapping imaginary noodles down on an imaginary table. She gave me a knowing look and guided me to the end of the aisle and pointed to a large box of noodles.
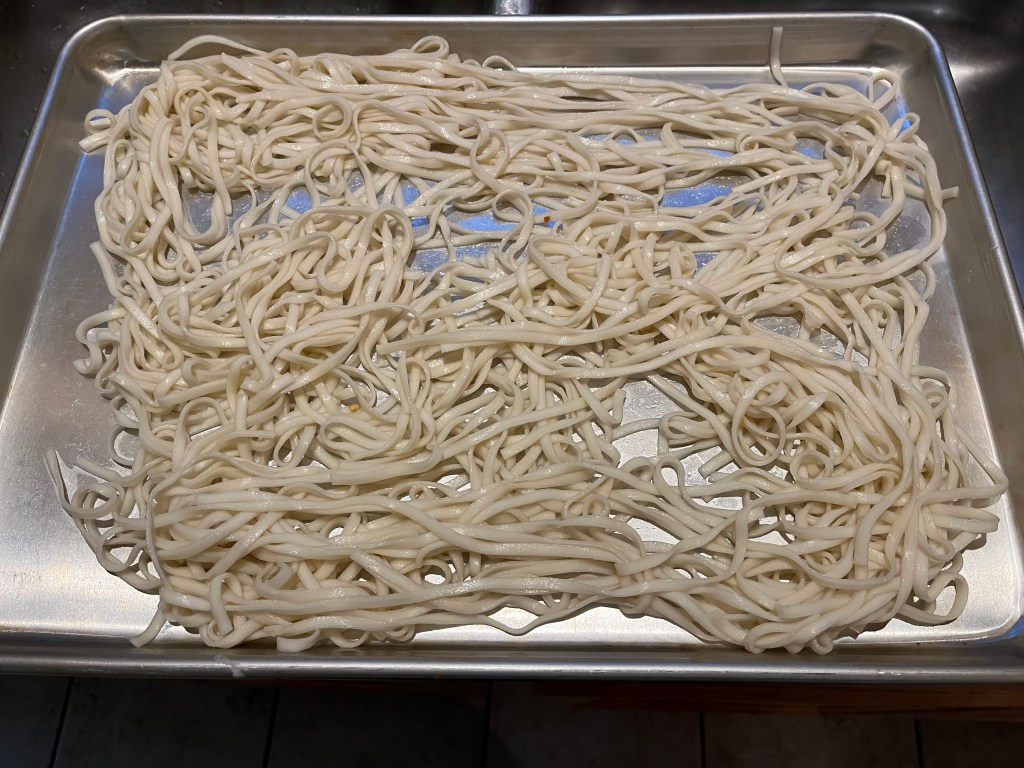
The box reminded me of a boxed set of record albums, big and squarish. I purchased the four-pound box of Chinese Wu Mu noodles, and I left the store feeling accomplished and satisfied.
Four pounds of dry noodles is a lot of noodles! You can expect several future posts that feature them.
Wu Mu noodles, also known as Wu Long noodles are one of the most common types of noodles in China and they are exported throughout the world. All you need to do to find them is gesticulate wildly with your hands until some kind soul guides you to them.
Wu Mu noodles are steeped in tradition. They represent good fortune and long life, and it is bad luck to break them during the cooking process or to cut them while eating them. This can lead to a lot of slurping at the table, and that’s quite alright.
This recipe only calls for a few ingredients. I made my own sauce for the stir-fry but that could easily be replaced by a store-bought sauce of your choice.
The noodles and tofu are simple vehicles for the sauce. Make your sauce sweeter by adding more Hoisin sauce, make it saltier by adding more soy, or make it spicier by adding hot sauce, or chili paste.
Ingredients for the sauce:
½ cup soy sauce
½ cup water
1 teaspoon sesame oil
1 teaspoon black soy sauce (sweet soy)
2 teaspoons rice wine vinegar
3 garlic cloves, mashed and minced
1 Tablespoon brown sugar
1 Tablespoon cornstarch (or another type of starch)
1 teaspoon garlic chili paste
Ingredients for the stir-fry
12 ounces dry Wu Mu noodles (parboiled to al dente)
1 16-ounce block of firm tofu, pressed and drained, cut into 1 inch cubes,
1/4 cup cornstarch
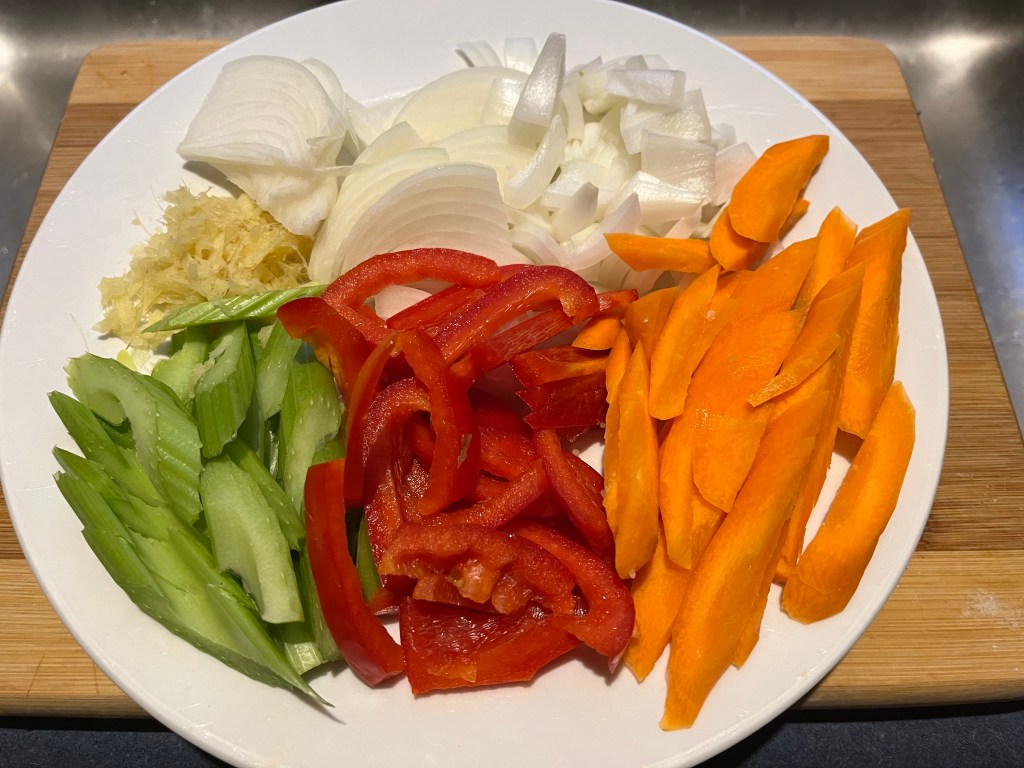
1 tablespoon fresh ginger, thinly sliced
3 small bok choy – about 1 pound (or any other Asian cabbage), chopped
1 large carrot (or 2 medium carrots), sliced
½ onion, thinly sliced
1 large celery stalk, sliced
½ bell pepper, thinly sliced
Directions:
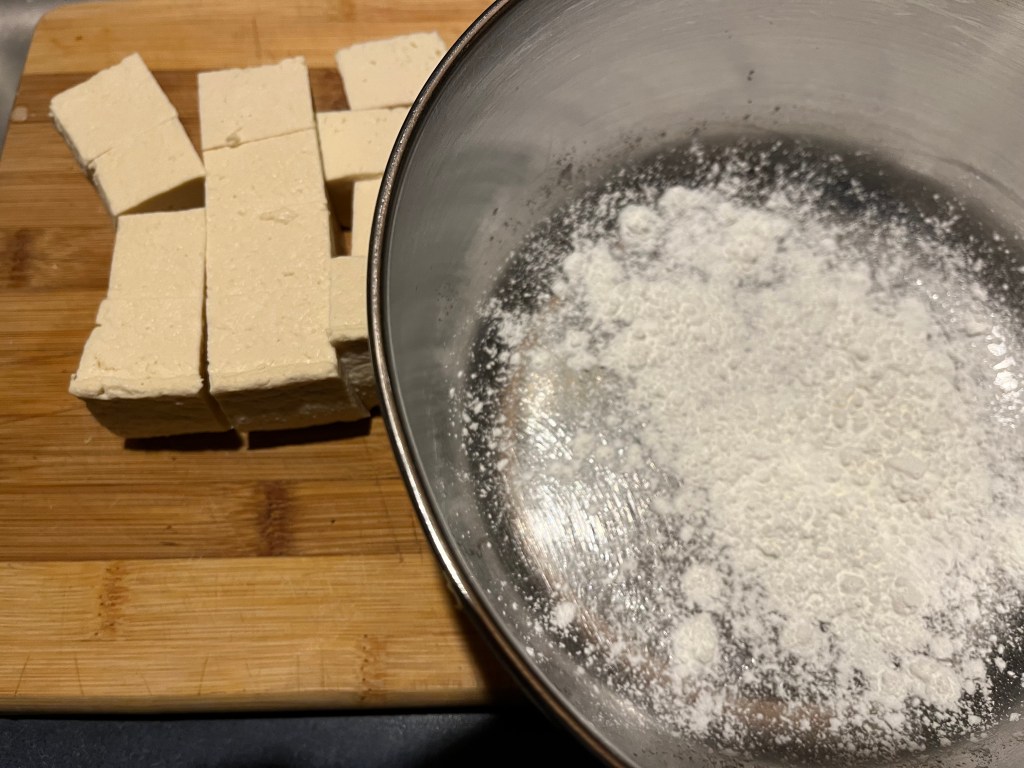
Press the tofu to remove excess moisture by placing the tofu between paper towels and laying a heavy object on top of the top. Allow the tofu to dry for an hour, replacing wet paper towels as needed.
Dust the tofu cubes with the cornstarch.
In a large frying pan, add a little oil and set heat to high. Sear all sides of the tofu pieces until they are lightly browned. Remove from the pan and set aside. Searing the tofu is optional. I wanted the tofu to have a bit of crispy texture.
Prepare the sauce by mixing all of the ingredients. Set aside.
Boil the noodles in a large pot until they are al dente. Strain the noodles and set aside.
Prepare the vegetables by chopping and slicing and set them aside.
Heat a few tablespoons of oil in a large wok.
Add the ginger and remove after a minute or two. Discard the ginger.
Add the carrot to the wok and stir for a few minutes. Add the bok choy and toss. Add the onion, celery and bell pepper. Stir until the vegetables are tender, but not overcooked.
Add the sauce and stir. Add the tofu and continue to toss for another minute.
Add the noodles and toss to coat the noodles with the sauce.
Remove everything to a large serving bowl and serve warm.
For me, a trip to a farmers’ market is like a holiday. Going to an international farmers’ market is like a romp through Disney World’s Magic Kingdom! I run from one produce aisle to another, like a kid on a sugar rush, gawking at all of the wonderful, magnificent fruits and vegetables. “Oooh, they have Sumooranges! Wow, durianfruit…that’s scary! Hey, look at all the types of bok choy…which kind should I choose?”
The “thinky” part of my brain, that causes me to come to the market in the first place, just to buy a thing, gives way to the impulsive, spastic part of my brain that screams, “Grab everything…you’ll figure out what to do with it when you get home!”
On this particular trip to the international farmers’ market, after making the rounds through the produce aisles twice, I found my way back to the refrigerated display case that houses the fungi, you know, all the different kinds of mushrooms. I was drawn to a small package of slender, white mushrooms that were labeled, “Seafood Mushrooms”. I had no idea what seafood mushrooms were, which is ultimately what compelled me to buy them. I guess I’m a sucker for a good mystery!
When I returned home, I consulted the all-knowing internet to see what seafood mushrooms were and how they are used in recipes.
Here’s what I found:
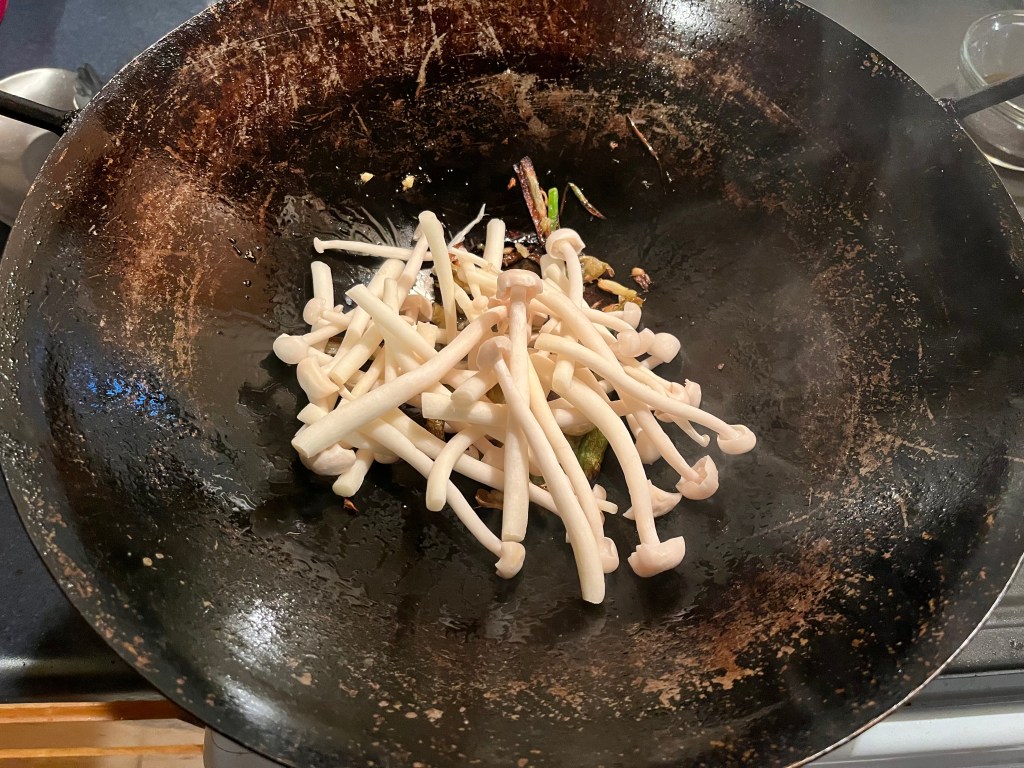
Seafood mushrooms are a smaller version of Enoki mushrooms. They are white mushrooms with long, white stems and mushroom caps. The mushrooms have a mild, earthy, slightly sweet flavor and they taste a little like seafood when cooked, with a subtle flavor of lobster or shrimp. They are crunchy when raw and become chewier, the longer they are cooked.
Since I only bought a small, five-ounce package of mushrooms, I decided to make an appetizer that would feature the mushrooms prominently.
Seafood Mushroom Stir-Fry
Prepare the mushrooms. Rinse the mushrooms under cool running water. The mushrooms are conjoined in a bundle at the base, which needs to be trimmed away to separate the mushrooms.
Ingredients:
1 Tablespoon olive oil
3 green onions, white parts only, cut lengthwise
1 Tablespoon fresh ginger, grated
5 ounces seafood mushrooms, cleaned and separated
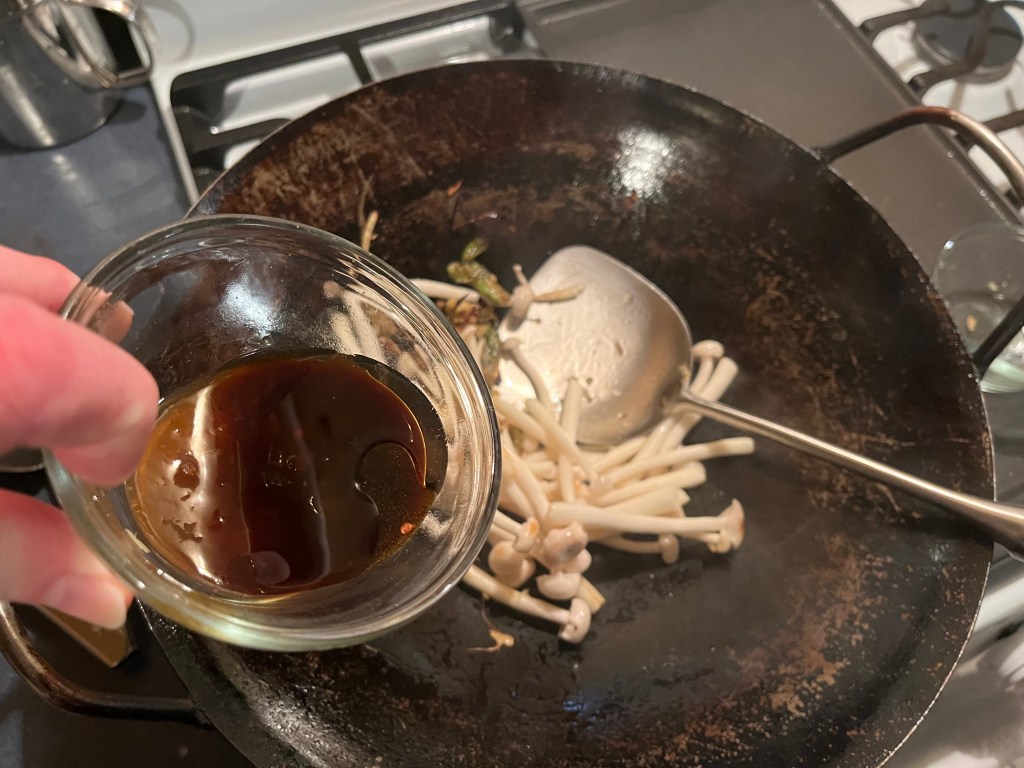
2 teaspoon soy sauce
1 Tablespoon Hoisin sauce
Directions:
Heat a wok to medium heat. Add oil and green onion.
During a recent conversation with my dad, I mentioned that I was making caldo de pollo. I was surprised when he asked, “What’s caldo?”
My dad speaks some Spanish so, I was a bit surprised when he wasn’t familiar with the word, caldo. I told him that it was like sopa, (which is soup, in Spanish). He knew sopa, but he had not heard of caldo.
That conversation got me thinking. What is the difference between caldo and sopa? So, after some research, I found that sopa translates to soup and caldo means broth. Caldo de pollo is chicken soup but, more importantly, it’s a soup made with a rich, delicious chicken broth.
Like many soups and stews, ingredients can easily be substituted. I used ingredients that I had on hand. You can replace any of the vegetables I used with cabbage, potato, celery, or whatever else strikes your fancy. I looked at this caldo as a good way to use some items before they withered away in my refrigerator.
Ingredients:
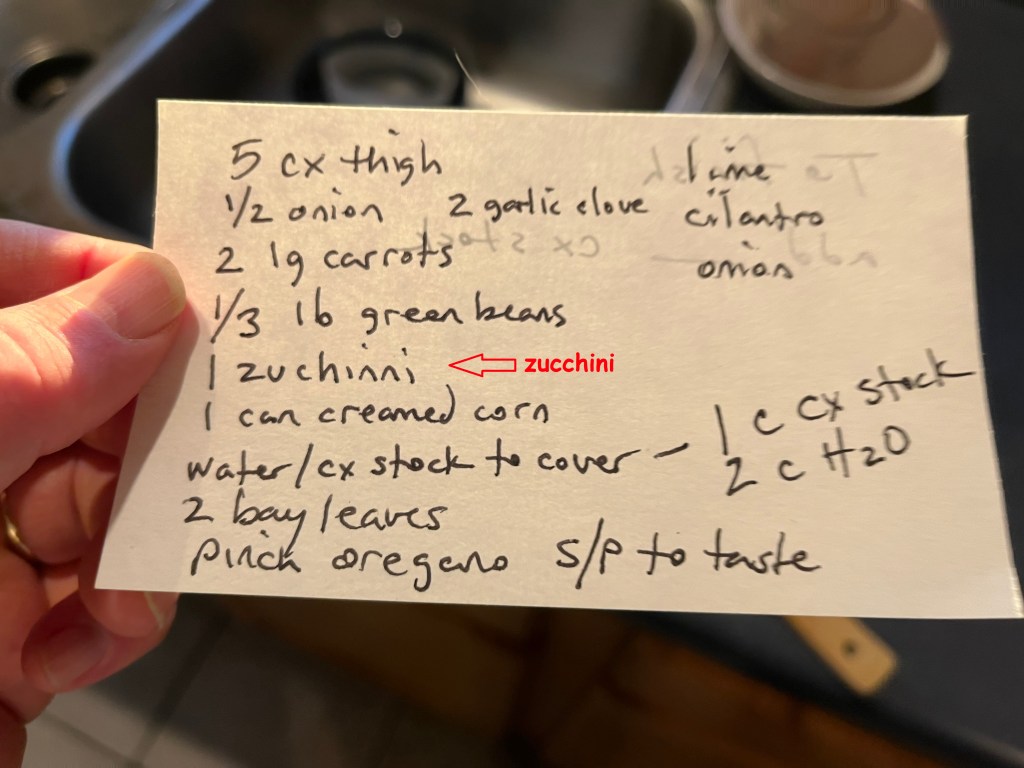
I rarely measure ingredients exactly when I cook because I like to measure by sight, feel and aroma. This makes cooking exciting for me, but that can make describing recipes difficult when it comes time to post on the blog! I sometimes jot down ingredients and proportions on a 3×5 card while I cook…
3×5 cards don’t have spell checkers!
5 skinless chicken thighs (bone in)
1 cup chicken stock
2 cups water
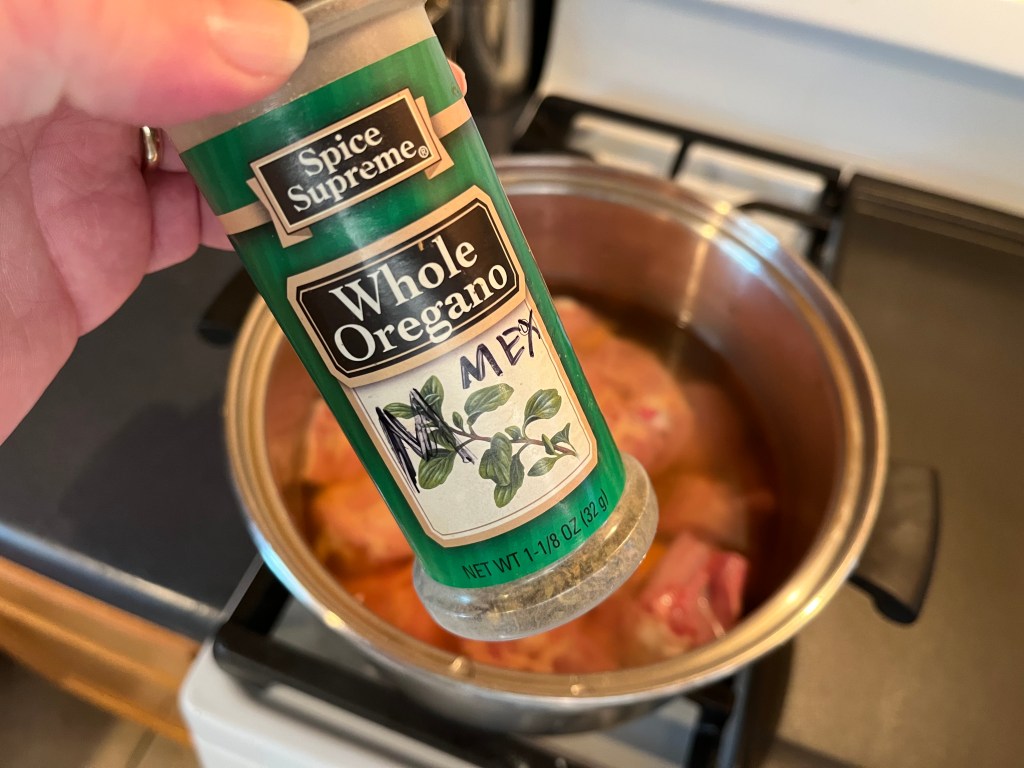
A pinch of Mexican oregano
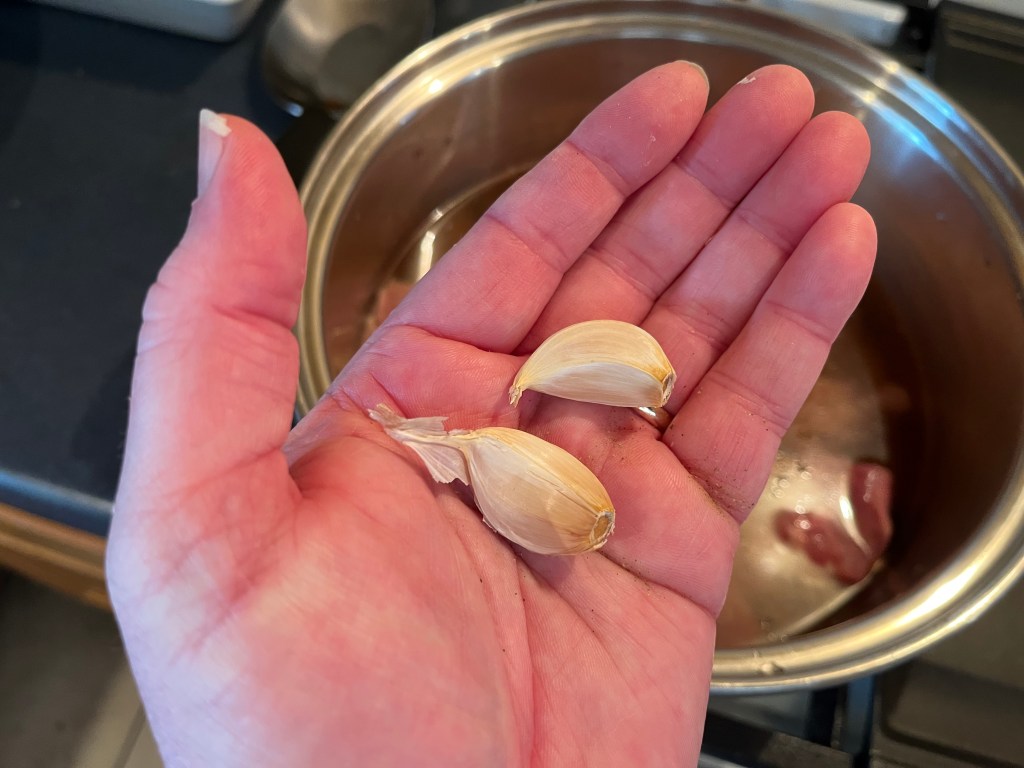
2 garlic cloves, mashed
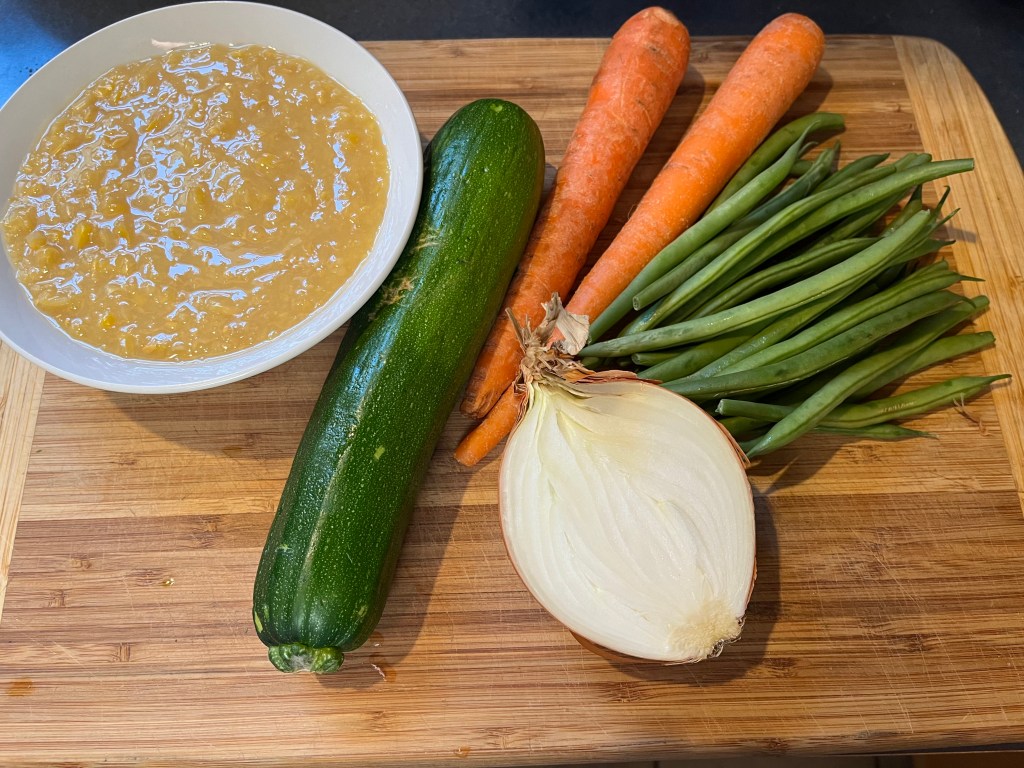
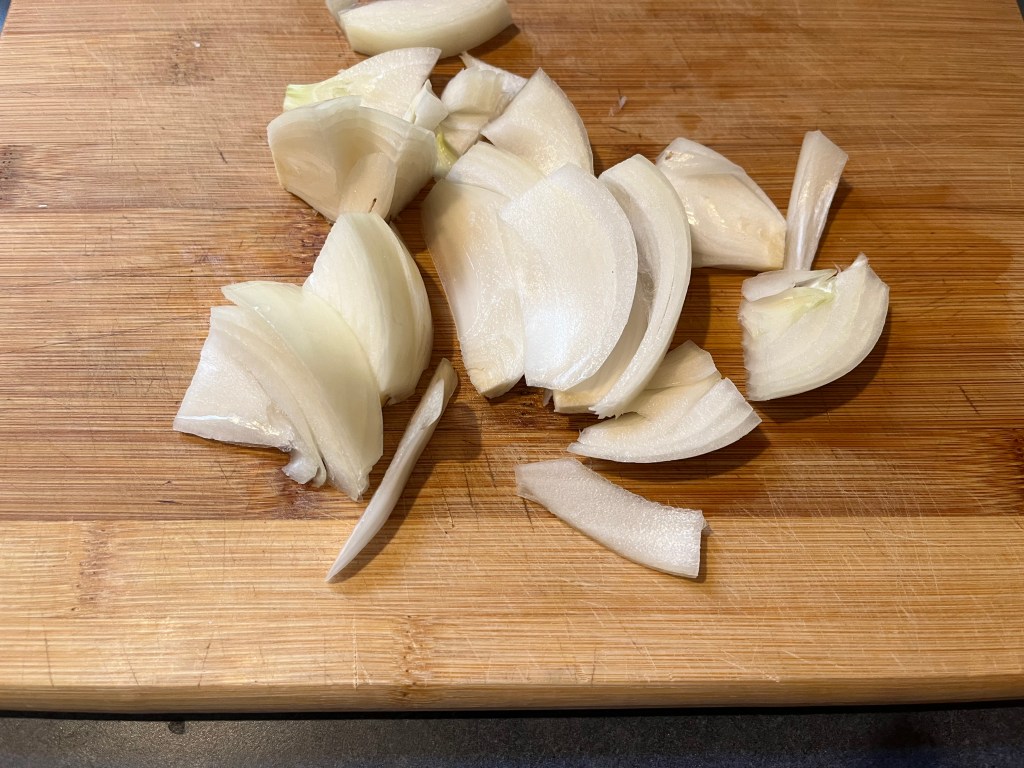
½ onion, chopped
2 large carrots, chopped
1/3 lb. fresh green beans, chop
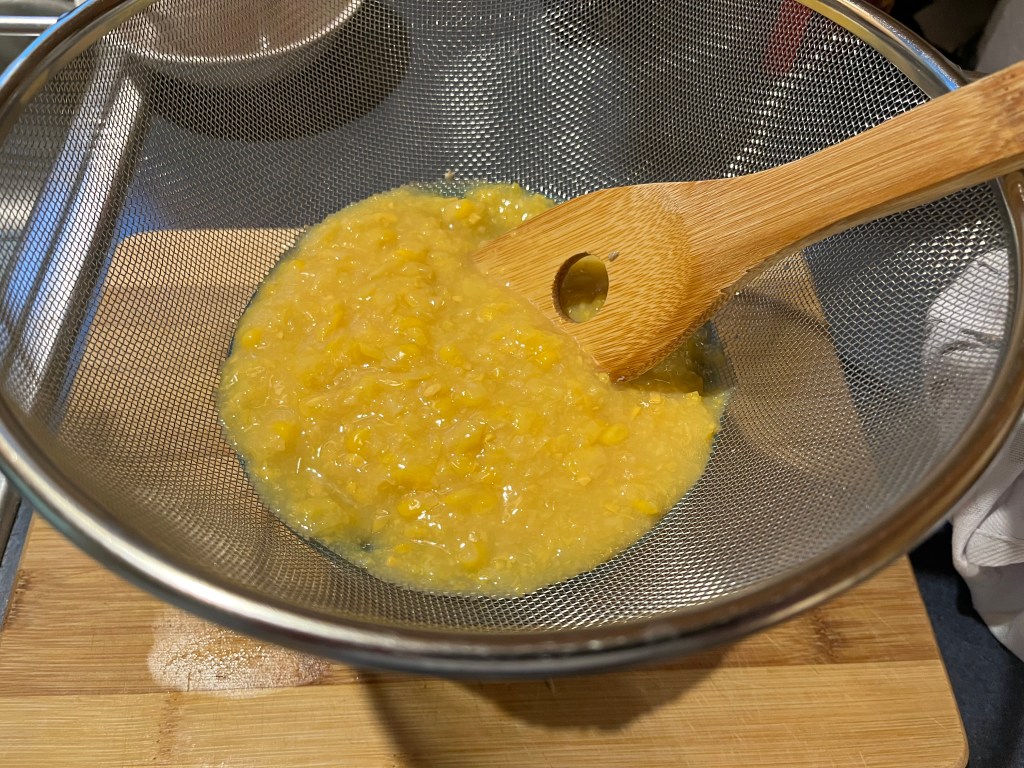
15 oz. can creamed corn, strained
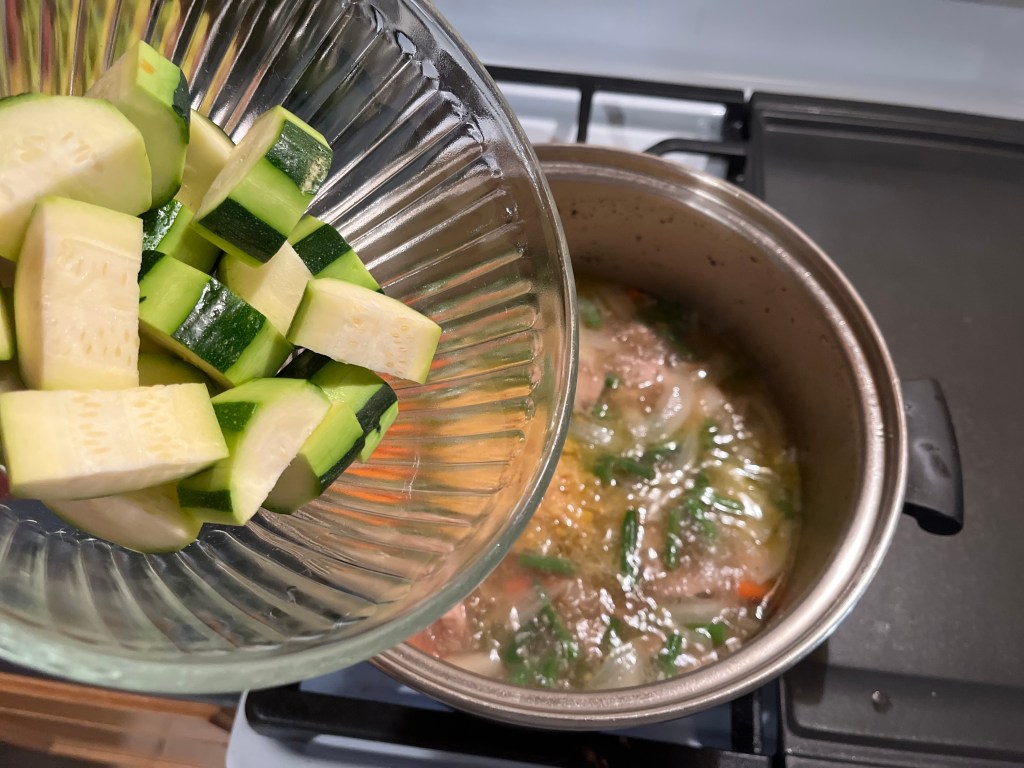
1 zucchini (calabacita, if you can get it), peeled and chopped
2 bay leaves
A pinch of Mexican oregano
Salt and pepper to taste
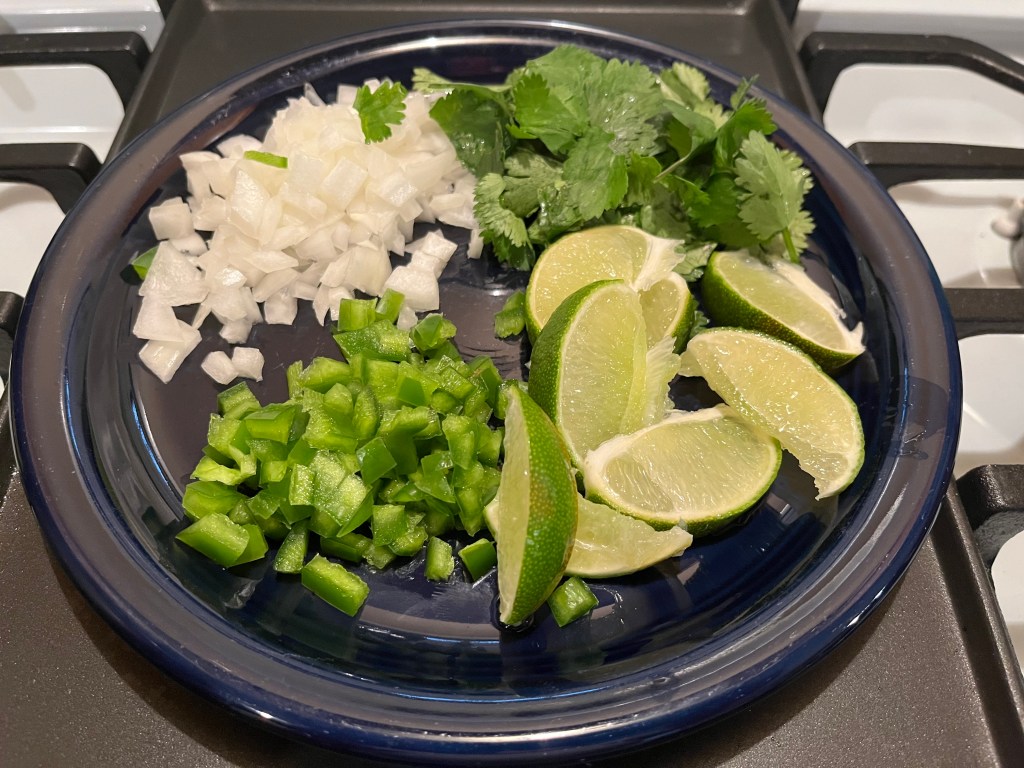
Lime, cilantro, diced jalapeño, and diced onion, for garnish
Directions:
Rinse the chicken thighs under cool running water.
Chop the thighs into large chunks. Chopping through the bones allows the bone marrow to release into the stock as it cooks, which is a great way to add rich flavor to the broth.
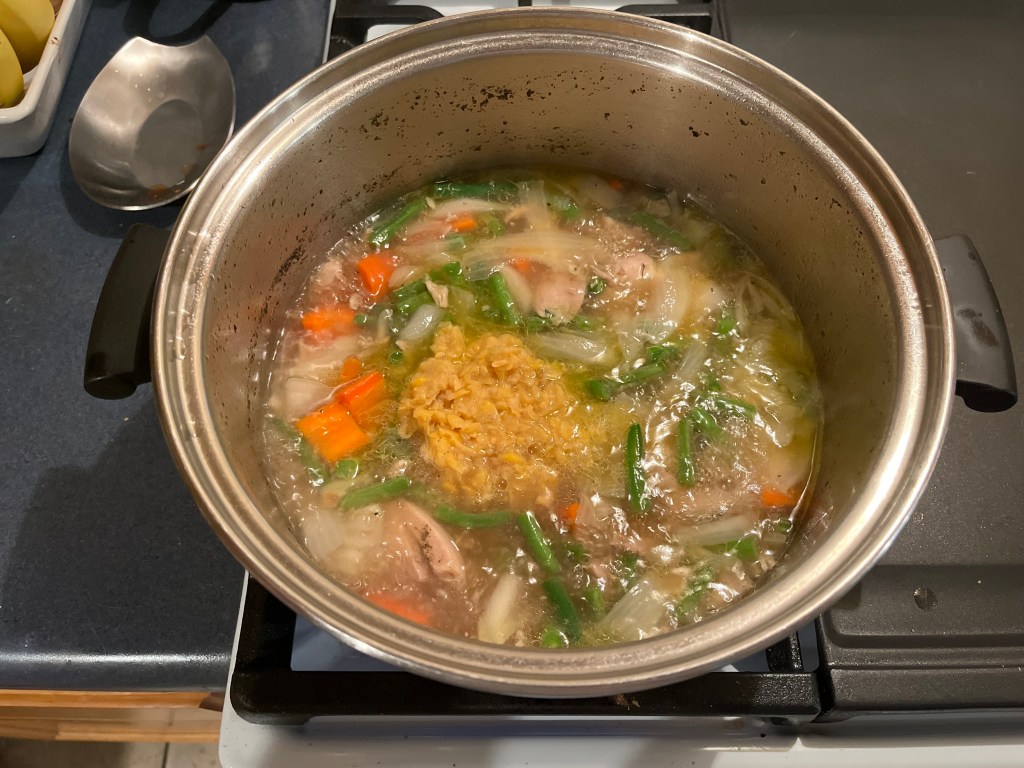
Add the cut chicken to a large stock pot. Cover with chicken broth and water. Set the heat to medium/low.
Add oregano and mashed garlic cloves.
Cover and simmer for about one hour.
While the chicken is cooking, prepare the vegetables.
Chop the onion, carrots, and green beans into large pieces. Set aside.
Strain the creamed corn. Save the solid pieces of corn and discard the liquid, (or drink it, like I did!)
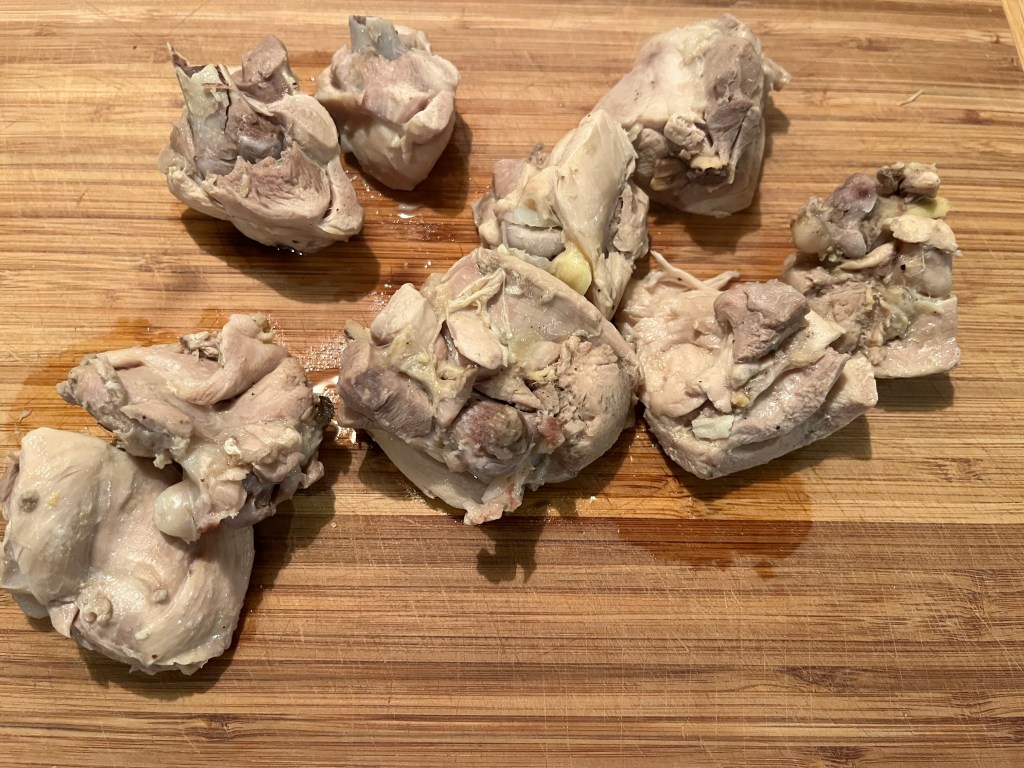
Remove the cooked chicken to a cutting board and allow to cool for a few minutes.
Separate the bones from the meat with a knife and fork. Discard the bones.
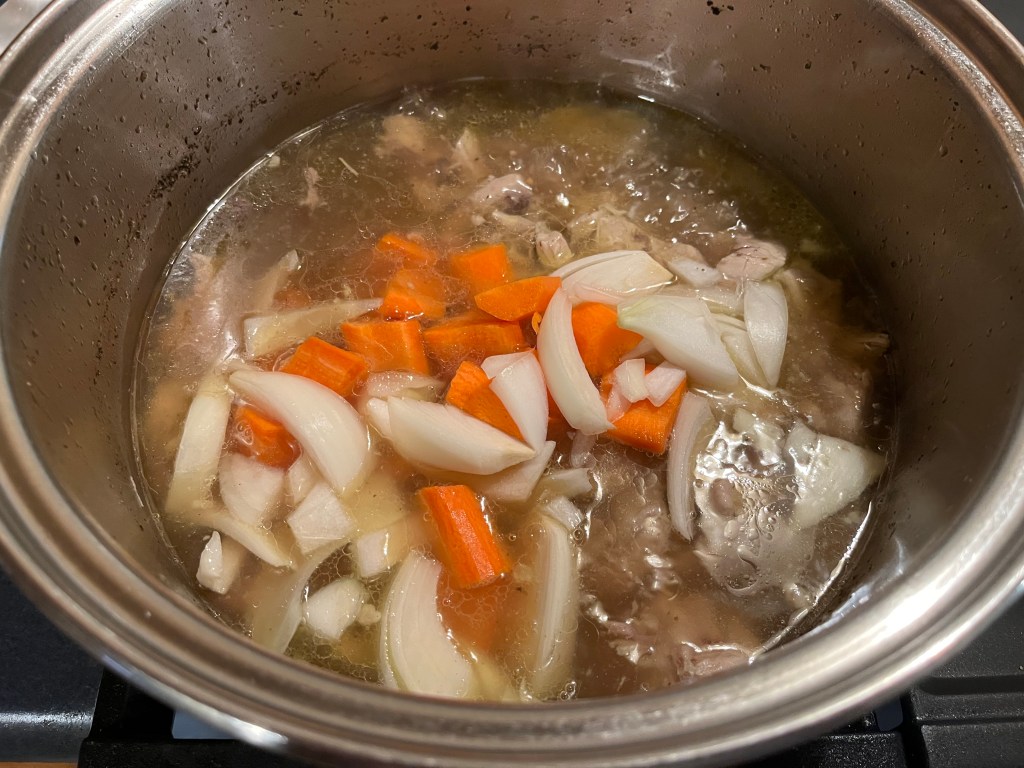
Return the chicken to the pot. Cover and simmer at low heat for another hour.
Add the onion and carrot. Cover and simmer for 10 minutes.
Add the green beans. Cover and simmer for another 10 minutes.
Add the creamed corn. Mix gently to combine.
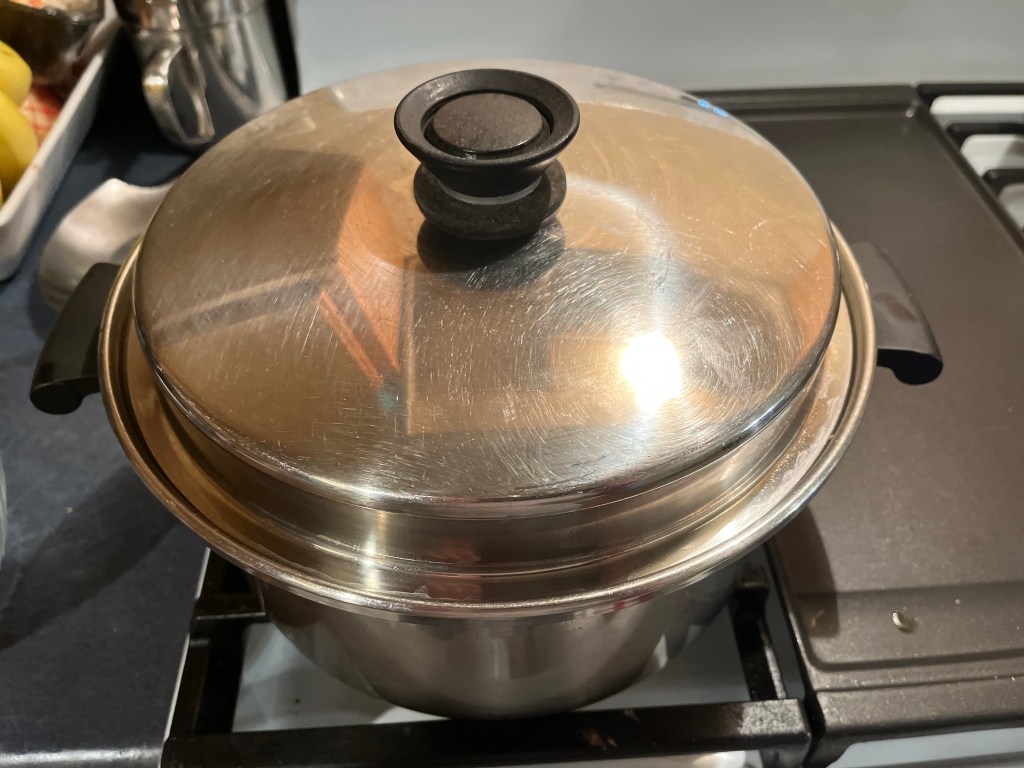
Add the chopped zucchini. Cover the pot and turn the heat off. Wait 20 minutes while the zucchini steams and softens.
Serve cut limes, cilantro, diced jalapeño, and diced onion on the side so that guests can add the items to suit their individual taste.
It occurred to me that I’ve shared recipes that use cast iron skillets and Dutch ovens but, most of those recipes showed how cast iron cookware can be used in the comfortable confines of the kitchen. The real beauty of cast iron cookware is what it can do outdoors!
There’s nothing like the unbridled, primal thrill that comes from cooking outdoors…just ask any backyard barbecue chef or weekend pit master.
My first outdoor cooking experience came when I was a Boy Scout. If there was such a thing as an underachiever merit badge, I would have earned it. Despite my short-lived, lackluster scouting career, I did learn a lot about nature, and I enjoyed camping and hiking with my friends. The extent of my cooking was usually limited to charred hot dogs, roasted on a skewer, or pouring a can of SpaghettiOs into my mess kit and warming it over the campfire, but I swear those were the best hot dogs and SpaghettiOs ever! Everything just tastes better when it’s cooked outdoors, over a lively campfire.
When I became a father, I rekindled my love of outdoor cooking when I became a father of Scouts. Both of my kids joined Scouting programs and, I am pleased to say they achieved ranks, knowledge, and experiences that far surpassed my pitiful attempt, so many years ago. I had the pleasure of cooking lots of meals and teaching kids how to cook outdoors. I took a deep dive into Dutch oven cooking.
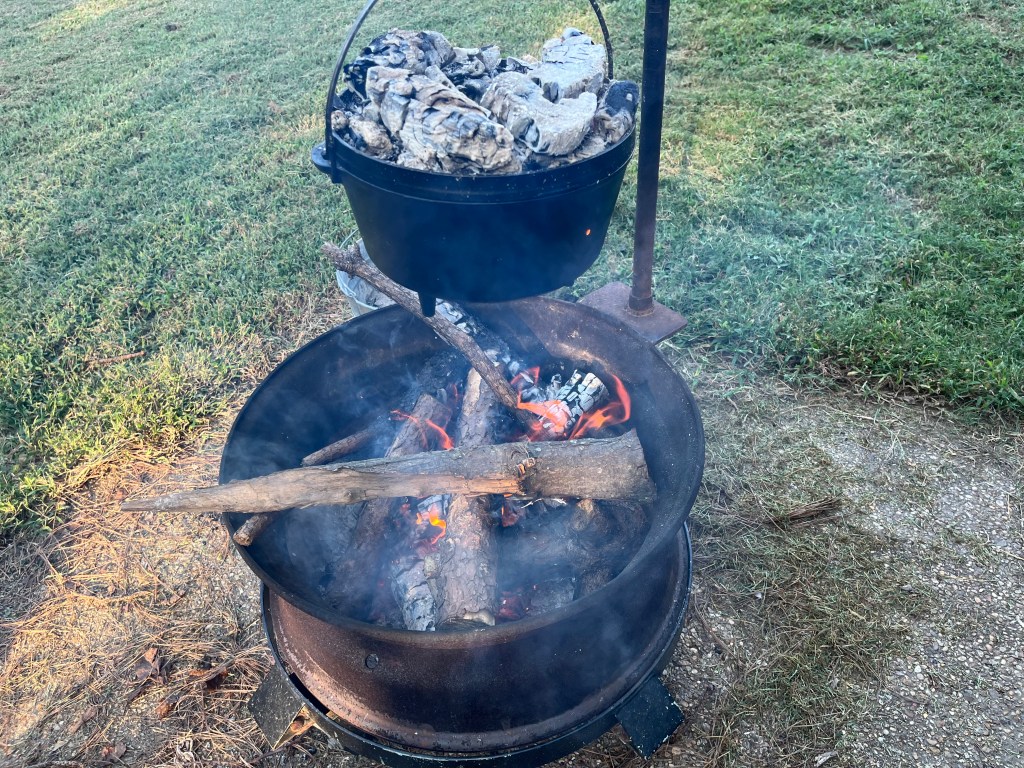
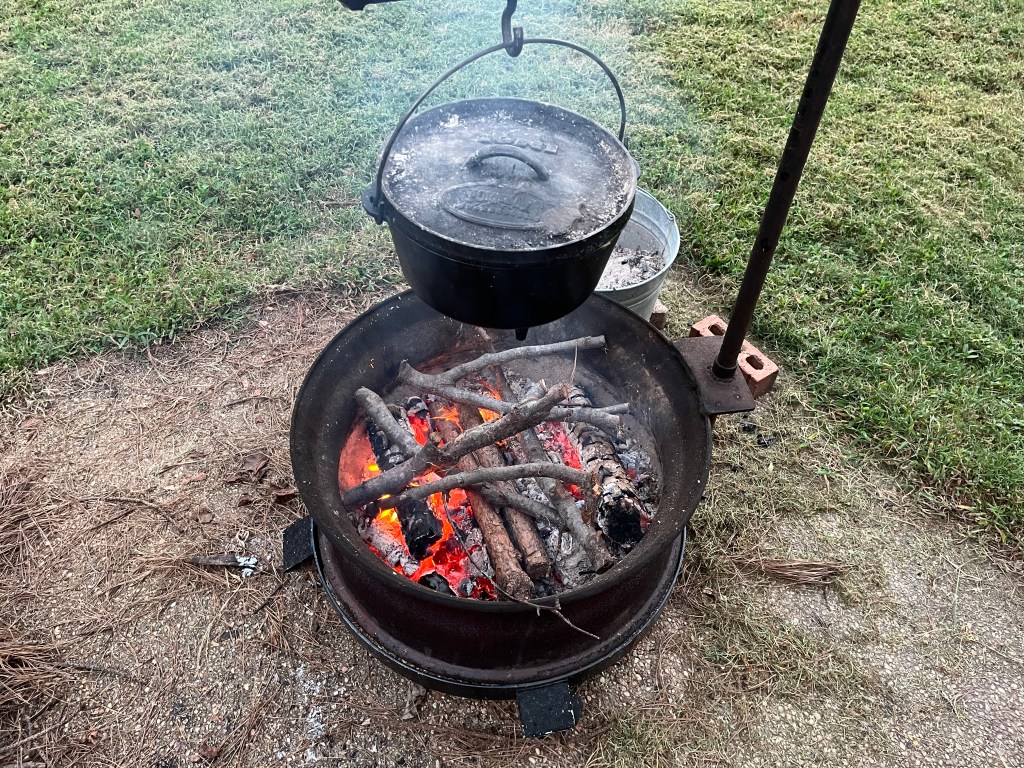
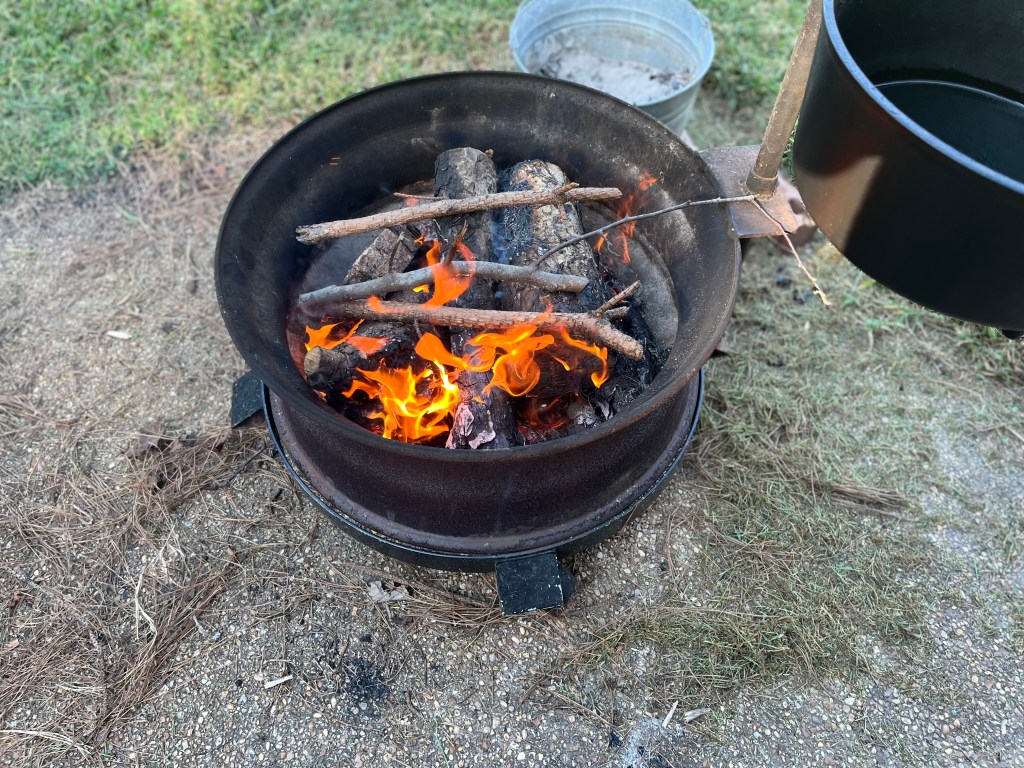
One of the “Scout dads” made a fire pit from a large, steel wheel rim. He added casters, so that it could be moved about easily, and he welded a pole to the base with a sturdy arm that could be used to suspend a Dutch oven. It’s very heavy and not something I would want to take on campouts, so I keep it on my back porch. I know that most people don’t have a cool handmade fire pit like this, but a simple campfire tripod can be purchased for a modest price, and it can achieve the same results.
Backyard Enchiladas
I made a few substitutions to the ingredients, based on what I had on hand. Feel free to use whatever ingredients you like! I used a 5-quart cast iron Dutch oven for this recipe. It’s a beast of a Dutch oven at 14” wide and 9” deep and it is perfect for making a big batch of stew, or a big batch of enchiladas! You will need some additional tools such as, fire resistant gloves, long metal tongs, a Dutch oven lid lifter, and a Dutch oven lid stand. You can find these items at an outdoor supply store, or shop online.
Total prep time (for me) was about 1 1/2 hours. Total cooking time for the enchiladas was about 1 hour.
Ingredients:
7 bone-in, skinless chicken thighs (about 2 ½ pounds)
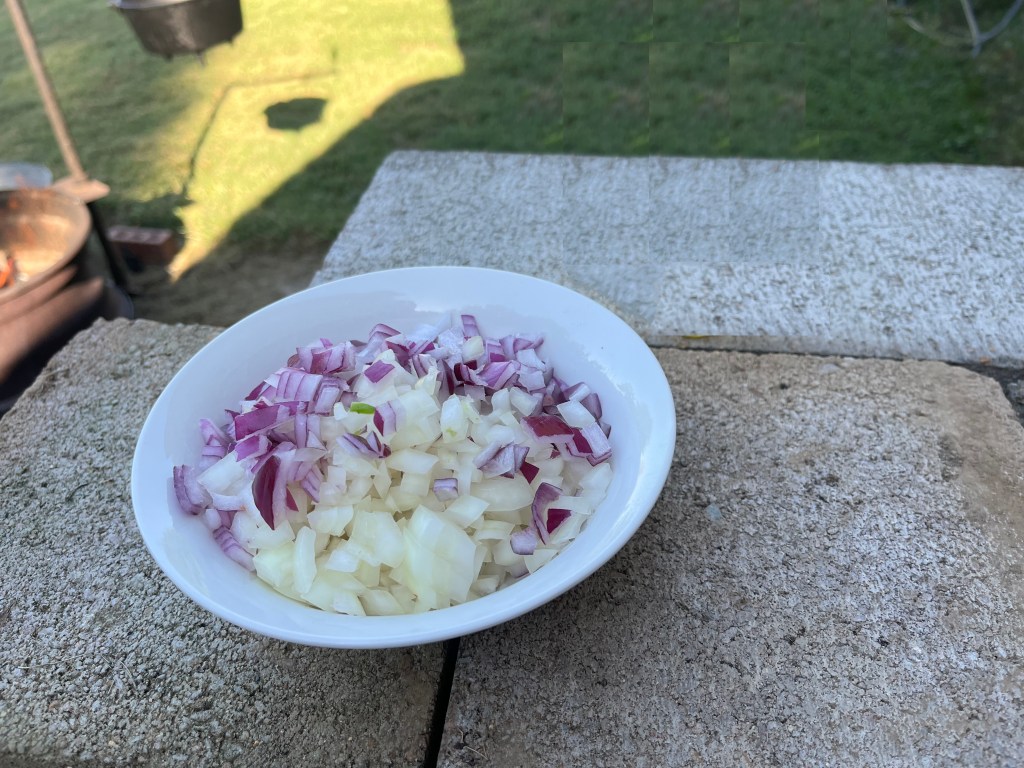
One large onion, diced (I used half of a red onion and half of a white onion)
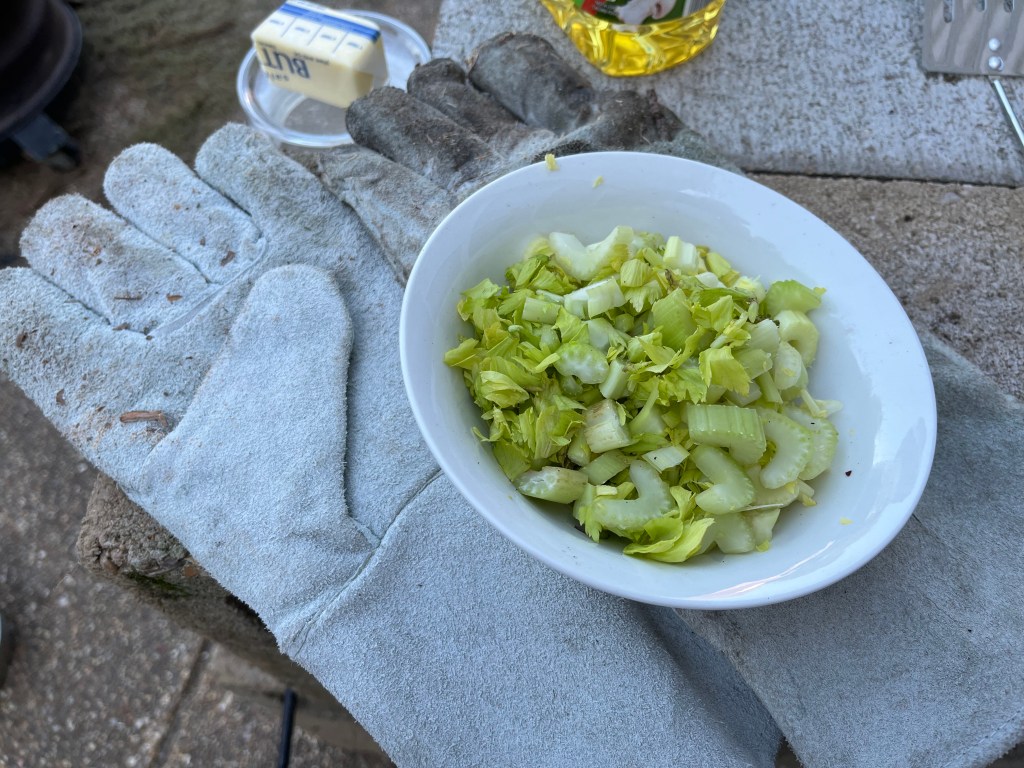
3 celery stalks (chopped)
4 tablespoons butter
6 tablespoons flour
32 ounces chicken broth
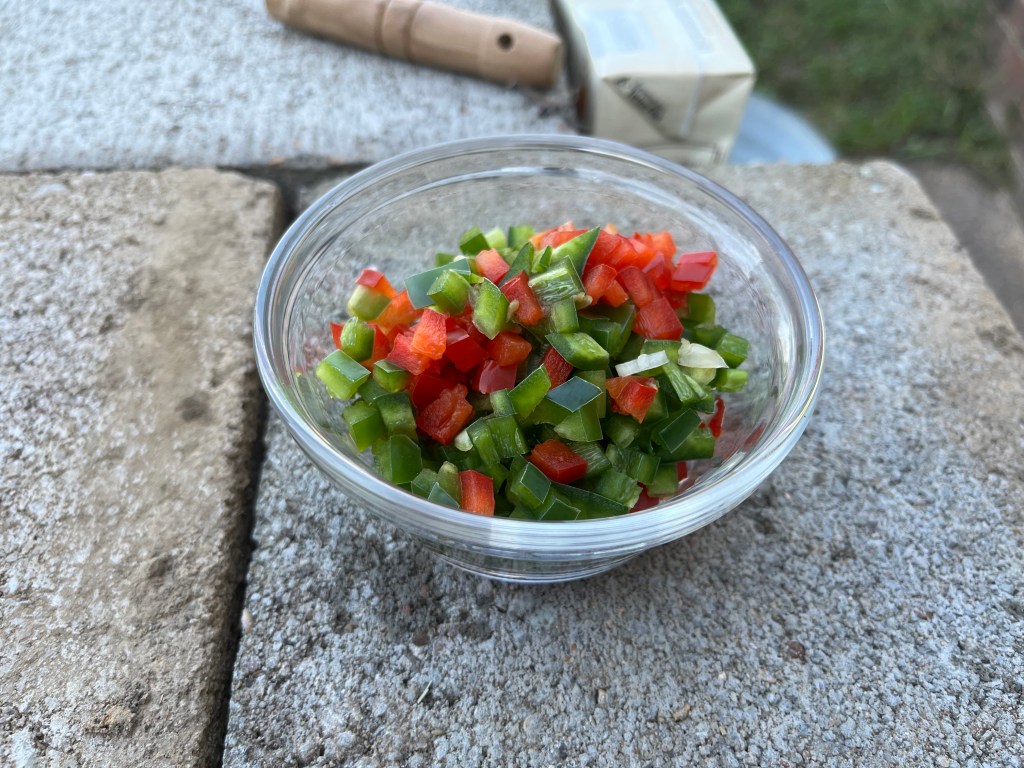
1 large jalapeño (seeded and diced)
¼ of a large red bell pepper (seeded and diced)
2 cups prepared green sauce (roasted, blended tomatillos and serrano chiles)
20 corn tortillas, pan fried in hot oil until they just become stiff, but pliable.
8 ounces Monterrey Jack cheese, shredded (I used Havarti cheese)
16 ounces cotija cheese (Mexican crumbing cheese)
½ cup fresh cilantro
Directions:
If there was ever a time to be fully prepared, cooking outdoors is it. Whether you plan on cooking in your backyard, as I have done, or cooking outdoors, far away from home, preparation is the key to success! If you plan on doing something like this on a camping trip, I suggest that you do all of the measuring, dicing, and chopping at home, in advance of your trip. Pack items that need to stay cool in a portable cooler and pack non-perishable items in a large tote bag or basket. I have found that things I can do quickly in my kitchen take much more time when I attempt to do them outdoors! I don’t like searching for utensils or cookware when I’m outdoors and I really don’t like trying to chop and dice vegetables on a wobbly surface, while I’m crouched in an awkward position. The idea is to make outdoor cooking fun, not to prove you can prepare the whole thing “from scratch”.
With that said, I will illustrate the various stages of preparation, but these steps do not have to be done in this order.
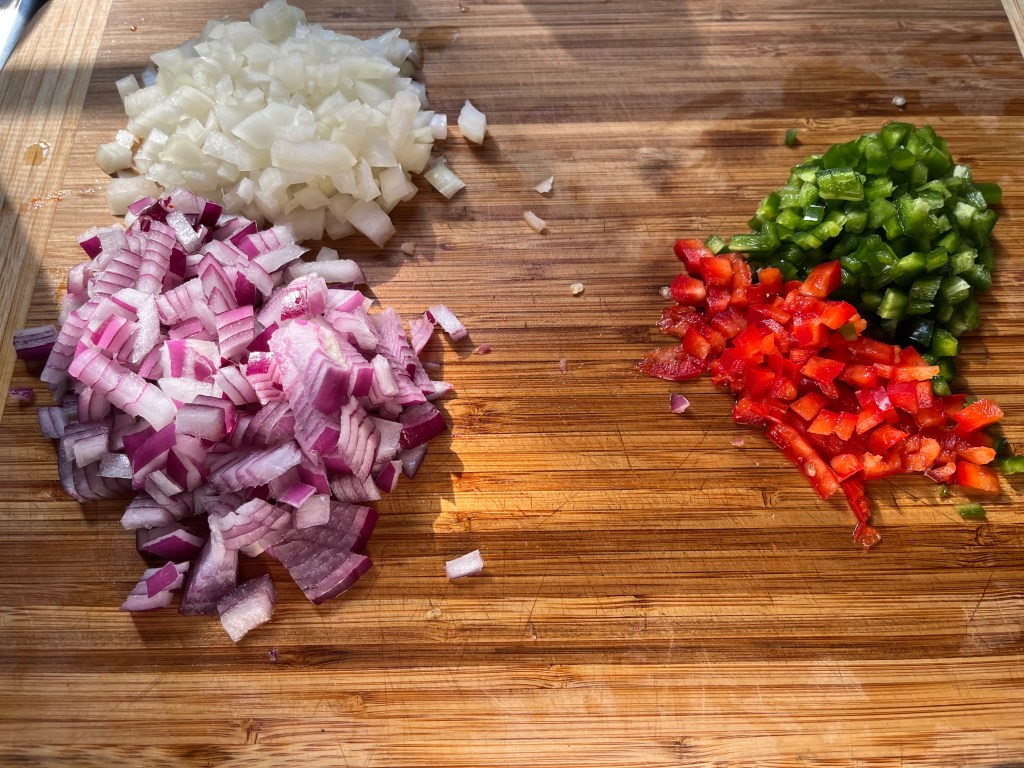
Prepare the Vegetables
Dice the onions and set aside.
Dice the jalapeño and red bell pepper and set aside.
Chop the celery (leaves and stalks) and set aside.
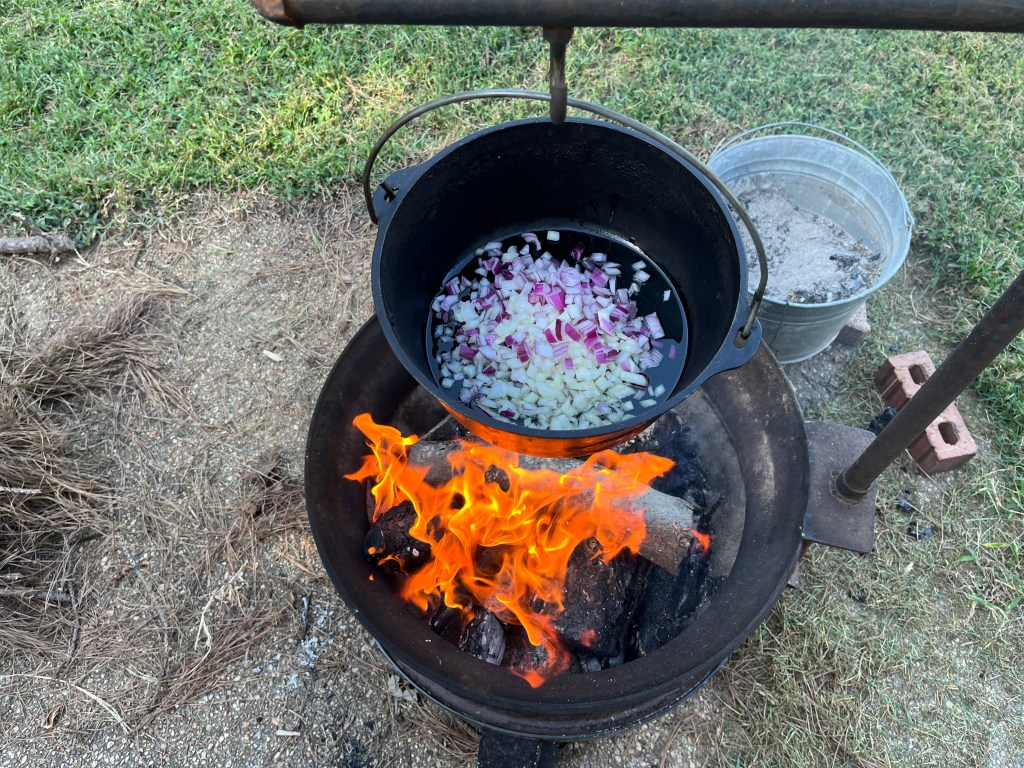
The Fire (and coals)
Start a fire and add logs to it to make a mound of hot coals. Keep adding more wood to maintain hot coals. I started the fire about an hour and a half before I cooked over it and I kept adding more wood during the cooking process.
Prepare the Tortillas
Add some cooking oil to a small pan and fry the corn tortillas to the point where they begin to stiffen but are still pliable. I did this on my stovetop, indoors, for convenience but, this could be outdoors over the coals, if you feel brave and adventurous. Set the tortillas aside.
Cooking the Enchiladas
Now that all of the prep work is done and the coals are raging hot, it’s time to cook!
Add just enough oil to cover the bottom of the Dutch oven. Add the diced onions and simmer over high heat for a minute or two.
Normally, I would trim the fat from the chicken thighs before cooking but, I wanted to render some of the fat to add flavor to enchilada sauce, and I wanted to avoid burning the chicken!
Pack the bone-in chicken thighs into the Dutch oven. (I put four pieces on bottom and three on top).
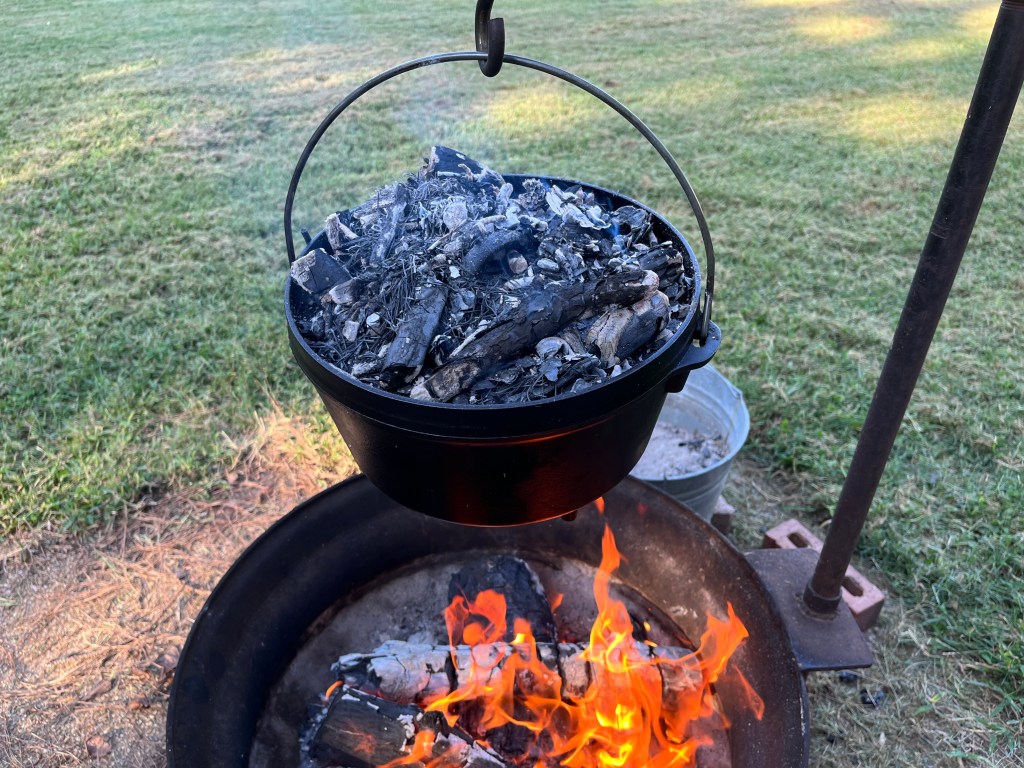
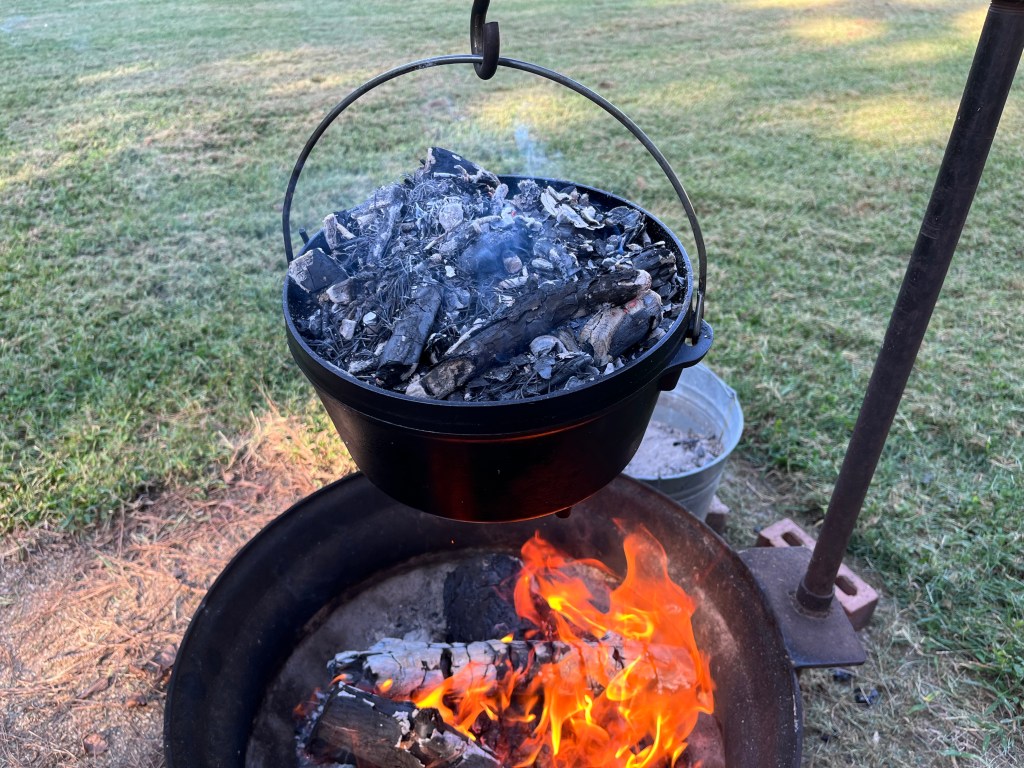
Cover the Dutch oven and pile plenty of hot coals on top of lid.
I piled on as many hot coals on top that I could. I wanted a lot of heat coming from top and bottom.
Cooking time will depend on how hot the coals are and how close the Dutch oven is to the heat source. Rotate the lid a quarter turn every ten minutes to ensure that the heat is evenly distributed. Luckily, when I checked the chicken after twenty minutes it was sufficiently browned and cooked. If you’re using a thermometer, the internal temperature of the chicken should be at least 165º F.
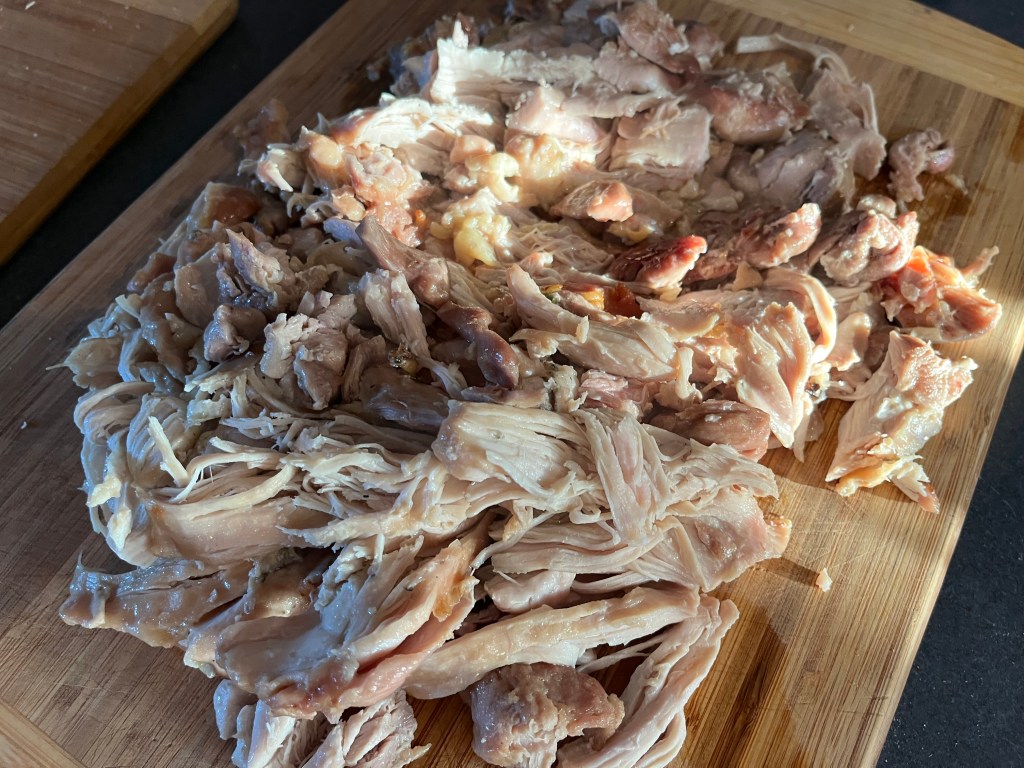
Remove the Dutch oven from the fire and remove the cooked chicken. Allow the chicken to rest and cool for a few minutes. I took the chicken inside and set it on a cutting board. Pull the chicken from the bones. Discard bones and any tough pieces of cartilage. If the chicken does not easily pull away from the bone, it hasn’t cooked long enough. Throw it all back into the Dutch oven and finish cooking.
Shred the chicken with a knife and fork.
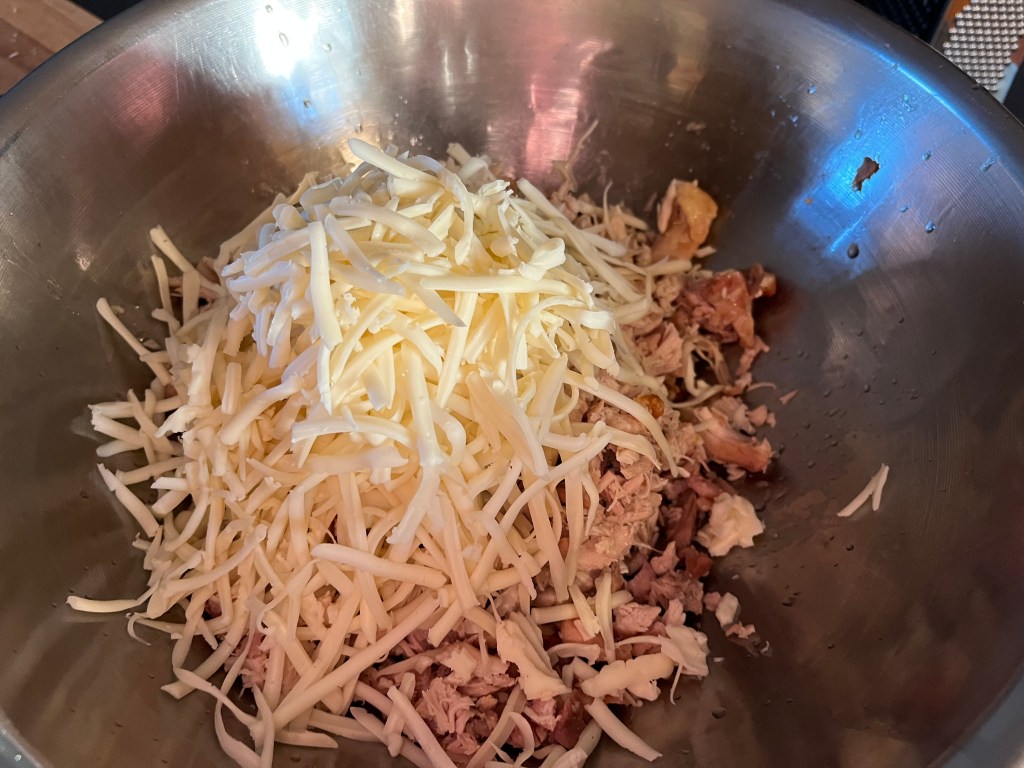
Shred the Monterrey Jack cheese ( I substituted with Havarti) and add the cheese to the shredded chicken. Mix well.
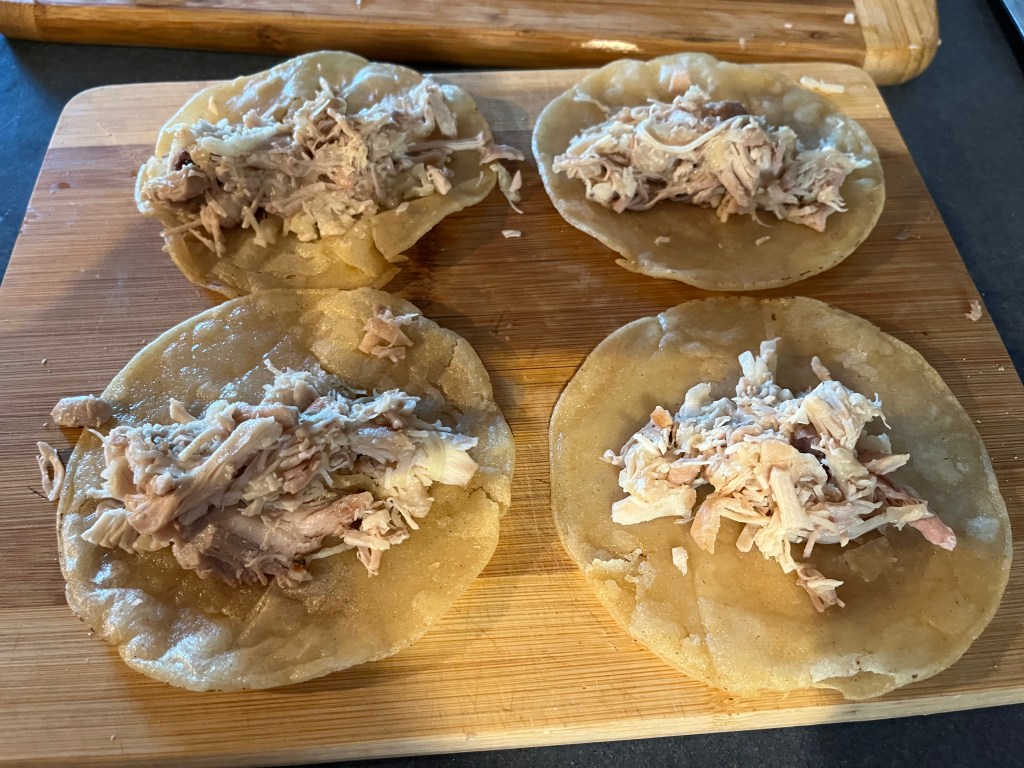
Assemble the enchiladas by placing the chicken and cheese mixture into prepared tortillas and wrapping them. Set the rolled enchiladas aside.
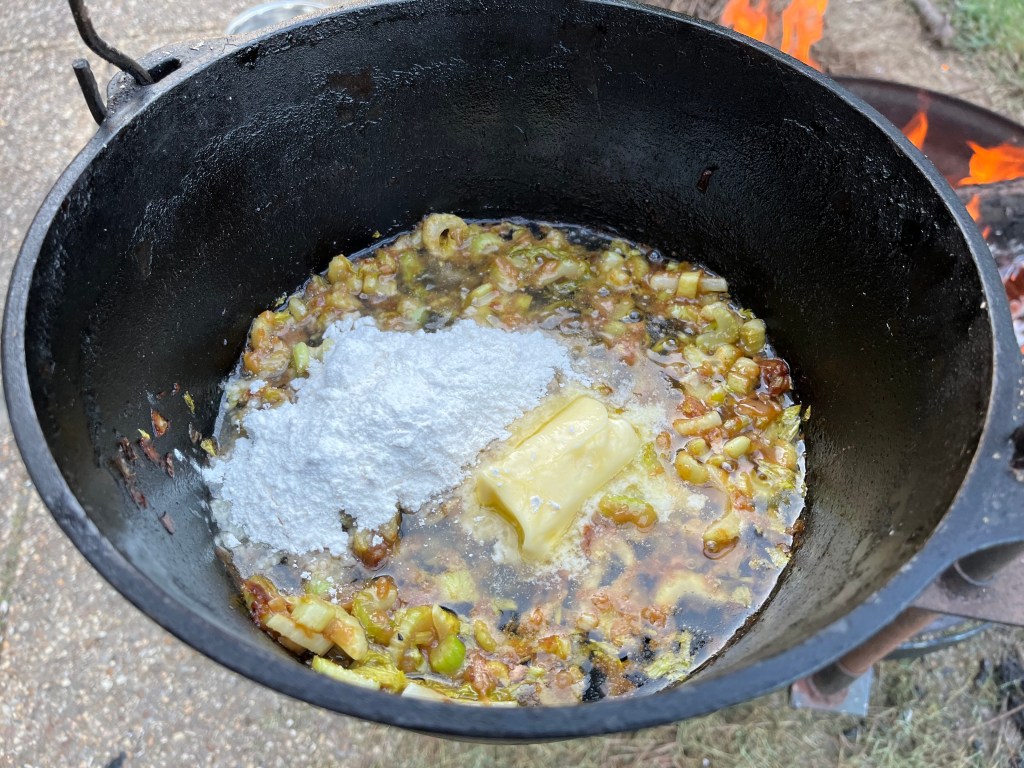
Place the Dutch oven back over the hot coals. Add the chopped celery and simmer, while stirring occasionally, for about 5 minutes.
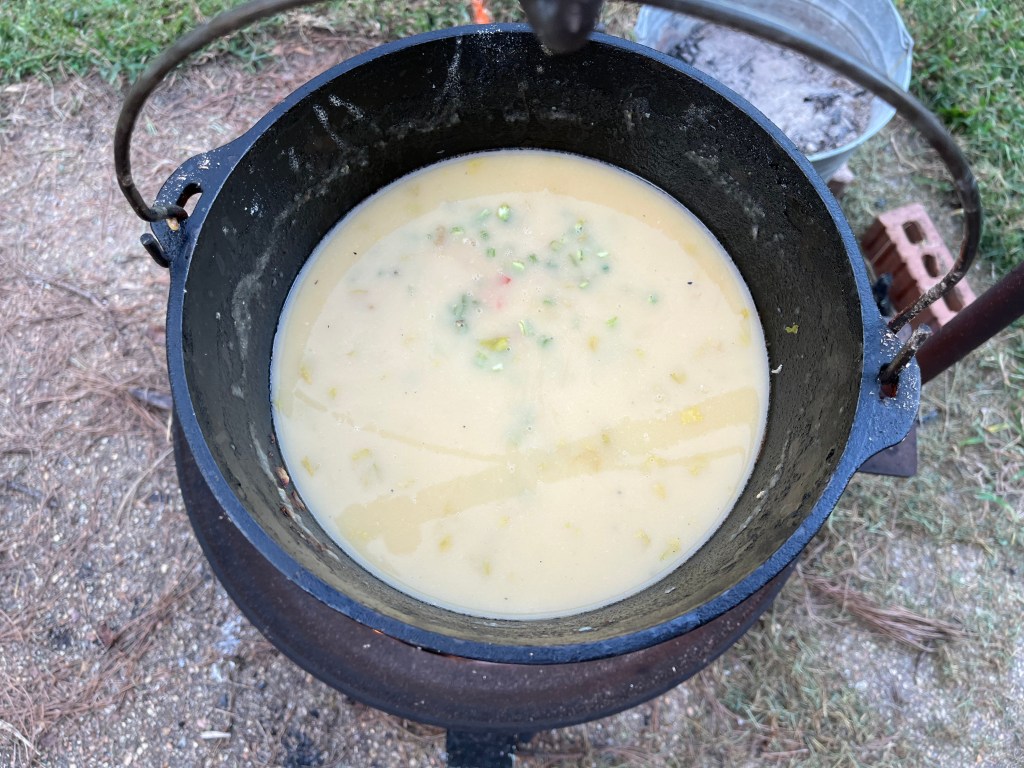
Add butter and flour. Whisk for a few minutes until the mixture makes a smooth roux.
Add the chicken broth and continue whisking for a few minutes, until the sauce thickens.
Add the chopped jalapeño and red bell pepper. Mix briefly.
Add the prepared green chile sauce and mix to incorporate. (Note: I used a homemade green chile sauce but, a good store-bought salsa verde will also work. Serrano chiles bring a significant amount of heat to the sauce I made. I used 1 serrano to every 6 or 7 tomatillos. It made a very spicy sauce but, when I added it to the enchilada sauce, it mellowed and gave the sauce a nice “green” flavor to the sauce. That’s what I look for in chicken enchiladas…a nice, spicy “green” flavor).
Here comes the tricky part! After the sauce was ready, I carefully poured half of it into a very large bowl. I knew that the enchiladas were going be stacked on top of each other, and I wanted to make sure that they were surrounded by the sauce. It might not have been necessary, but I wanted to achieve homogeneity. (Hey, my spell checker is telling me homogeneity is really a word!) Pouring a sauce from a very hot and very large Dutch oven is not easy! It requires a good deal of strength and skill. If you’re not up to the challenge, just use a ladle to remove half of the sauce.
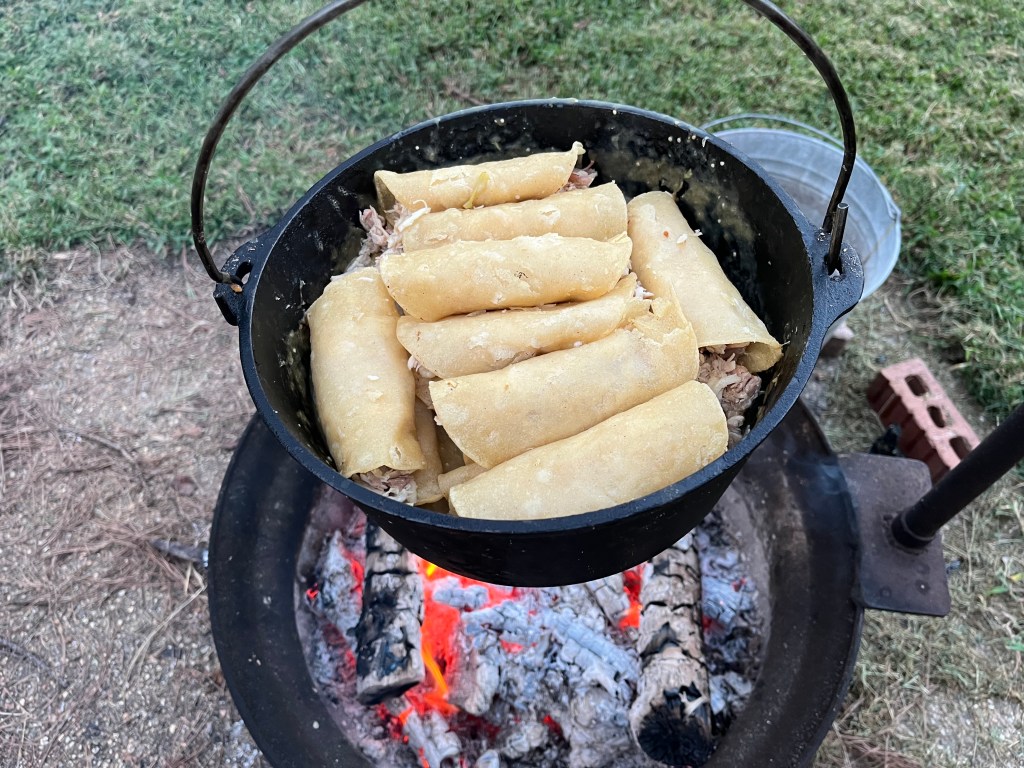
Carefully add a layer of enchiladas to the Dutch oven.
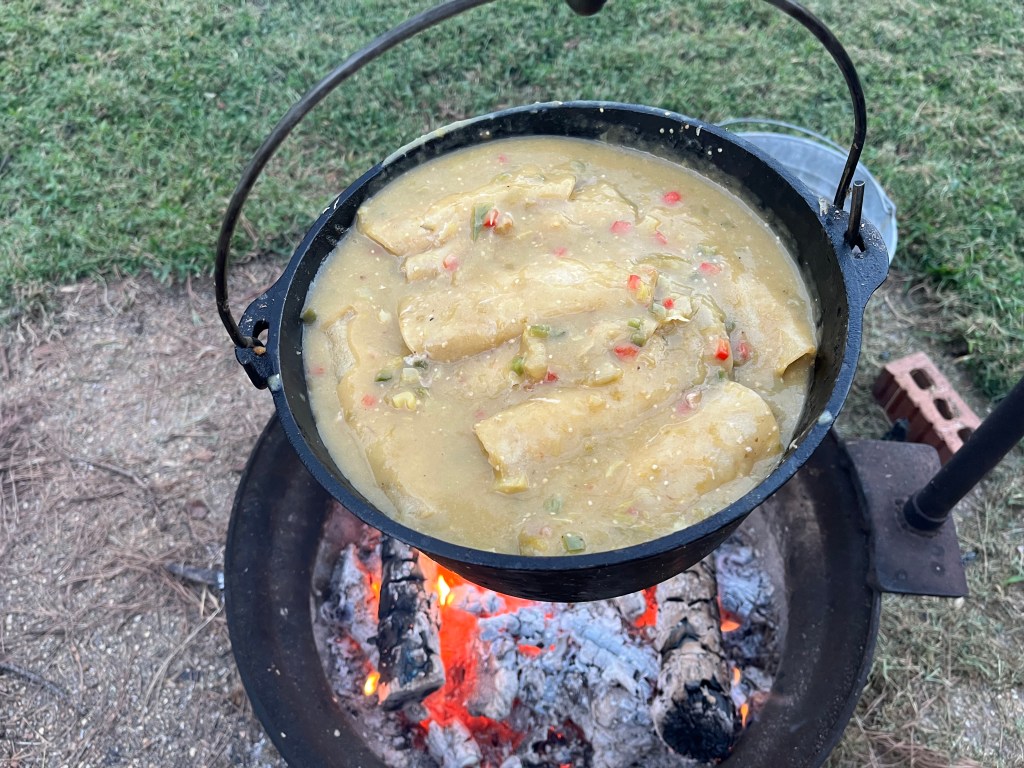
Stack the remaining enchiladas on top and pour the remaining sauce over them.
Cover and simmer over medium heat for about 15 minutes. No need to add coals to the top, this time!
Remove the Dutch oven and let it rest, uncovered for a few minutes.
It’s time to dig in!
Pull the enchiladas out of the Dutch oven with tongs or ladles. They’re going to break apart either way, so don’t worry about glamorous presentation!
Serve with rice, cotija cheese, cilantro, and a fresh, cool salad. (Adding cucumbers to the salad will offer some relief in case the enchiladas are too spicy)!
I didn’t intend on making Mediterranean-style pork chops but, after scanning through the pantry and refrigerator, I found several items that needed to be used before they passed their prime and spoiled. I know this isn’t an elegant way to kick off a food blog post but, it’s the truth, and as a simple home cook, I know there’s plenty of cooks out there that have felt the painful guilt that comes when they discover that their grocery store purchases have rotted away, untouched and ignored.
Let’s take a look at our middle-aged cast of characters, shall we?
One pound of small yellow and red potatoes, about three weeks old.
4 small poblano chiles, fresh from my neighbor’s garden – two weeks ago!
3 tomatoes, picked pipe from my garden, a week ago.
½ red onion that must have been two weeks old.
A lemon, that held up surprisingly well for two weeks in the refrigerator.
Two pounds of bone-in pork chops, that passed the smell test after 7 days in the refrigerator.
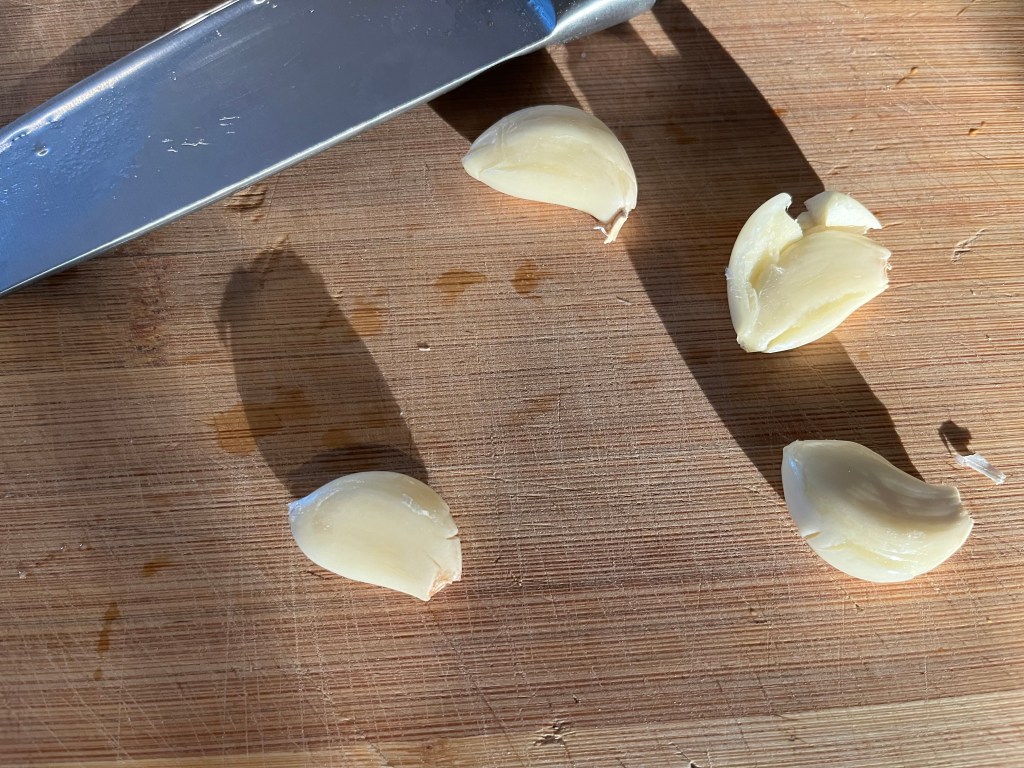
Once I gathered the aging actors together for this ensemble, I brought in a young, vibrant supporting cast including, fresh garlic, Kalamata olives, and green and black olives.
Ingredients:
4 Tbs. olive oil, divided
4 garlic cloves
1 ½ – 2 lbs. pork chops
½ cup water
1 lemon, sliced into ¼” thick circles
¼ cup wine (red or white)
1 lb. small potatoes (mix of yellow and red)
½ red onion, chopped
4 small poblano chiles
3 medium, ripe tomatoes, chopped
1/3 cup Kalamata olives
1/3 cup black olives
1/3 cup green olives
Directions:
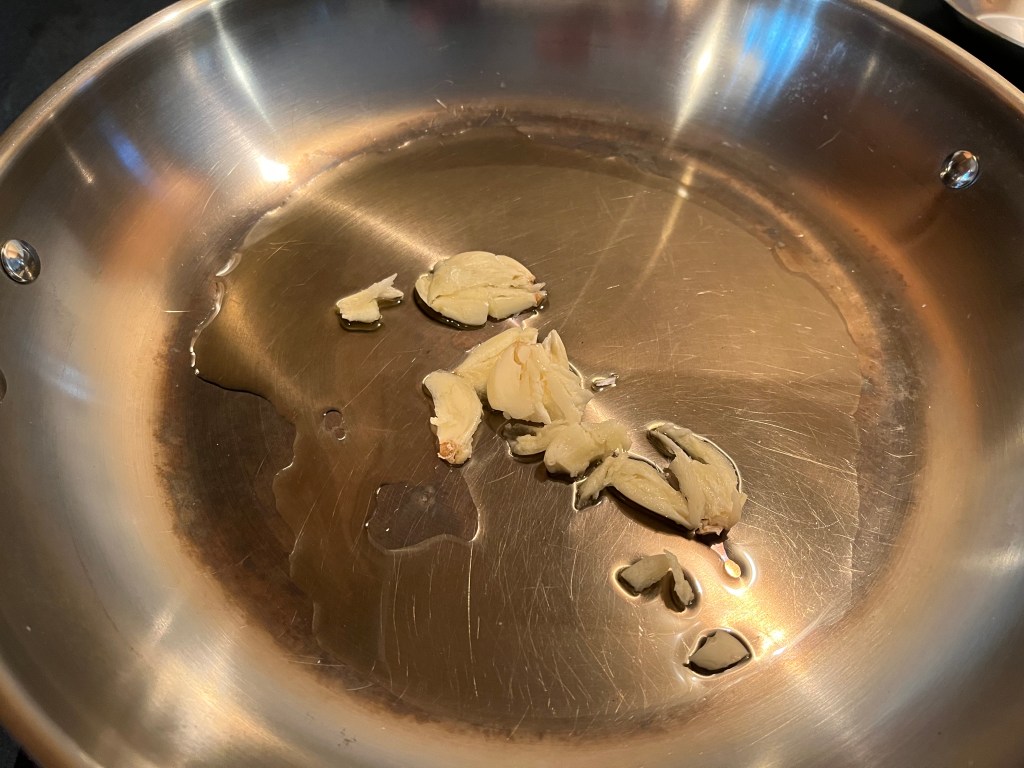
Mash the garlic cloves.
Add 3 tablespoons of olive oil to a large, oven-proof skillet. Set heat to low. Add the garlic and simmer for a few minutes.
Remove the bones from the pork chops. (I only did this because I knew that I wouldn’t be able to fit all of the pork chops in the skillet unless I removed the bones.) Sprinkle the chops with salt and pepper.
Add the pork chops to the skillet and turn heat to medium high. Sear the pork chops for a few minutes and turn them over to sear the other side.
Remove the pork chops and garlic and set aside.
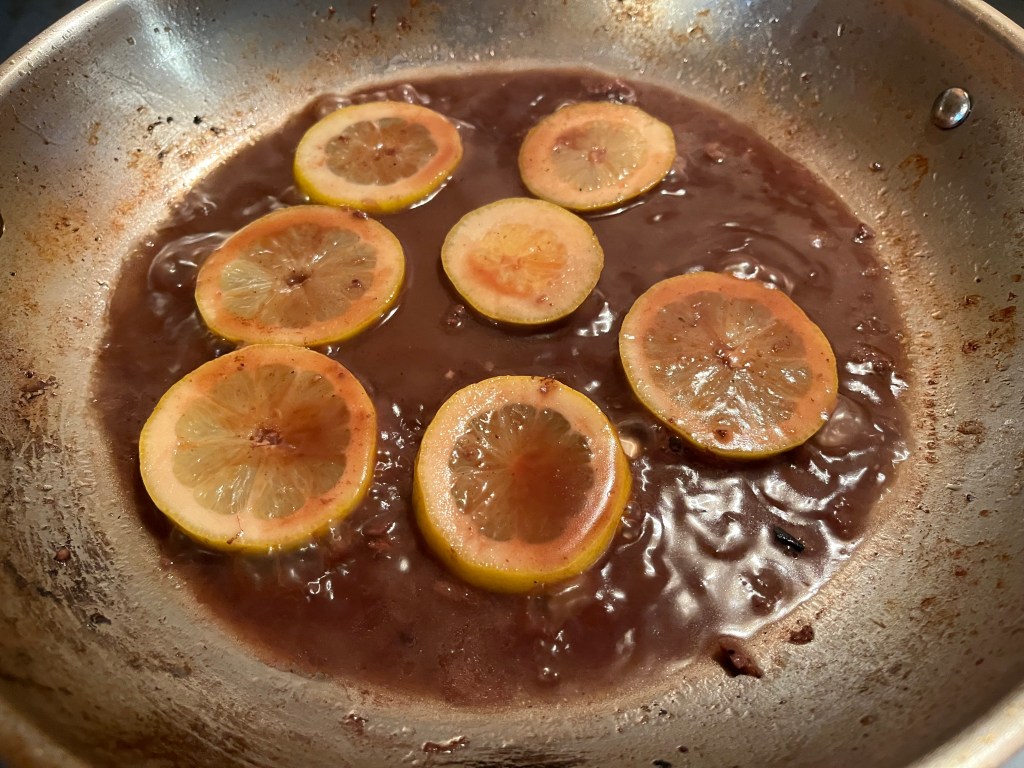
Add about ½ cup of water to the pan and deglaze by whisking. Add wine and simmer at medium heat for two minutes.
Add the lemon slices to the skillet. Reduce the sauce, while stirring occasionally, for about 5 minutes.
Remove the sauce to a bowl and set aside.
Wipe the skillet, to remove any remaining sauce. Add 1 tablespoon of olive oil. Add potatoes and toss, to thoroughly coat the potatoes with oil. Season with black pepper and salt. Toss again and bake in the uncovered skillet in a 350° oven for 40 minutes.
Carefully remove the skillet from the oven and pour the potatoes into a large bowl.
Add the seared pork chops and garlic back to the skillet.
Cover the pork chops with the potatoes.
Add a pinch of oregano to the chopped tomatoes and toss gently.
Add the chopped onion, tomatoes, chiles and lemon slices.
Top with olives.
Bake 30 minutes in a 350° oven.
Carefully remove the pan from the oven and place arrange the ingredients on a large serving platter.
One final thought: The only thing worse than throwing away perfectly good food that is reaching the end of its life expectancy is serving food that has gone bad or spoiled. If it smells bad, looks bad, feels bad, or tastes bad, it’s bad. Toss it and move on with your life! Your friends and family will thank you.
The month of July has been a brutal test of our endurance, here in the South. Daily high temperatures have ranged from 92° to 99°, with heat indexes as high as 110°, due to the high humidity. It’s been a long, relentless stretch of extreme heat, but I’m not telling you anything you don’t already know if you live somewhere on this planet.
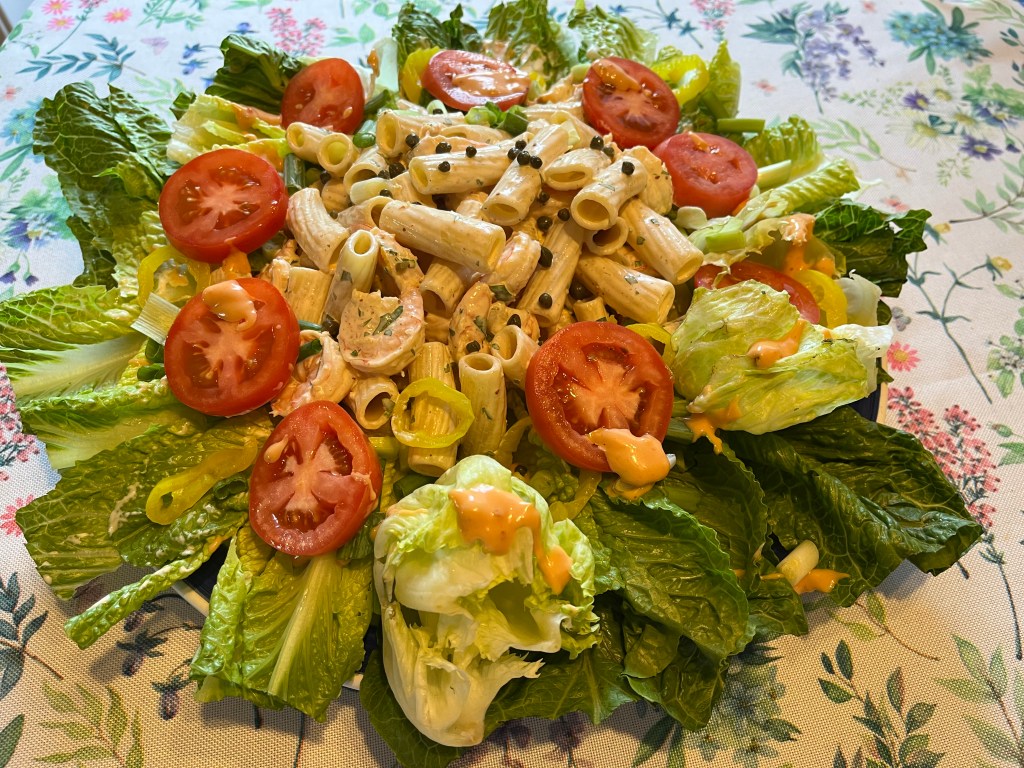
One way to beat the heat is to have a cool, refreshing salad and one of my favorites is shrimp remoulade. I’ve made this many times and I rarely adhere to a strict recipe, and that’s one of the things I like most about the salad. It’s versatile and easy to make.
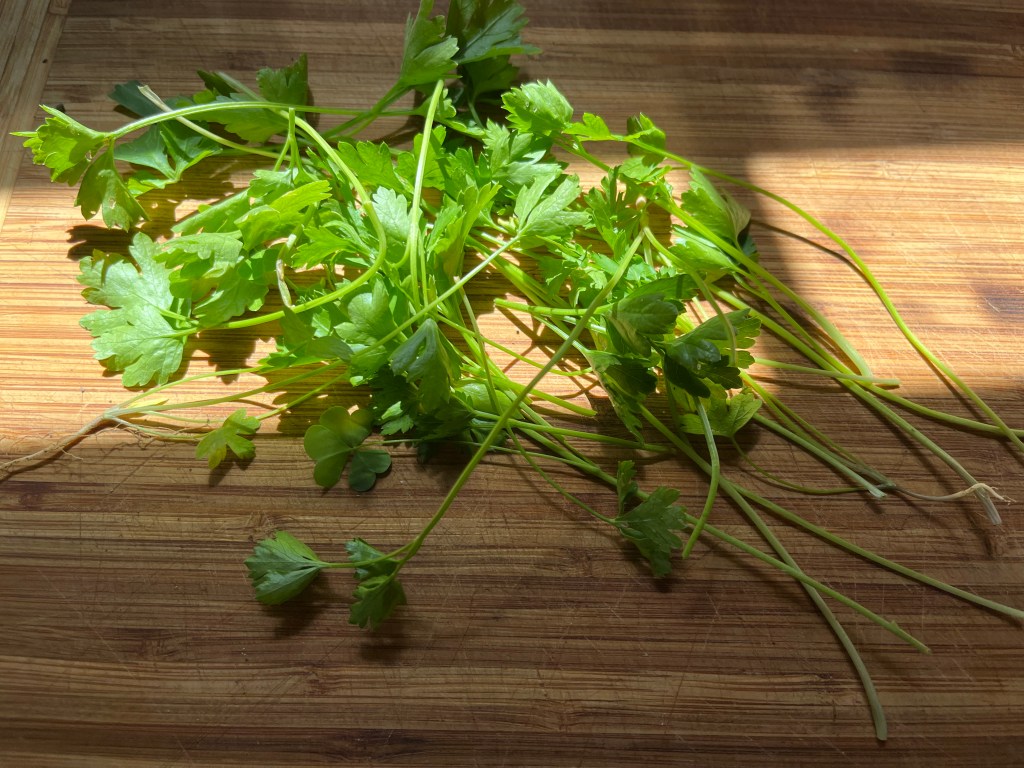
As usual, I looked at items I had on-hand to help steer the recipe. The parsley, from my garden, didn’t produce much this year, but it contributed to one of the essential ingredients in a respectable remoulade. We had a bunch of lemons that need to be used, so I used the juice in the remoulade, and I added the rest of the lemons to a half gallon of water, for the shrimp boil.
Any size of shrimp can be used. I used one and a half pounds raw, peeled, and deveined jumbo shrimp.
Finally, if you want to do it right, use Duke’s mayonnaise. I used to think that mayonnaise was mayonnaise, regardless of the brand. That’s until I performed a side-by-side taste test to compare Duke’s to another leading brand. I strongly suggest doing that with all sorts of store-bought items, when possible. I found that Duke’s has a rich, robust flavor that the other brand didn’t have. (I’m not getting money or sponsorship from Duke’s…I just like the stuff.)
Ingredients:
Juice from 2 lemons (reserve lemon rinds for shrimp boil)
2/3 cup mayonnaise (Duke’s, of course!)
1 Tbs horseradish (I used horseradish mustard)
1 Tbs Dijon mustard
1 tsp Louisiana hot sauce
½ tsp cayenne pepper
¼ cup fresh parsley leaves, chopped (reserve stems for shrimp boil)
8 cups water
4 or 5 large bay leaves
1 Tbs Cajun seasoning
1 Tbs Old Bay seasoning (or any other seasoning mix that you like)
3 garlic cloves, crushed
1 ½ lbs raw shrimp (peeled and deveined)
8 ounces uncooked pasta (I used rigatoni)
1 head of romaine lettuce (trimmed)
¼ head of iceberg lettuce (cut into wedges)
2 Roma tomatoes, sliced
1 green onion, chopped
1 or two pickled banana peppers, sliced
2 tsp capers
Directions:
Trim the parsley and reserve the stems for the shrimp boil.
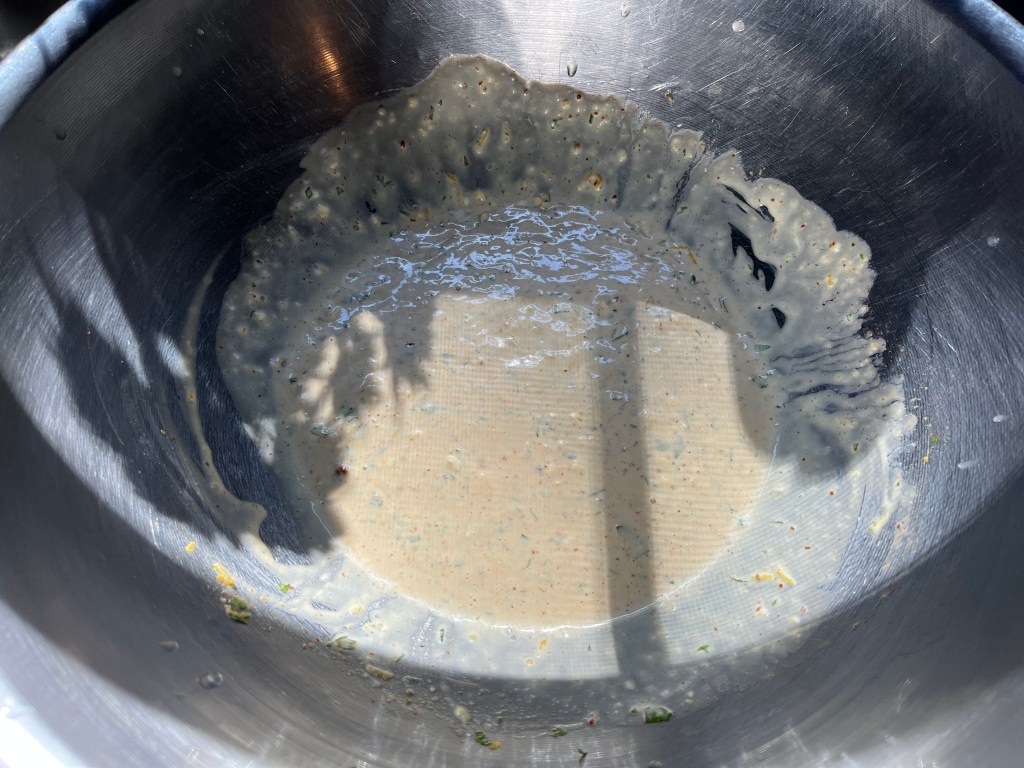
To make the remoulade sauce, start by adding lemon juice to a mixing bowl. Add mayonnaise, horseradish, Dijon mustard, hot sauce, and cayenne pepper. Add the chopped parsley. Mix thoroughly. Store for at least 20 minutes, or up to one day, in a refrigerator.
Prepare the pasta according to the directions on the package. The finished pasta should be cooked just the point where it is soft, but not overcooked. Rinse the pasta under cool water and chill, until needed.
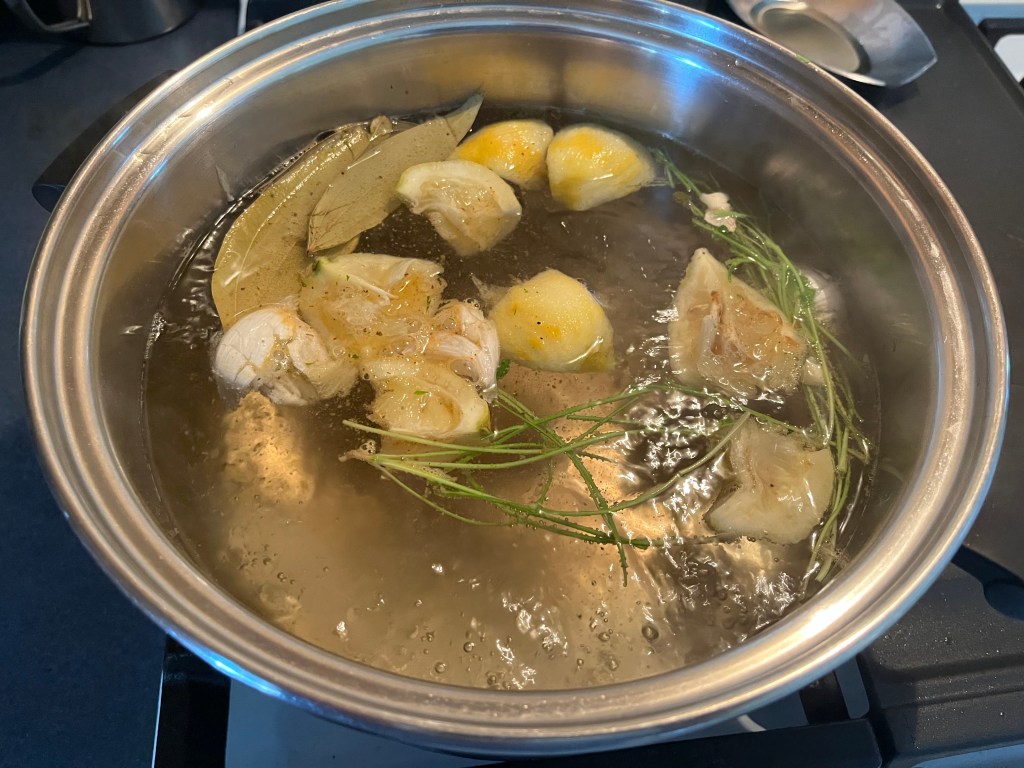
Bring 8 cups (one half gallon) of water to a rolling boil in a large pot. Add lemon rinds, parsley stems, Cajun seasoning, Old Bay seasoning and garlic.
Continue to boil for a minute and then turn the heat off.
Add shrimp and stir gently for about two minutes, or until the shrimp turn pink and are tender.
Strain the water from the shrimp. Run cold water over the shrimp until the shrimp are cool to the touch.
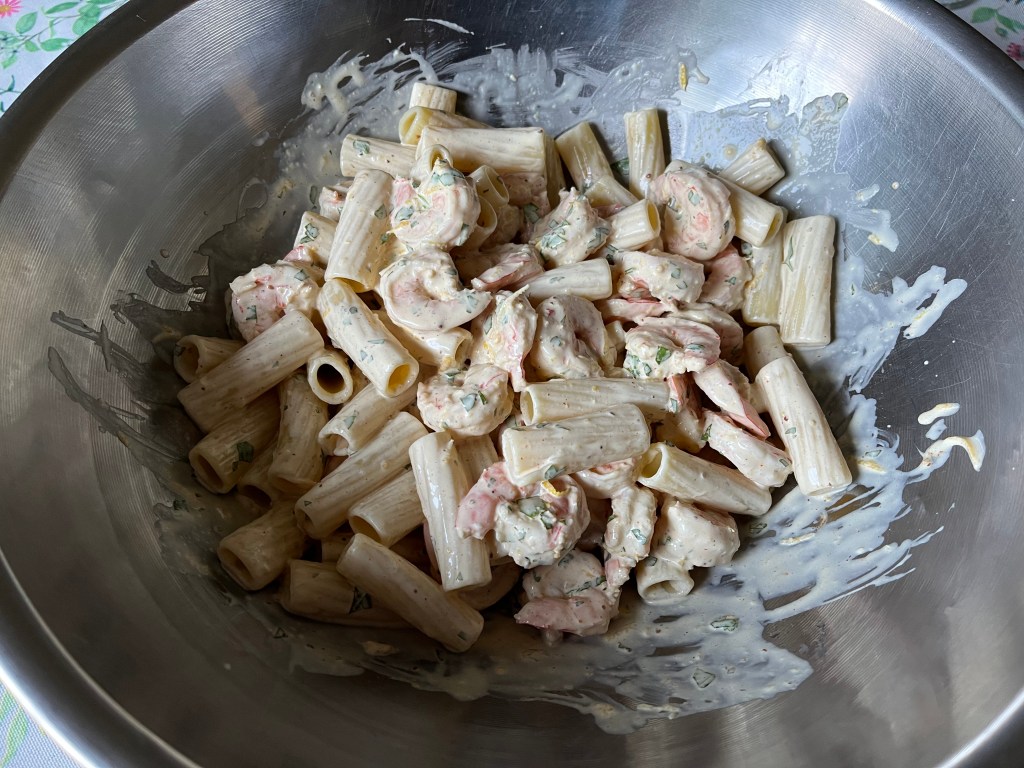
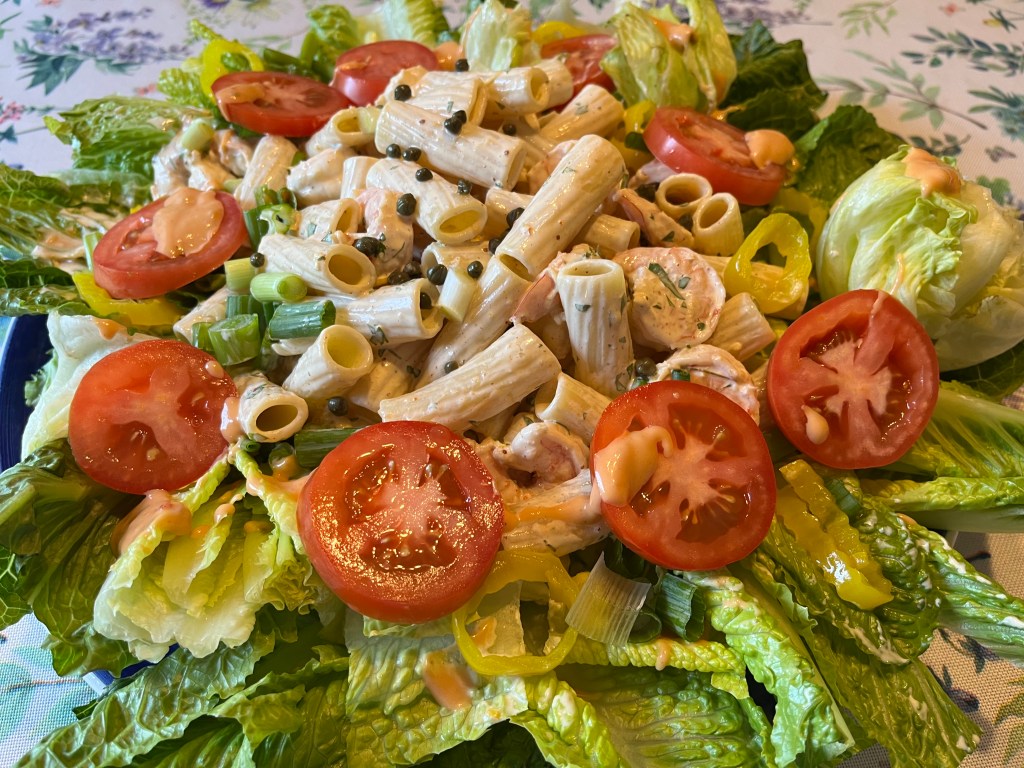
Add the shrimp and pasta to the remoulade and stir gently to coat the ingredients with the sauce.
Arrange romaine lettuce around the rim of a large platter and scatter a few wedges of iceberg lettuce.
Add the shrimp remoulade to the platter. Top with tomato slices, banana peppers, green onion, and capers. Serve chilled.