Crazy Bread

First things first, this isn’t a copy-cat version of the Little Caesar’s classic. 

But, since I brought up Little Caesar’s Crazy Bread I feel the urge to share my thoughts on that ingenious invention.  Long, long ago, in a past career, I was once versed in food cost and clever marketing.  I remember when Little Caesar’s came out with Crazy Bread.  My first thought was, “Well… some marketing guru just earned a big bonus!”

The idea behind Little Caesar’s Crazy Bread is so simple that it needs no explanation, but really, it does.  Successful restaurants make money when they focus on selling mass produced low food cost items.  Conversely, they run the risk of going belly-up if they dabble too much in high food cost items…especially high food cost items that have a short storage life. 

Dough is cheap.  Little Caesar’s knows that.  That’s why they can sell a large pizza for $5. Throw on a little sauce, some cheap cheese and one topping and sell the pizza for five bucks.  They don’t make a ton of money off of the pizza but they sell a lot of them.  Overall food cost for the pizza is probably between 1 and 2 dollars.

About 20 years after Little Caesar’s came into being, they figured out how to increase their profit margin with a gimmick.  Crazy Bread is nothing more than bread dough with a dusting of dried parmesan cheese.  They’re very cheap to make.  They sell 8 bread sticks for just few dollars.  The ingenious part of their scheme is the sauce.  What’s a bread stick without marinara sauce?  Oh, sure you can eat a bread stick without sauce but wouldn’t it be much nicer to dip the soft bread stick in warm marinara sauce?  Mmmmm.   Is a 4 ounce cup of marina sauce worth 60 cents?  You bet!  And that’s where they make the money.  Here we are, nearly 40 years after Crazy Bread was introduced and it’s still going strong.

Don’t get me wrong, I don’t have anything against Little Caesar’s or their Crazy Bread and I’m all for capitalism.  I just find this sort of stuff fascinating! 

OK, enough of that…let’s dig into some of my crazy bread.

As I have mentioned previously, I have been working long hours and I don’t have much time to make elaborate meals, or much time to document them for my blog!  I came home rather late one night, recently and knew I had to come up with something quick to prepare.  My first thought was to check the refrigerator for things that might spoil, if not used soon.  Raw meat always tops the list of things to check.  I saw a pound of sweet Italian sausage and knew that it had been in the refrigerator for about three days.  A pasta dish came to mind but I really didn’t want to make a big production.  And then my mind went to bread.  I didn’t stop to think.  I started to make a quick, simple bread dough.  While the dough rose I browned the sausage in a pan and shredded some extra sharp cheddar cheese.

Total time to prepare from start to finish:  1.25 hours.   It was worth the wait!

Ingredients:

3 cups flour

1 packet instant, fast rising  yeast

1 1/4 cup warm water

1 Tbs garlic powder

1 tsp crushed red pepper flakes

2 tsp sugar

1 Tbs honey

1 lb sweet Italian bulk sausage

1 cup grated extra sharp cheddar cheese

Directions:

Mix 2 cups flour, yeast and garlic powder with a whisk.  Set aside.

Add the honey and sugar to a large mixing bowl.

Heat the water in a microwave or stove top to about 100°.  Add the water to the mixing bowl and whisk to blend with the sugar and honey.

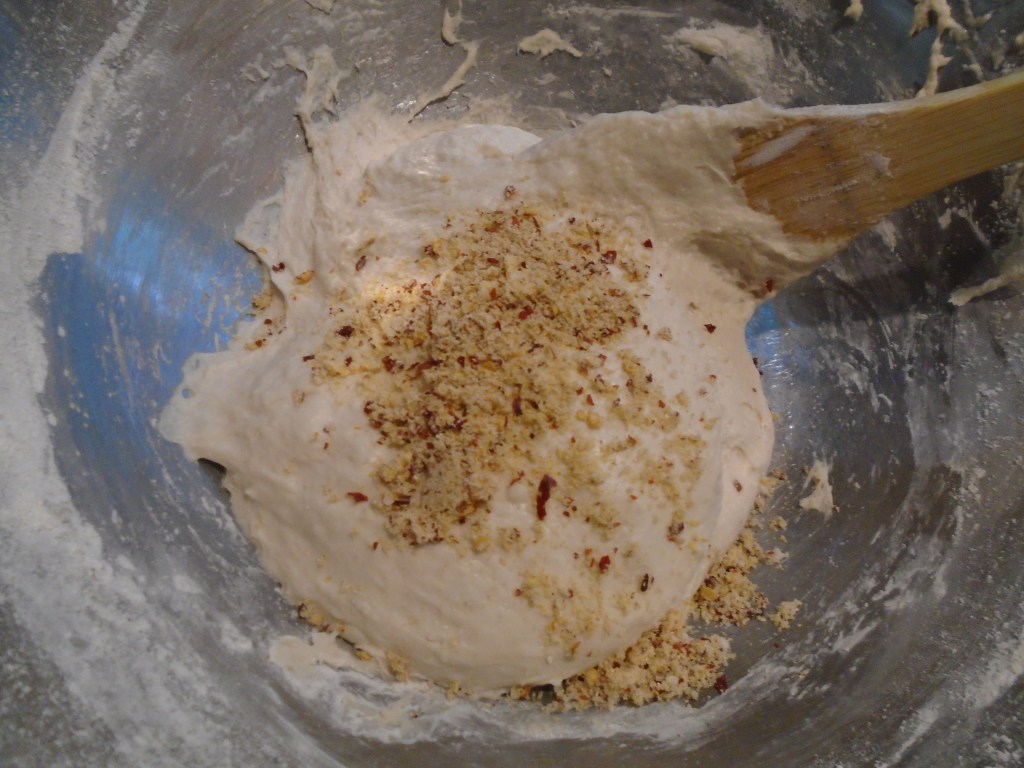
Slowly add flour mixture and stir with a spatula. 

Add the crushed red pepper and garlic powder.  Mix to combine thoroughly.   Slowly add the rest of the flour and mix by spatula and then by hand.

Turn the dough out to a lightly floured surface.  Knead for a few minutes until the dough becomes a firm and forms a ball.

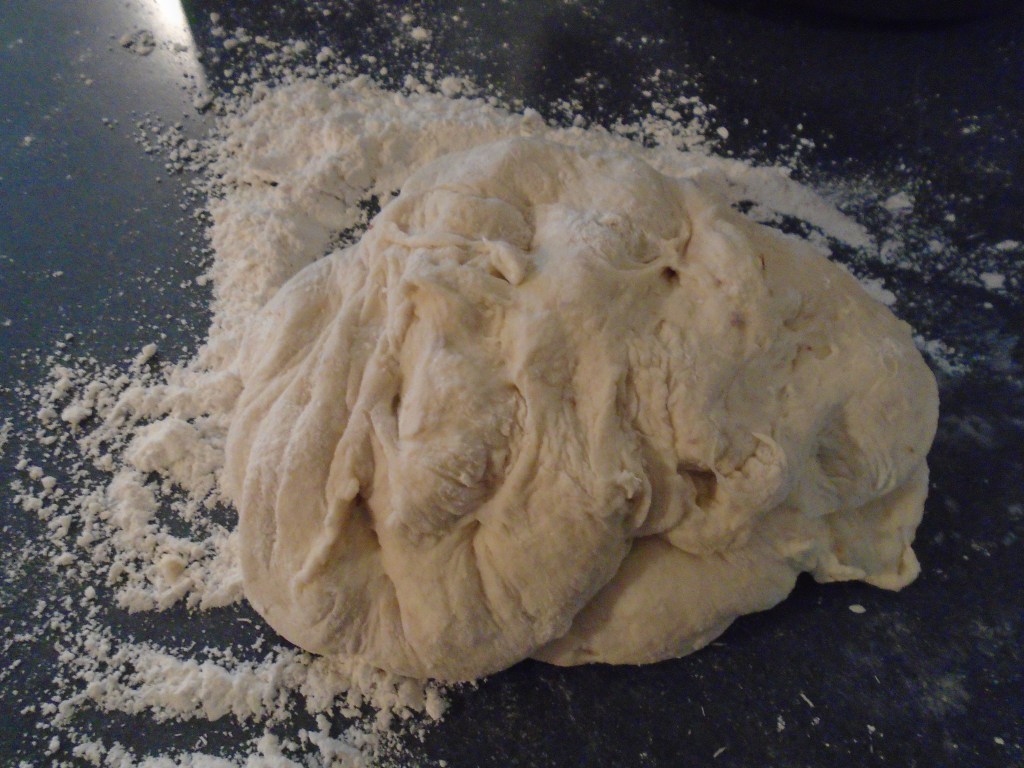
Return the dough to the mixing bowl, cover with foil and keep in a warm place.  Let the dough rise for at least 45 minutes.

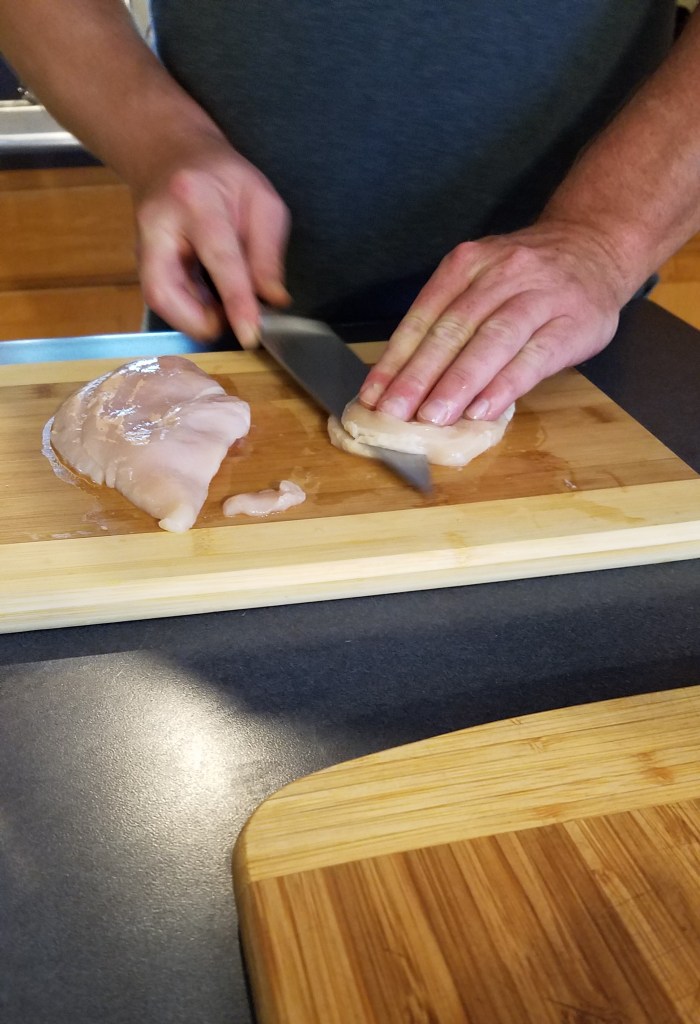
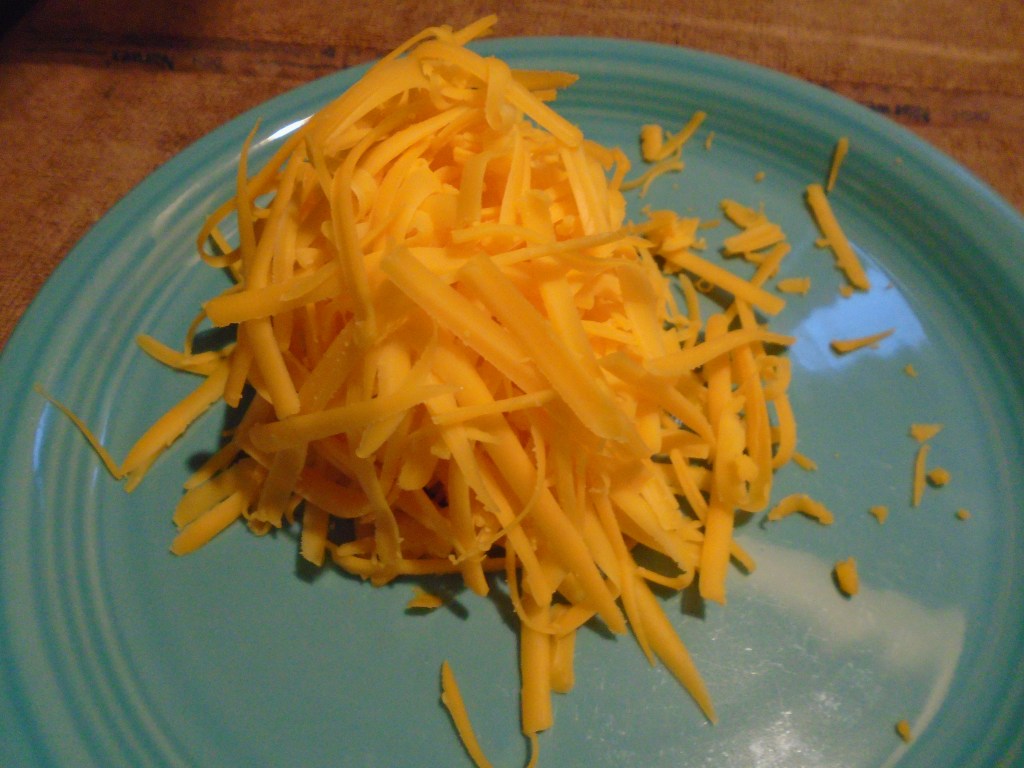
While the dough rises, brown the sausage and shred the cheese.

Once dough has doubled in size, add the cooked sausage and grated cheese.

Mix the dough thoroughly and let it rise in a warm place for 5 or 10 minutes.

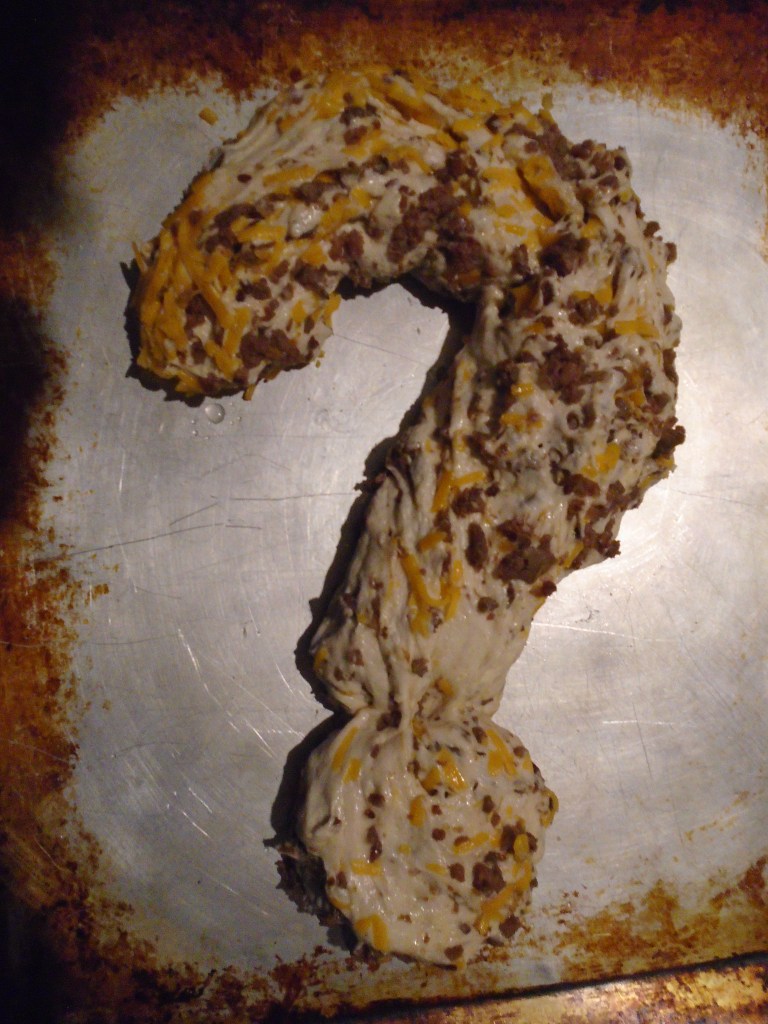
On a lightly greased baking sheet, form the dough into the shape of your preference.  Since this is crazy bread I decided a question mark shape would be appropriate.

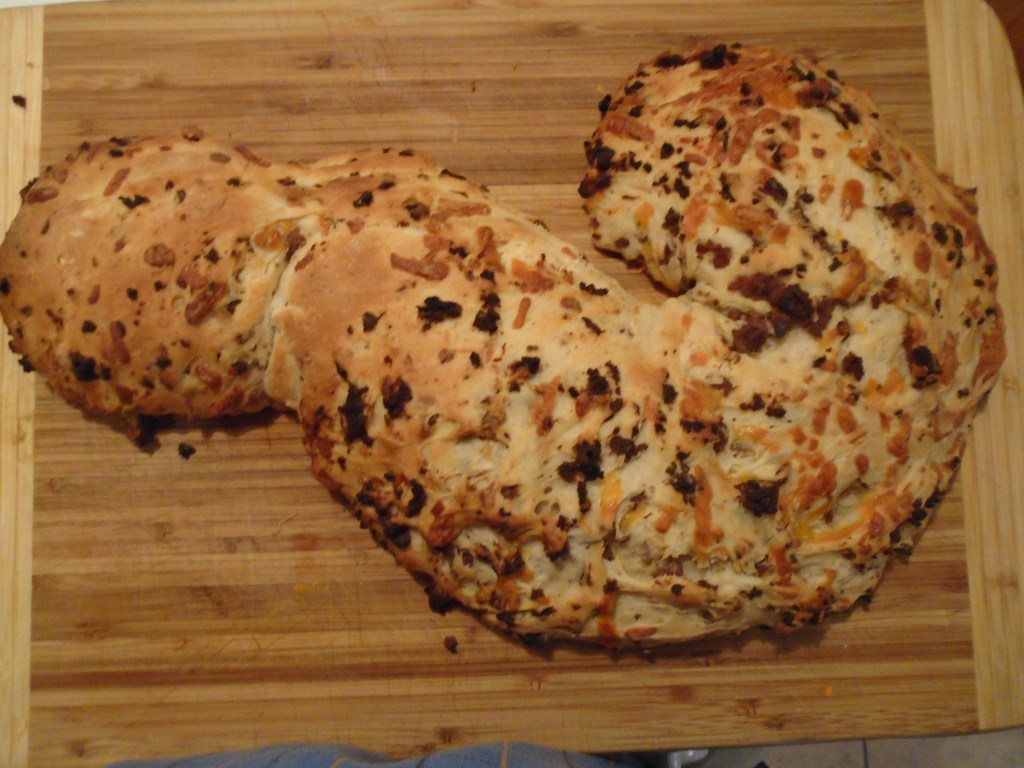
Bake at 400° for about 30 minutes.  Remove and allow the bread to cool for a few minutes before serving.

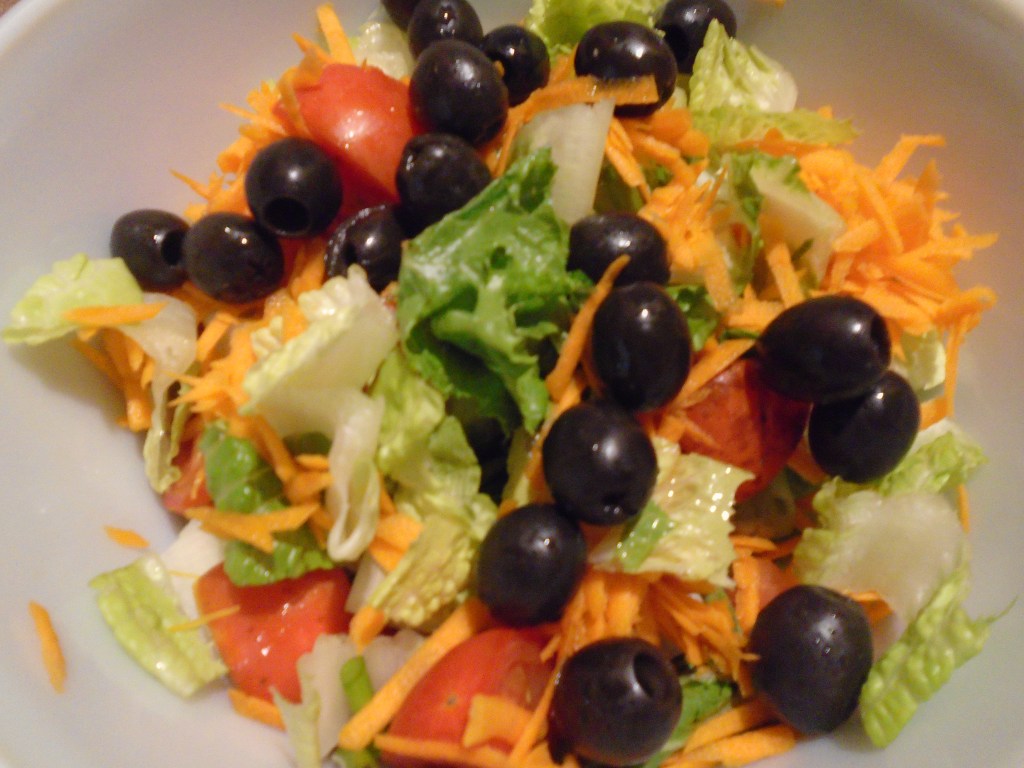
Serve with a fresh salad.

This is the first time I have made bread this way and I was pleasantly surprised.  I imagine using breakfast sausage next time and serving with scrambled eggs and fresh fruit. 

Cambodian Rice Noodle Stir-Fry

Sometimes I conceive a meal by following my instincts, rather than following a recipe.  It makes me feel like I am creating something brand new.

On this particular weeknight, I allowed my taste buds to tell me what I wanted to make and my mind followed.  I knew I wanted to include shrimp, because I’ve been craving shrimp.  I knew I wanted to use Cambodian rice noodles, because I have had some in my pantry for a few months.  From that launching point, my mind quickly assembled the rest of the items that would bring the dish together.  Pork, vegetables, sesame oil, peanuts, fish sauce, garlic, green onions and so on. 

I resisted the urge to look up recipes on the internet.  I’m not saying that looking up recipes on the internet is cheating but I sometimes find that internet searches just affirm what I already know.  Once a person has made several stir-fry dishes, the process becomes instinctive and intuitive.  Deciding what to include in a stir-fry is only limited by the imagination of the cook.  My imagination and creativity runs deep and I have learned not to think about “success” or “failure”, when cooking.  Maybe that’s because I have become more comfortable in the kitchen over the years, or maybe it’s because I pretend to be fearless when I am creating something.  It could be a little of both. 

I approach stir-frying like I approach painting, in an abstract style. 

When I paint an abstract painting I usually follow this thought process:

What is my state of mind?  How do I want to convey my thoughts and emotions?

That leads to, what colors would be best to get my point across?  What sort of shapes do I see?  What will be the focus of the painting, or will there be a main focus?  Etcetera.  The thinking process goes on as long as I need it to and then my hands start working quickly.

Mix the paint on the pallet.  Lay out my brushes.  Act quickly.  Act without thinking.  Let the creative part of my mind dictate my actions but allow the reasonable part of my mind to make critical decisions. 

Is the finished work a masterpiece?  That’s not for me to decide.  The real question I ask is, “does this satisfy me?”

The same goes with cooking, especially stir-fry cooking. 

How am I feeling today?  What kind of meal would complete this day in a meaningful way?

I decide what flavors I want to use.  I decide what meats, vegetables and starches will achieve what I want to convey my thoughts.  I decide how I want the finished dish to look, when it is presented.   

Is the finished work a masterpiece?  That’s not for me to decide.  The real question I ask is, “does this satisfy me?”

Anyone who eats a meal or sees a painting leaves with their own memories, thoughts and feelings.  The intention of the cook or the painter is irrelevant.  I don’t know why that makes me so happy, but it does!

Ingredients:

1 garlic clove, smashed

7 roots of green onion

1 Tbs sesame oil

1 lb lean pork, shaved thin

12 medium sized shrimp, peeled and de-veined

1 tsp sesame oil

5 oz thin Cambodian rice noodles

For the marinade:

¼ cup dark soy sauce

¼ soy sauce

¼ cup Vietnamese chili garlic paste (Sambal Olek works nicely, too)

¼ cup Vietnamese fish sauce (smells funky, tastes great)

For the stir-fry:

2 carrots

7 green onions (just the greens)

¼ head of cabbage, sliced thin

2 Tbs ginger, sliced very thin

2 jalapeños, sliced

1 lime, quartered

For the peanut sauce:

¼ cup soy sauce

1 ½ Tbs Hoisin sauce

1 Tbs peanut butter

1 Tbs brown sugar

½ cup roasted peanuts, crushed

Directions:

Prepare the vegetables:

Slice the garlic, ginger, cabbage, carrots, and jalapeños and green onions.  Arrange separately on a large plate until needed.

Add 1 tablespoon oil to the wok and add the roots of the green onion roots and garlic.  Simmer at low heat.  Turn off heat after 1 minute.   Continue to allow the onion and garlic to flavor the oil.

Prepare the marinade:

Combine dark soy sauce, soy sauce, chili garlic paste and fish sauce in a bowl.

Prepare the pork and shrimp.

Remove the fatty edges of the pork and reserve. 

Use the pork fat to flavor the oil

Slice the pork thinly and store in a bowl. 

Peel and de-vein the shrimp.  Store in the bowl that contains the pork.

Add the marinade to the pork and shrimp.  Store in the refrigerator until needed.

Add pork fat to the wok.  Turn up heat and cook while stirring.  Remove the onions, garlic and pork fat after they char (just a few minutes).  Discard the garlic, onions and pork.  Leave the flavored oil in the wok.

Prepare the peanut sauce:

Add one tablespoon of peanut butter…not in photo.

Crush the peanuts with the broad side of a knife.

Combine soy sauce, Hoisin sauce, peanut butter, brown sugar and crushed roasted peanuts in a bowl.  Transfer to a hot skillet and stir to combine for a minute. Set aside cooked sauce.

Quarter the lime and reserve until serving time.

Prepare the noodles:

Prepare the rice noodles, according to the instructions on the package.  In this case, I soaked the rice noodles in cold water for about 5 minutes until they became soft, but not mushy.  Strain out the water and set the noodles aside, until needed.

Time to stir-fry!

All of the prep work is essential.  Make sure to have everything prepped before you crank up the wok.  Seriously…there’s nothing worse than going full force into stir frying and realizing that you have forgotten to cut some vegetable or meat or realizing that you haven’t prepared a sauce.  Take a moment to review all of the items that you are going to include in the stir-fry and make sure that they are ready to go!  Take the marinated meat out of refrigerator and keep it close, on hand.  Keep some oil near the wok.  Make sure to have your serving plate ready to receive the finished food. 

Now, go!

Add 1 tablespoon of sesame oil to the wok.  Cook the shrimp and pork at high heat.  Stir constantly until the shrimp and pork are cooked.  This should only take a minute, or so.  Remove to a bowl and store in a warm place.

Add a tablespoon of oil to the hot wok and add the sliced ginger and a little bit of green onion.  Stir for a moment and then add the carrots and jalapeños.  Stir for a minute, to allow the carrots to soften. 

Add the cabbage and stir constantly.  Once the cabbage has wilted and softened a little, remove all of the vegetables to a large bowl.  Don’t remove the liquid from the wok. 

Add the noodles and stir constantly.  Once the noodles have absorbed some of the liquid in the wok, add the peanut sauce.  Stir to incorporate. 

Return the vegetables and shrimp and pork to the wok.  Stir with the noodles and turn out to a large serving platter.  Top with green diced green onion and lime slices.

Spritz with fresh lime and serve.

Dinner #5: Pizza

If you have seen some of my previous posts you might remember Dinner #1: Spaghetti.  For many years I relentlessly cranked out the same dishes (with some subtle variations) week after week.  Getting kids to eat healthy food was a real trick. 

Pizza was always Dinner #5.  Friday, the last day of the work week, was a day when I knew I could really relax and spend some time in the kitchen. 

I still come home Friday evenings and think, “how about pizza?”  

This time, I made three pizzas. Hamburger with mushroom and onion, Pepperoni and Italian cold cuts with spinach, mushroom, and tomato.

A quick rundown of some of the ingredients and then straight to the pizza…

Ingredients

Capocollo and Calabrese.   These Italian cold cuts are perfect for pizza and many grocery stores sell them packaged together, in 6 to 12 ounce portions.  They are a little pricey by weight but I don’t spend more than $5.00 and they can make two large pizzas!

Pepperoni.  Oh, no!  I accidentally picked up turkey pepperoni at the store.  I don’t like turkey pepperoni but, I put a char on it and pretended I was eating the real deal.

Mozzarella.  I bought “fresh mozzarella” at the store on an impulse.  It’s a step up from the brick of mozzarella but I’m not so sure that it’s worth the cost.  Real, fresh mozzarella is a treasure.  I want to make my own! Freshly grated Parmesan is always a good thing!

If you want to see how I make pizza dough, check it out here

Portions are arbitrary when it comes to pizza.  Put whatever you want on your pizza and use as much as you want, but use some common sense.  My cautionary advice is, if you think you’re putting on too much cheese, you are.  If you think your pizza toppings are excessive, they are.  Simplicity is key to really good pizza. 

Ghost Pepper Rub and Sauce

Well, I couldn’t resist.  I had to try a little bit of the wicked ghost pepper powder that I made a few days ago.

It’s funny.  Normally, when describing a recipe, I might say, use a tablespoon of this and a teaspoon of that but, when it comes to ghost pepper, I think much smaller.

As an example, here is the rub that I used for two large chicken breasts, before breading and frying them.

1 ½ Tbs dried onion flake (crushed into a powder)

2 tsp smoked paprika

1 Tbs salt

2 tsp Tajin seasoning

1 tsp dried thyme

1 tsp ghost pepper powder

If I did the math right, the amount of ghost pepper in the spice mix is about 13%.  At first thought, 13% doesn’t sound like much but, when that 13% is ghost pepper, it’s impressive.  The curious thing is, when I use a spicy rub on chicken, prior to frying, much of the spiciness diminishes during the cooking process.  So, even though this was a robust amount of ghost pepper, the spice rub didn’t make the chicken unbearably spicy. 

However, the sauce that I prepared for the chicken bumped up the heat, just enough to make me grin with satisfaction.

3 Tbs soy sauce

2 Tbs sriracha sauce

2 Tbs Louisiana hot sauce

1 Tbs Worcestershire sauce

¼ tsp ghost pepper powder

See the difference in the ratio of ghost powder in the rub compared to the sauce?

The total amount of sauce is about ½ cup and the amount of ghost pepper powder in the sauce is a mere ¼ teaspoon.   But that’s plenty!  Any more ghost pepper and the sauce would be ridiculously hot.  

I like this sauce.  The overriding flavor comes from the soy sauce and Worcestershire sauce.  The heat provided by the hot sauces and ghost pepper gives it a nice, spicy kick.

A parting thought…

Tread lightly when adding spice to your sauces.  You can always keep a secret stash of wicked sauce on the table.  Don’t wreck a great meal for others just because you want to push your own taste buds to the extreme.  Same goes with sugar or salt.  Be kind. Be bold. Come back for more when you’re hungry! – The Pick

Ghost Peppers

Of all the peppers that my garden produced this season, these are by far the hottest.  They are insanely hot!  It’s hard to find a way to use them in recipes.  I wouldn’t dare throw one in a stir-fry and I wouldn’t want to take even a small bite of a fresh one.  I like to dry them and crush them into a powder.  Once they are in powder form, I can add a small pinch to sauces or flour dredges when I want a serious kick.

I wear latex gloves when I work with the peppers.  In order to prepare the peppers for the food dehydrator, I cut off the stems and slice the peppers into small rings. 

Then I lay them on the dehydrator tray and I make sure to allow space for the air to circulate evenly.  I put the dehydrator in the garage and ventilate by opening the garage door.  The air that comes out of the dehydrator is nearly lethal.  Seriously.  I take shallow breaths when I am near the chillis. 

I set the dehydrator at 100° and let it run for 12 hours.

Once the peppers are dry and crisp, I put them in a spice grinder and pulverize them. 

I don’t use this spice grinder for anything else because no matter how much I clean it, it still hangs on to some of the oils and residue of the chillis.  I made the mistake of using my coffee grinder once and suffered the consequences.  I cleaned the grinder several times but the coffee beans picked up the heat from the chillis for the next several grinds.  The subsequent coffee brews were painful.

This is a ridiculous amount of spice! It will be used sparingly over the next several years.

Now I’m ready to make some crazy hot wings!

*Frozen* Stir Fry

I recently made a beef and vegetable stir fry.  When I say recently, I really mean two months ago.

I realized that I had way more beef than I needed for the dish, so I put the marinated beef in a freezer bag, along with the marinade, and tossed it in the freezer for later use. 

Fast forward two months.

 I had a big frozen block of marinated meat.  Now what?

Well, a sensible cook would have thawed the beef in the refrigerator for a day.  But, I was not in a sensible mood.  I was hungry and I wanted to make dinner RIGHT NOW.  My solution was undoubtedly unconventional but I promise, the end result was delicious.

Note:  I used Canola oil throughout the entire stir-fry process until the very end.  I used sesame oil to prepare the leafy celery tops and green onions, which topped the dish.  The intermittent and distinct flavor of sesame oil gave the dish an element of surprise. 

Ingredients:

1 lb frozen, marinated beef strips

2 Tbs cooking oil (I used canola oil)

2 Tbs fresh sliced ginger

1 onion, julienne sliced

2 medium sized carrots

2 celery stalks (with leafy green tops)

1 quarter head of cabbage

1 tsp sesame oil

2 green onions

2 jalapeños

Spicy sauces: Vietnamese chili garlic sauce and Ed’s Widow Maker (local wicked, habanero sauce)

Cooked white rice, enough for to serve four.

Directions:

Prepare steamed white rice.  Keep warm.

Prepare vegetables.  Chop and slice.  Set aside.

Box-cut jalapenos to remove seeds and membranes.
Frozen solid! OMG…what now?

Heat a wok to low heat.  Add 1 tablespoon of cooking oil.  Add the frozen beef.  Stir to coat and cover. 

Turn every few minutes and remove portions of beef as they warm and separate from the frozen glob of meat.  Set the thawed pieces of meat aside on a plate.

Continue to heat the beef until all of it is thawed.  This took about 10 minutes at low heat, covered.  Remove and set aside.

Add one tablespoon cooking oil to wok and crank up the heat.

Add sliced ginger and stir for 30 seconds.

Add the vegetables and stir fry until the vegetables become tender, but not overcooked.

Add the beef and stir over high heat.  Turn the heat off and prepare the serving dish.

Add cooked white rice to a large serving bowl.  Create a well in the center, for the stir fry.

Add the stir-fried beef and vegetables to the bowl.

Return the wok to the stove and set heat to high.  Add 1 teaspoon sesame oil.  Add the celery tops and green onion.  Stir fry for about one minute and transfer to the top of the serving bowl.

Serve with additional hot sauces and fresh jalapeño for the adventuresome…no need to punish everyone, I suppose.

Quick Dinner

Working moms and working dads are challenged every day.  On any given day, parents and kids are both worn out by the time they come home.  I have learned that if I sit down, when I come home, I’m pretty much done for the day.  The longer I sit, the more likely I am to order Pizza or Chinese food.  There’s nothing wrong with that but I find more satisfaction by staying on my feet and cranking out a quick, nutritious meal. 

Ironically, the more difficult my workday is, the more likely I am to push through and cook something.  Once I get started cooking I get into a rhythm and the act of cooking becomes therapeutic and strangely relaxing.  The best part is, I get to talk to my family in the kitchen while dinner is prepared and then we all get to sit together and have a meal. 

Ground beef tacos are super-easy to make and they can be accompanied by as much or little as you wish. 

This time it was just my wife and me having dinner.  My kids are young adults now and we don’t all gather for dinner, like we did in the past.  I miss that, but at the same time, I know that’s just the way life works.

After a long day of work, moms and dads don’t want to waste precious time or energy. 

Use every shortcut.  Work efficiently and always make one thing special, or out of the ordinary, and include some sort of fresh vegetables.

No recipe this time…just pictures.  It’s tacos for crying out loud! 

Stuffed Chicken Breasts

The biggest challenge here is making the chicken breast thin enough to roll.  It needs to be thin in order to cook evenly and it needs to be thin enough to roll up like a burrito. 

You could flatten the chicken breasts by pounding them down with a mallet but I prefer to slice the breasts horizontally, nearly all of the way, and then I lay the chicken breast open.  If the chicken breast is really thick you can slice it from the top side and then slice it again, in the opposite direction from the bottom side, to make a tri-fold.

Before we get going…

A caution about using toothpicks to secure food.  I use the same number of toothpicks on each item that I secure.  If I need two picks on one chicken breast, I use two on all of the other breasts, even if I might only need one toothpick for some.  That way, when serving time arrives, I know that I must remove two toothpicks from each breast.  It eliminates the guessing game that comes when I think, “did I use one or two toothpicks on this one?”  Make sure to remove toothpicks before serving! 

As with many recipes, you can stuff the chicken with anything you like.  This time around, I had some ricotta cheese that needed to be used and some prosciutto that was just itching to be used for something.  This recipe serves three people.

Ingredients:

3 chicken breasts

4 oz prosciutto

1/3 cup parmesan cheese

7 oz ricotta cheese (about half of a 15 oz container)

1 ½ cups Panko bread crumbs

½ cup cooking oil

For the sauce:

1 Tbs butter

1 Tbs flour

½ onion

¼ cup chicken stock

24 oz tomato sauce (I used an 8 oz can and 16 oz tomato sauce)

¼ cup half-and-half

1 cup shredded mozzarella cheese

4 oz spinach

Directions:

On a clean cutting board, flatten the chicken breasts to ¼” thick, or carefully slice them.

Layer the chicken breasts with several slices of prosciutto ham. 

Scatter grated parmesan cheese over the chicken breasts.

Apply a schmear of ricotta cheese to the chicken.

Spread some panko bread crumbs onto a large platter.  Lay a chicken breast onto the bread crumbs and press down lightly. 

Roll the chicken breast and secure with toothpicks. 

Heat a large skillet to medium heat and add ½ cup cooking oil. When the oil is hot, gently lay the chicken breasts into the pan, being careful to not crowd the pan.

When the bottom side browns, turn it over and cook the other side.  When both sides are golden brown, remove to a clean plate, lined with a paper towel.

Discard the oil from the pan.  I like to reuse oil so I usually dump the oil in a stainless steel bowl and filter it later and store it in a can.

Wipe remaining oil from pan but leave a slight, residual film of oil.  Turn heat to medium high and add onions.  Sautee for a minute until onions soften.  Remove onions and set aside.

Deglaze the skillet with chicken stock.

Butter and Flour, Tomato Sauce, Half and Half and Chicken Stock

Add butter and flour and whisk to make a roux. 

Add cream and tomato sauce.  Whisk and sauté until the sauce thickens.  Return the onions to the skillet.  Lower the heat.

Add mozzarella.

Add fresh spinach and sauté for another minute, or so, until the spinach wilts.

Pour the sauce onto an oven proof serving platter.  Arrange the chicken on top of the sauce and add a few slices of mozzarella. Bake in the oven for a few minutes to melt the cheese.

Garnish with fresh spinach and serve.

A Night at the Improv

There comes a time in every cook’s life when they realize that they don’t have an ingredient they need for a recipe.  Sometimes those moments happen in the midst of preparing a meal.  Sometimes cooks just have to improvise.  Sometimes cooks just have to “fake it” and force their way through life’s unexpected problems.

I’ve had some long, long days at work recently, which is why my blog posts have become less frequent.  A few nights ago, I came home from work and I was craving something spicy.  I wanted to make a variation of my Yin and Yang Chicken Wraps because it was quick and easy to prepare.  I prepped the vegetables and chicken and just as I was getting ready to fry the chicken, I realized that I didn’t have any eggs.

Eggs are something that I always keep on hand…except this time. 

I usually fry chicken by dipping the chicken in egg and dredging it in flour.  That’s Chicken 101.  Of course, buttermilk could be used instead of egg… that’s the classic recipe for southern fried chicken.  Buttermilk is not something I usually have on hand.

In a moment of inspiration, or desperation, I decided to use milk and Italian dressing instead of eggs. 

Why Italian dressing?  Why not?  I figured that if I was going to improvise I might as well try something completely new.

The result was some very crispy and very delicious chicken.  The rest of the preparation was smooth sailing and I made some extremely spicy wraps.  So, satisfying!  

Italian dressing contains oil, among other things, and that, combined with the milk, gave the flour something to stick to and it produced great flavor.

I ate two of the large wraps and went to bed an hour later.  Big mistake! The joy I experienced while eating the spicy chicken wraps was perfectly balanced by the upset stomach I experienced 5 hours later as I drove to work the next morning.  Yin and Yang, indeed!

So, don’t panic when you find yourself missing an ingredient.  Trust your instincts and face adversity bravely.  Improvise.  Be daring!

Oh, and don’t go to sleep an hour after you eat…especially if you eat something very spicy!

Do as I say, not as I do.

Steak Ranchero Tacos with Fried Potatoes

Tacos de Carne Ranchero con Papas Fritas… Steak Ranchero Tacos with Fried Potatoes.

Well, here I go again with another Tex-Mex recipe.  I never knew just how often I go to Tex-Mex until I started a food blog.  Mexican cuisine is just so versatile that it’s hard to resist. 

Growing up in Texas meant that I was surrounded by Tex-Mex.  It was only natural that I gravitated to Tex-Mex when I started cooking.  Now that I live in Mississippi, I suppose I could refer to my Mexican dishes as Miss-Mex, but it just doesn’t sound as cool as Tex-Mex.

When I cook Mexican food I don’t aim to achieve “authenticity” in a recipe.  I have to laugh when I see Mexican restaurants that claim to serve “authentic Mexican food”.  I’m sure that those restaurants mean well but, if you want authentic Mexican cuisine, go to Mexico.

Consider everything that goes into a meal…the vegetables, the fruit, the meats, the spices.  They are a product of the sunlight, rain and soil of the region that they come from.  Anyone who has moved from one place to another usually recognizes a difference in the taste of the local water.  Every aspect of our natural world is unique to specific regions and even though those differences may seem subtle, they play a major part in authenticity. 

The point is, it doesn’t matter what you call it.  It just needs to be good.  Learn cooking methods from other cultures and apply them to what you want to make.  

This recipe was intended for two to four people. 

Ingredients:

1 ½ lbs top round beef roast

1 Tbs garlic powder

1 Tbs red chili powder

2 tsp cumin powder

1 ½ tsp salt

1 tsp ground black pepper

½ tsp chili piquin powder (or cayenne)

3 green onions, separate white from green parts

2 garlic cloves, smashed

2 ripe tomatoes

¼ cup prepared picante sauce

1 medium yellow onion (chop half and slice the other half)

12 corn tortillas

½ cup chopped cilantro

1 cup shredded lettuce

1/2 cup cotija cheese

12 corn tortillas

2 russet potatoes (or 1 very large potato)

1 cup prepared guacamole

1 lime

Directions:

On a clean cutting board, cut the beef into ½” steaks. 

Remove the tough connective tissue.  Look at the white strips and feel them with your fingers.  If they feel tough, cut them out. 

Combine the garlic powder, chili powder, cumin, salt, pepper and chili piquin in a small bowl. 

Sprinkle the spices over each side of the steaks.  Set aside.

Wash and scrub the potatoes.  Dice potatoes into ½” pieces. 

Heat a skillet to medium/low and add about ¼ cup of vegetable oil.  Add the potatoes and fry until golden brown and crispy. 

Strain the potatoes and keep them warm until ready to serve.  I usually keep them in a bowl on top of the stove, with the oven set to 250°.

Chop the other vegetables and slice the lime into quarters.  Set aside.

Prepare the ranchero sauce:

Heat a skillet to medium and add 1 tsp cooking oil.  Add garlic and chopped white parts of the green onions and sauté for about 30 seconds.  Add about half of the chopped tomatoes, half of the chopped yellow onion and the picante sauce.  Simmer for several minutes until the vegetables are fully cooked and soft.  Remove the sauce and keep warm.

Prepare the tortillas

Heat a skillet to medium.  Add ¼ cup of cooking oil.  When oil is hot, prepare the tortillas by cooking on each side until the tortillas are firm, but not crisp. 

Store the tortillas in a warm place.  The stove top works for me.

Heat a skillet to high heat.  Add 1 Tbs cooking oil.  Once the oil is hot, add the steaks to the skillet.  Leave the steaks alone…don’t mess with them.  Once you see a char developing on the bottom of the steaks, turn them over and cook for another minute, or so.  Total cook time should be about 2 or 2 ½ minutes.  Don’t overcook them!

Remove the steaks to a clean cutting board. 

Slice into ½” strips. 

Heat a skillet to low/medium heat and add the steak and ranchero sauce.  Cook for a minute, just to warm everything. 

Prepare the tacos

I like to use two tortillas per taco. 

Add strips of steak to each taco.

Add chopped lettuce, cilantro, diced tomato, sliced yellow onion and chopped green onion.  Squirt some lime juice onto the tacos.

Top with guacamole and cotija cheese.

Serve with fried potatoes.